
You can transform your terracotta tiles into stunning floors with DIY epoxy paint without breaking the bank. Start by properly cleaning and sanding the tiles to guarantee good adhesion. Mix the epoxy resin and hardener in a precise two-to-one ratio, then apply a primer coat followed by sanded layers for strength. Ascertain each layer cures before adding the next, and finish with a protective seal coat. Regular maintenance, like checking for peeling, will keep your floors looking great. This budget-friendly project allows for creativity while enhancing your space, and there's plenty more helpful info ahead to guide you through the process!
Project Overview
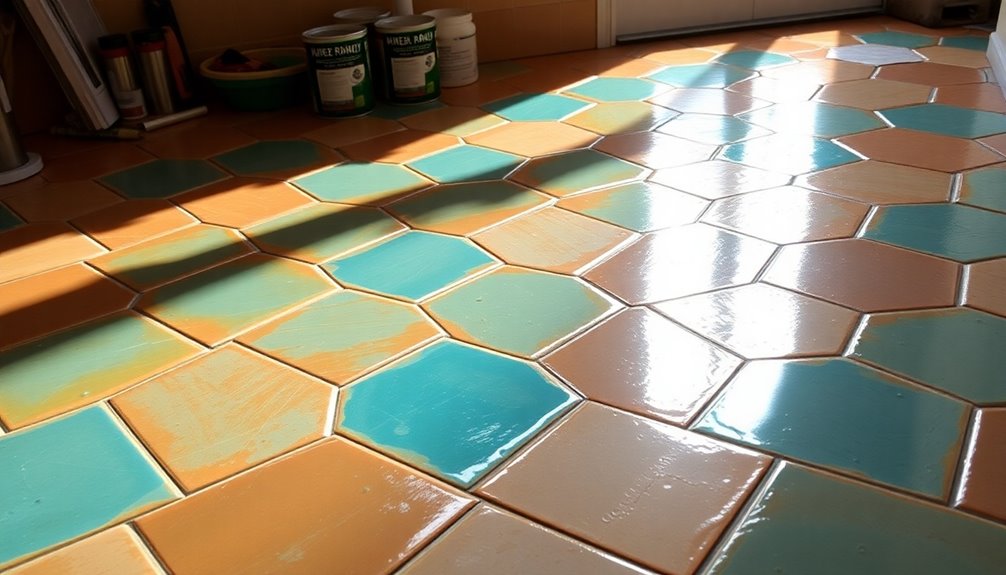
When you begin the DIY epoxy floor project, you're set to transform your terracotta tiles into a stunning ocean-themed masterpiece. This project not only enhances your space but also showcases your creativity on a budget. By utilizing expense tracking tools, you can effectively manage the costs associated with this transformation. Budgeting apps can help you stay within your financial limits while planning your project.
You'll be using a realistic ocean pour technique, which has received rave reviews from the community.
To kick off your budget transformation, gather your materials and prepare your workspace. You'll need epoxy components mixed in a two-to-one ratio, ensuring you achieve the right consistency. Adding a bit of water to make rolling easier is a clever tip, but don't worry—it won't compromise durability.
For the aesthetic, focus on ocean blue, crater blue, and blue-green metallic hues. These colors will bring your vision to life, creating a vibrant ocean floor effect.
After pouring, don't forget the final clear coat—it adds depth and enhances the overall appeal. This project emphasizes the beauty of DIY, proving that you can achieve a high-end look without breaking the bank, much like how expense management apps streamline financial organization and enhance accuracy.
Get ready to plunge into this creative venture, and watch as your terracotta tiles transform into a breathtaking ocean-themed floor!
Surface Preparation Steps
To guarantee your epoxy adheres properly, start by thoroughly cleaning your terracotta tiles, removing all dirt, grease, and debris that could interfere with the bond. Use a suitable cleaner and scrub the surface well, then rinse and let it dry completely.
After cleaning, put on safety precautions like gloves and goggles to protect yourself from dust and chemicals.
Next, sand the tile surface to create a rough texture. This significant step enhances the bond between the epoxy and the tile materials, making sure of a successful application. Choosing eco-friendly materials can reduce environmental impact, aligning your DIY project with sustainable practices. Additionally, using sustainable businesses for your materials can further support a socially responsible economy.
Once you've sanded, inspect the tiles for any cracks or gaps. Fill these with adhesives or caulking to create a smooth and even surface.
After addressing any imperfections, use Level Quick to raise the floor above the original grout joints, making sure the surface is level. Follow the instructions on the packaging for best results.
Allow proper cure time for any leveling or filler materials used, as this guarantees a solid foundation for the epoxy. Skipping these preparation steps can lead to issues like peeling or bubbling, so take your time for the best outcome. Additionally, opting for sustainable packaging solutions during your DIY project can further enhance your commitment to eco-friendly practices.
Mixing Epoxy Paint
Mixing epoxy paint requires precision to guarantee a strong, durable finish. Start by adhering to a two-to-one ratio of resin to hardener. This balance is essential for ideal results.
Before you begin, make certain all components are at room temperature; this guarantees proper chemical reactions. Use your mixing tools, like a drill with a mixing attachment or a paddle mixer, to combine the ingredients thoroughly. Additionally, consider using a user-friendly interface to streamline the mixing process and enhance efficiency. Establishing a clear mixing plan can also help in managing your time effectively, allowing you to stay focused on your long-term financial objectives.
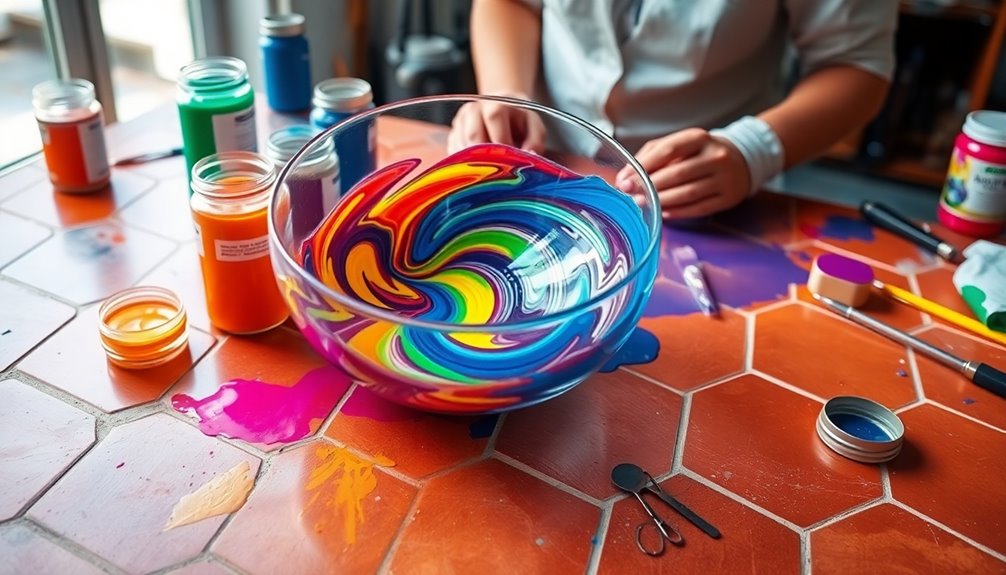
If you're adding metallics for enhanced visual appeal, incorporate a dispersion fluid to prevent clumping. This step will elevate your epoxy floor's aesthetic.
You can also mix in a small amount of water to improve rolling ease, but be careful not to add too much, as this could compromise the integrity of your final product.
Once everything's combined, mix for at least 3-5 minutes, scraping the sides and bottom of the container to achieve a uniform blend.
Don't forget to take into account your epoxy color options at this stage! Selecting the right color can transform your terracotta tiles and make your space truly unique. Additionally, understanding the concept of investment diversification can help you allocate your budget effectively for future home improvement projects.
Now you're ready for the next steps in your DIY project!
Application Techniques
Successful application techniques are vital for achieving a flawless epoxy floor finish. Start with proper surface preparation; sand your terracotta tiles to create a suitable base. Fill any cracks using adhesives or caulking, then level the floor with Level Quick.
For your epoxy, mix it in a two-to-one ratio, and consider adding a small amount of water to make rolling easier, but don't overdo it to maintain durability. Exclusive digital coupons can help maximize ROI by providing discounts that encourage bulk purchases for your materials. Additionally, using digital coupons can lead to significant savings on various supplies.
When applying the initial prime coat, use a troweling technique at a rate of one ounce per square foot for even coverage. Follow this with dry rolling to eliminate excess material.
It's essential to sand between layers with 220 grit to guarantee a strong mechanical bond for subsequent coats. Use isopropyl alcohol to wipe away dust, optimizing adhesion.
For the seal coats, apply three layers at about one ounce per square foot. Pay close attention to detail during the final top coat application to achieve a bubble-free finish. Additionally, consider utilizing coupon codes to save on the cost of your epoxy supplies.
Post-Application Care

After applying each layer of epoxy, you should sand the surface to create a strong mechanical bond for the next coat.
Cleaning with isopropyl alcohol is also essential, as it removes dust and helps improve adhesion. This process not only enhances the finish but also aligns with the importance of timely payments for maintaining financial stability. Additionally, establishing a routine for custom notifications can help you stay on track with your finances, just as consistent care is vital for your flooring. Implementing clear payment terms can also reduce confusion and enhance your overall financial management.
Following these steps will set you up for a durable and visually appealing finish.
Sanding Between Layers
Sanding between layers is essential for achieving a strong mechanical bond in your epoxy floor paint project. This step isn't just an afterthought; it greatly enhances adhesion improvement for the subsequent coats.
To get the best results, use 220 grit sandpaper to smooth the surface, which helps eliminate any imperfections left from the previous layer.
Make sure to allow each layer to cure properly before you start sanding—following the manufacturer's recommended time is important to avoid damaging the underlying layer.
Once you've sanded, it's critical to clean the surface thoroughly with isopropyl alcohol. This will remove any dust and debris, ensuring ideal adhesion for the next coat.
Cleaning for Adhesion
Proper cleaning is essential for guaranteeing ideal adhesion in your epoxy floor paint project.
Begin by thoroughly cleaning the terracotta tiles to remove all dust and debris. This smooth surface is vital for maximum adhesion of the epoxy coating. Use effective cleaning tools, such as a stiff broom and vacuum, to achieve this.
After sanding between layers, make sure to use isopropyl alcohol to eliminate any fine dust particles. These particles can interfere with the bond of subsequent epoxy coats, so don't skip this step.
Before applying the next layer, check that the surface is completely dry and free of residues to secure the best adhesion and finish.
Consider applying a primer coat of epoxy at a rate of one ounce per square foot. This extra layer enhances adhesion techniques, setting a solid foundation for your main epoxy layers.
Lastly, regularly inspect the surface throughout the application process. Address any imperfections promptly to maintain the integrity of your epoxy finish.
Following these cleaning for adhesion steps will help you achieve a stunning, durable epoxy floor that transforms your terracotta tiles beautifully.
Tips for Success
To achieve a successful epoxy floor, pay close attention to surface preparation and mixing techniques.
Start by sanding the tiles for a smooth base, then mix your epoxy components correctly for ideal application.
Following these steps will set you up for a durable and attractive finish.
Surface Preparation Importance
Preparing your surface well is essential for achieving strong epoxy adhesion. Start by thoroughly sanding your terracotta tiles to create a suitable surface texture for epoxy bonding. This step is significant, as it enhances the grip of the epoxy, preventing peeling or flaking in the future.
Before applying any leveling compounds, fill any cracks with adhesives or caulking according to the leveler packaging instructions. A smooth, even surface is critical for a successful application.
Consider using Level Quick to raise the floor above the original grout joints, creating a uniform base for your epoxy coating.
Once your surface is ready, remember that post-application procedures are just as important. Sand between layers to promote adhesion and clean the surface with isopropyl alcohol. This guarantees you achieve a strong mechanical bond for a high-quality finish.
Mixing Techniques Essentials
While mixing epoxy, getting the proportions right is vital for achieving ideal performance. Use a two-to-one mixing ratio for the epoxy components. This guarantees the right consistency and durability of your floor.
Be cautious when adding water; just enough will help with rolling, but too much can compromise strength.
To achieve even color distribution, pre-mix any metallics in the epoxy dispersion fluid. This prevents clumping and guarantees that the color is consistent throughout your floor.
Pay close attention to the instructions on the leveler packaging, and make sure all cracks are filled with adhesives or caulking before leveling.
Start with a prime coat application of one ounce per square foot to create a solid foundation.
After the prime coat, sand between layers using 220 grit sandpaper. This step is essential for creating a mechanical bond, promoting better adhesion for the next coat.
Finally, clean the surface with isopropyl alcohol before applying additional layers.
Following these mixing techniques will help you achieve a beautiful, durable epoxy floor that transforms your terracotta tiles on a budget.
Conclusion
Transforming your terracotta tiles with DIY epoxy floor paint is like giving your space a brand-new wardrobe without breaking the bank. Just as a fresh outfit can boost your confidence, a newly painted floor can rejuvenate your home. Remember, preparation and patience are key to achieving that stunning finish. With a bit of effort and creativity, you're not just painting; you're crafting a vibrant canvas that elevates your living space into something truly extraordinary. Happy painting!


