

Building your own tub can save you up to 50% compared to buying pre-made ones. You can customize dimensions, use eco-friendly materials, and add unique features that reflect your style. For your DIY tub, gather waterproof materials and tools, and carefully plan your design. With the right approach, you’ll not only save money but also gain a sense of accomplishment. Find out more about planning, constructing, and maintaining your homemade tub for the best results.
Benefits of Building Your Own Tub
Building your own tub can be a game-changer for your bathroom renovation. Not only can you save up to 50% compared to buying a pre-made tub, but you also gain the freedom to customize dimensions and styles that perfectly suit your space.
Building your own tub not only saves money but also allows for complete customization to fit your unique bathroom space.
When you build your own tub, you can use materials like repurposed wood or concrete, creating a unique and eco-friendly feature that aligns with sustainable practices.
Plus, you can incorporate personalized touches, such as built-in shelves or unique textures, tailored to your tastes.
Engaging in this DIY process not only enhances your bathroom’s functionality but also fosters a rewarding sense of accomplishment, making your renovation project truly personal. Additionally, the financial discipline gained from effective management of spending can lead to further successful home improvement projects.
Materials Needed for Your DIY Tub
Creating your DIY tub requires several essential materials to guarantee it’s both functional and durable. To prevent leaks and water damage, make certain you gather the following:
- Marine-grade plywood – For a sturdy frame.
- Waterproof adhesive – To secure your materials effectively.
- Cement board – For the tub surround, ensuring moisture resistance.
- Waterproof liner or fiberglass resin – Essential for a watertight seal.
Additionally, don’t forget plumbing supplies, including pipes, fittings, and a drain kit, for proper water flow.
For finishing touches, consider a non-slip surface treatment or tile that can withstand bathroom humidity.
Finally, budget for sealing materials like caulk and grout to make sure your tub remains leak-free and lasts for years to come. Incorporating a budgeting app can help you track your expenses effectively throughout the renovation process.
Planning Your Tub Design
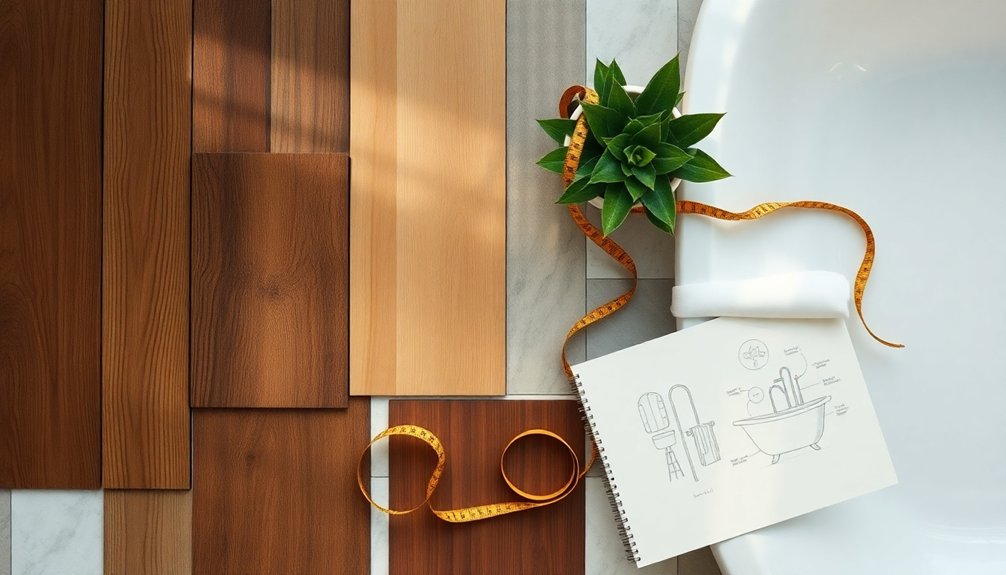
When planning your tub design, start by defining your style to create a cohesive look in your bathroom.
Next, measure your available space to guarantee the tub fits comfortably within the layout.
Finally, choose materials wisely to balance aesthetics, durability, and maintenance. Additionally, consider implementing budgeting tools to help manage your renovation costs effectively.
Define Your Style
To define your style and plan your tub design, it’s essential to first envision the overall aesthetic you want for your bathroom. Here’s how to get going:
- Research Tub Styles: Explore options like freestanding, clawfoot, or built-in designs to match your vibe.
- Create a Mood Board: Gather color palettes, materials, and textures that resonate with your style, guaranteeing harmony.
- Consider Dimensions: Confirm your tub fits your space without overwhelming it; standard sizes range from 60 to 72 inches.
- Explore Materials: Choose between wood for warmth or concrete for modern durability, considering aesthetics and function.
Measure Available Space
Measuring the available space for your tub design is crucial to guarantee a perfect fit in your bathroom. Start by measuring the length, width, and height of the designated tub area to verify your custom design aligns with your measurements.
Make sure to account for existing plumbing and drainage to avoid costly adjustments later. Typically, soaking tubs range from 60 to 72 inches in length, so use these standard dimensions as a guide.
Don’t forget to leave at least 18 inches of clearance around the tub for easy access and comfort. Finally, check your ceiling height and any overhead fixtures, as you’ll need at least 72 inches of vertical space for both the tub and additional features like showerheads.
Choose Materials Wisely
Choosing the right materials for your tub design can make all the difference in both aesthetics and functionality. By selecting cost-effective materials, you can create a stunning tub without breaking the bank.
Here are some smart choices:
- Use plywood or cement board for a durable tub structure.
- Apply waterproof paint or sealant to protect against moisture damage.
- Incorporate reclaimed or salvaged materials, like vintage tiles, for unique character.
- Consider acrylic or fiberglass sheets as a budget-friendly tub lining.
Always research and compare prices at local hardware stores and online retailers to find the best deals.
Step-by-Step Construction Guide
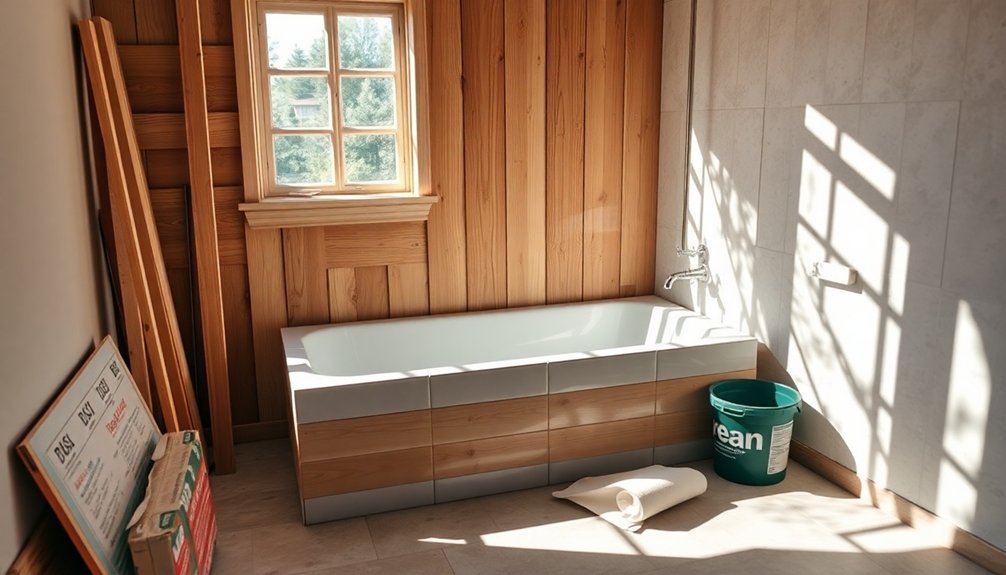
Now that you’ve planned your tub design, it’s time to gather your materials and start the construction process.
You’ll need sturdy base materials and treated lumber for framing, along with a waterproof membrane for protection. Additionally, consider utilizing expense management apps to keep track of your renovation costs effectively.
Let’s walk through each step to guarantee your tub is built to last and looks great!
Materials Needed Overview
A successful DIY bathroom renovation starts with the right materials to guarantee your tub is both functional and visually appealing. Here’s what you’ll need:
- High-quality plywood or cement board: This forms the base structure, ensuring it withstands moisture and weight.
- Waterproof sealant or liner: Essential to prevent leaks and water damage; don’t forget a compatible drain assembly.
- 2×4 lumber: Use this to create a sturdy frame around your tub for added stability.
- Decorative overlay: Choose glazed ceramic tiles or a faux marble effect to enhance aesthetics while keeping costs low.
With these materials, you’ll be well on your way to creating a beautiful tub that works seamlessly with your shower curtain!
Construction Process Steps
With the right materials in hand, you’re ready to tackle the construction of your DIY bathroom tub. Start by planning your space carefully to determine the dimensions and design of your DIY tub, ensuring it fits the existing plumbing.
Choose durable materials like acrylic sheets, plywood, or concrete, and consider effective waterproofing methods such as sealants or liners to protect against water damage.
Build a sturdy frame using treated wood or metal brackets for added strength. Assemble your tub according to your design, applying waterproofing measures as you go.
Finally, install the tub in the designated area, connecting it to the plumbing and ensuring proper drainage and faucet installation to complete your project successfully.
Tips for Achieving a Professional Finish
Achieving a professional finish in your DIY bathroom renovation can elevate the entire space, so it’s essential to pay attention to detail.
Elevate your DIY bathroom renovation by focusing on detail for a truly professional finish.
Here are some tips to help you get that polished look:
- Use moisture-resistant materials to prevent water damage and maintain structural integrity.
- Properly level the base of your tub; an uneven surface can lead to leaks and instability.
- Carefully caulk all joints and seams with waterproof caulk to fill gaps and prevent water seepage.
- Sand down surfaces before painting or sealing to enhance adhesion and create a smooth, professional appearance.
Finally, consider investing in a high-quality sealant for the final finish, which will improve aesthetics and protect against moisture. Additionally, consider sustainable packaging solutions for materials used in your renovation, which can help minimize environmental impact.
Incorporating Custom Features
Incorporating custom features into your bathroom renovation not only enhances the space’s functionality but also reflects your personal style.
Designing and building your own tub lets you use unique materials like reclaimed wood or stone, adding character while saving costs on standard products. Custom features, such as built-in shelving or integrated lighting, can make your tub a stunning focal point.
Don’t worry if you’re a novice; DIY kits offer step-by-step guidance to help you safely incorporate these custom elements. To maintain durability, consider using waterproof paint or sealant on your handmade tub.
Adding features like a ledge for candles or bath accessories can create a spa-like atmosphere, elevating your overall bathing experience. Additionally, using eco-friendly materials in your renovation can help reduce your environmental impact while enhancing the aesthetic appeal of your space.
Cost Breakdown for DIY Tub Project
When planning your DIY tub project, it’s crucial to look at material costs, which can range from $300 to $500 based on your choices.
You’ll also want to factor in any labor expenses, especially if you need plumbing adjustments.
Plus, renting tools instead of buying can save you a significant amount on your overall budget. Additionally, utilizing expense tracking tools can help you manage your project costs effectively and avoid overspending.
Material Costs Overview
While planning your DIY tub project, it’s essential to understand the material costs involved.
Here’s a quick material costs overview to help you budget effectively:
- Basic Materials: Expect to spend around $200 to $500 on plywood, waterproof paint, and sealants.
- Freestanding Tub: A tub shell can set you back $1,000 to $1,200, plus plumbing and fixtures.
- Reglazing Kits: If you’re revitalizing an old tub, these kits cost between $50 to $100.
- Additional Costs: Don’t forget plumbing alterations and installation, which can add another $300 to $500.
Labor Expenses Consideration
Although you might save on labor costs by tackling a DIY tub project, it’s essential to factor in the time and effort required.
Hiring professionals can set you back anywhere from $500 to $2,000, while your DIY approach can cost around $300 to $600 for materials.
However, you’ll need to invest time in prep work and installation, which could take a few hours to several days based on your skill level.
Don’t forget about tool expenses; basic tools like a saw and drill may add another $100 if you don’t already own them.
Keeping these labor expenses considerations in mind will help you stay within budget and guarantee a successful project.
Tool Rental Savings
Taking on a DIY tub project can be a rewarding experience, especially when you consider the potential savings from renting tools.
Here’s a quick breakdown of how tool rental savings can benefit your budget:
- Cost of Ownership: Buying high-end tools can cost $100 to over $1,000.
- Daily Rentals: Rent tile cutters, saws, and drills for $20 to $50 per day.
- Specialty Tools: Consider renting a concrete mixer or jackhammer for $30 to $100 per day.
- Bundled Discounts: Look for rental packages that offer multiple tools at discounted rates.
Always compare rental prices across local stores and online platforms to guarantee you’re maximizing your tool rental savings.
This approach keeps your DIY project affordable and efficient!
Maintenance Tips for Your Homemade Tub
To keep your homemade tub in great condition, it’s essential to regularly inspect it for any signs of wear or leaks. Addressing issues immediately can prevent water damage and costly repairs.
Clean your tub using non-abrasive, pH-balanced cleaners to maintain its surface; avoid harsh chemicals or abrasive scrubbers that can degrade the finish. Reseal any joints or seams every few years, especially if your tub is made from wood or composite materials, to guarantee a watertight finish.
To enhance durability, consider applying a protective coating or wax periodically. These simple maintenance tips will help your homemade tub stay looking new and functional for years to come, assuring you enjoy your DIY project to the fullest. Additionally, monitoring due dates for maintenance tasks can help you stay ahead of any necessary upkeep.
Creative Design Ideas for Unique Tubs
Here are some creative design ideas for unique tubs that won’t cost you thousands of dollars:
- Rustic Freestanding Tub: Use reclaimed wood for an eco-friendly touch that adds character.
- Vintage Clawfoot: Repurpose an old tub with a fresh coat of paint for an eye-catching centerpiece.
- Built-in Shelving: Create a tub with storage to display decorative items or bath essentials.
- Concrete Minimalism: Craft a modern tub that can be customized in shape and size, looking really well in any contemporary bathroom.
Incorporating sustainable materials, such as eco-friendly design principles, can enhance the aesthetic and environmental impact of your renovation.
Check out today’s video for more inspiration on incorporating marble countertops and other stunning features!
Sharing Your DIY Tub Experience
Once you’ve crafted your unique tub, sharing your DIY experience can inspire others to initiate their own projects.
Document your step-by-step process to provide valuable insights, and don’t forget to include before-and-after photos to showcase the transformation. These visuals can motivate others to tackle similar renovations.
Share tips on sourcing materials affordably—check local hardware stores and online marketplaces for discounts or recycled items.
Discuss any challenges faced during construction and how you overcame them; this helps others prepare for potential obstacles.
Finally, encourage feedback and questions from your audience. By fostering a community of DIY enthusiasts, you create a space for sharing experiences and advice, making the journey more enjoyable for everyone involved. Additionally, utilizing AI-driven tools can streamline your material sourcing process, ensuring you find the best deals efficiently.
Conclusion
Building your own tub can save you a staggering 30% compared to buying a pre-made one! Not only does this DIY project allow you to customize your space, but it also gives you the satisfaction of creating something unique. Remember, the journey doesn’t end with construction—maintaining your tub is key to enjoying it for years to come. So grab those tools, release your creativity, and transform your bathroom into a personal oasis that truly reflects your style!


