You can create a stylish hanging bookshelf for under $20 using simple materials. Start with 2-3 pieces of 1×4 lumber, wood glue, screws, and a drill. Measure and cut the wood to your desired size, then secure the pieces together with the glue and screws. Sand the edges for a smooth finish and choose a paint or stain color that matches your decor. Locate wall studs to mount the shelf securely, using brackets for stability. This project not only saves you money but also enhances your space. If you want more detailed steps and tips, there's plenty more to explore!
Project Overview
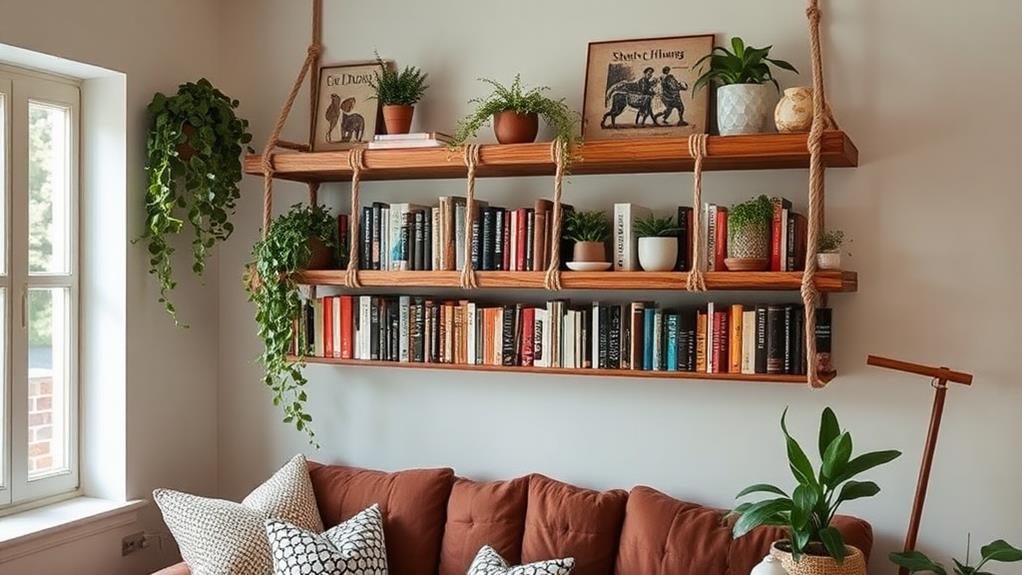
The hanging bookshelf project offers an affordable and stylish way to display your favorite books and decorative items, costing around $20. This DIY project is perfect for those looking to enhance their space with wall mounted bookshelves that are both functional and visually appealing. It encourages a love for reading, especially for children aged 3 and up, making it an excellent addition to any child's room.
Utilizing tools like budgeting apps can help manage costs effectively, ensuring you stay within your budget while investing in creative projects to enhance your home financial tools for budgeting.
You'll love how easy it's to customize your floating shelves based on the available space in your home. The project utilizes simple construction techniques, meaning you don't need to be a woodworking expert to achieve great results.
You'll find that the assembly process involves straightforward steps like cutting, gluing, and securing the shelves, making it accessible for DIY enthusiasts of all skill levels.
As you design your wall mounted bookshelves, you can adjust the dimensions and aesthetics to fit your style. This project not only provides practical book storage but also adds a personal touch to your decor.
Get ready to transform your space with this budget-friendly, creative solution!
Materials and Tools
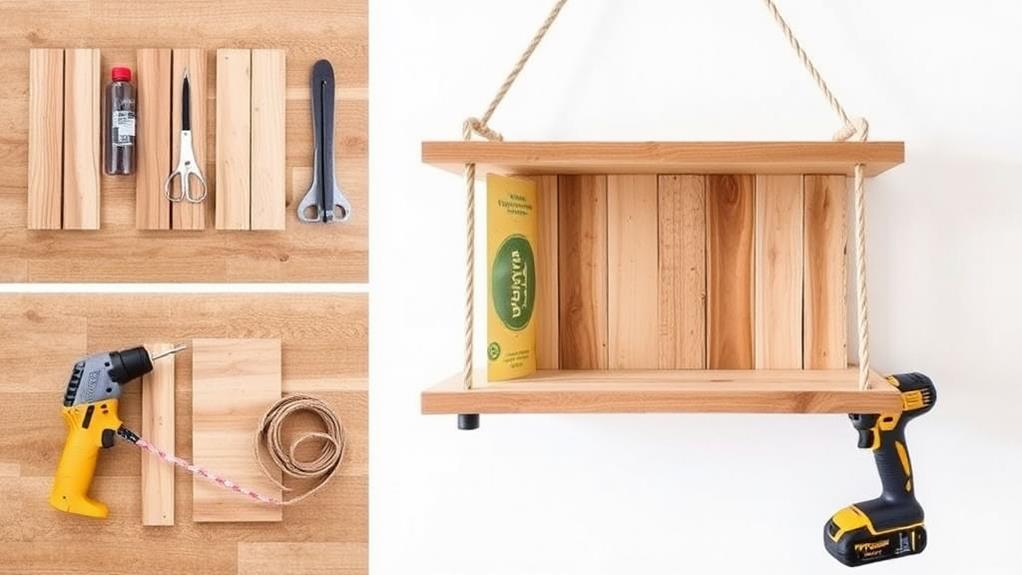
To bring your hanging bookshelf project to life, you'll need a few specific materials and tools. Start by gathering 2-3 pieces of 1×4 lumber, each 6 feet long. This will form the shelves and supports of your bookshelf.
Utilizing receipt scanning technology can streamline your project expenses, making it easier to keep track of costs. Next, pick up some wood glue and screws to guarantee a sturdy assembly. You'll also need a drill to create holes for the screws, making it easier to secure everything together.
Don't forget to grab a measuring tape, as it's vital for making accurate cuts and placements. This tool will help you measure the lengths needed for your shelves and the distance between them. A level is also necessary to confirm your shelves hang straight and look professional.
For hanging the shelves, consider using decorative rope or strong twine, which adds both style and functionality. Optional materials include sandpaper for smoothing any rough edges and paint or stain to give your bookshelf a finishing touch that enhances its appearance.
With these materials and tools in hand, you're all set to start your project!
Construction Steps
Start by measuring and cutting your wood pieces to the desired lengths, typically opting for a 1×3 or 1×2 board for the shelf supports and bases.
Once you have your pieces cut, use wood glue and nails or a nail gun to securely assemble the shelves, making certain they're flush and square. Budgeting for your DIY projects can help guarantee you stay within financial limits, aligning with your financial objectives.
Sand all surfaces to create a smooth finish, and fill any gaps or holes with wood putty for a polished look.
Next, use a stud finder to locate the wall studs where you'll mount the shelf brackets. It's vital to secure the brackets into wall studs for maximum stability. If you can't find a stud in the right spot, use wall anchors to make certain your brackets hold strong.
After attaching the brackets to the wall, place your assembled wooden boards on the brackets. Adjust them for level, making any necessary tweaks.
Finishing Touches
Once your hanging bookshelf is securely mounted, it's time to focus on the finishing touches that will elevate its appearance. Start by sanding all edges and surfaces thoroughly to guarantee a smooth finish. This step not only prevents splinters but also enhances the overall look of your bookshelf.
For any visible nail holes or gaps, apply wood filler and allow it to dry before sanding again for a seamless finish. By using sustainable materials for your project, you can also contribute to eco-friendly practices that minimize environmental impact.
Next, choose a paint or stain color that complements your decor. A well-chosen hue can make a significant difference in the aesthetic appeal. Apply 2-3 coats, starting with a primer to cover the wood grain, and remember to allow adequate drying time between coats. This guarantees a durable and attractive finish.
Consider adding decorative trim or molding to the shelves for an even more polished look. This small addition can transform your bookshelf from simple to stunning.
Installation Process
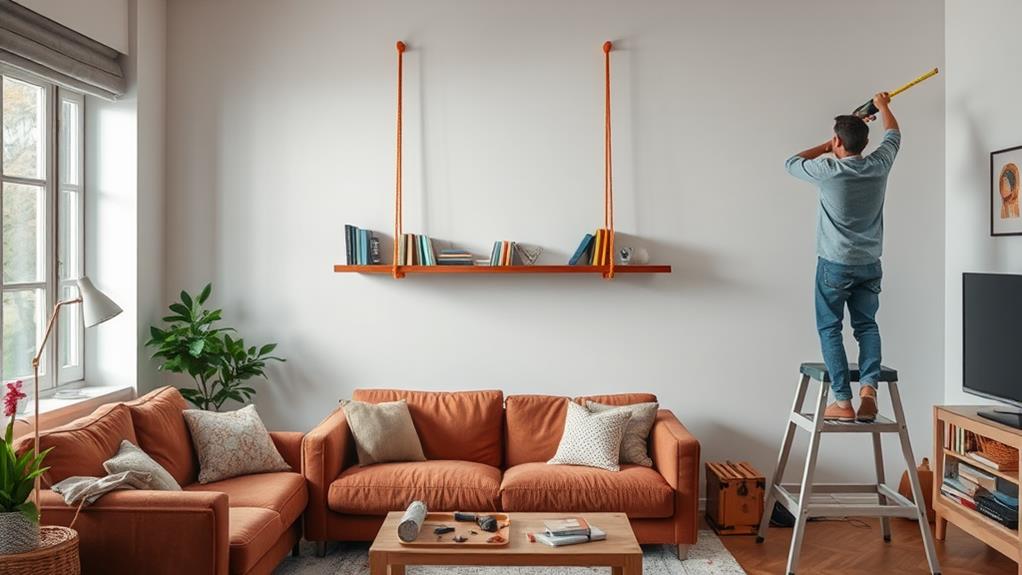
Installing your hanging bookshelf requires careful planning and execution to confirm it's both sturdy and visually appealing. Start by locating two studs in your wall with a stud finder. This confirms your bookshelf attaches securely, providing the necessary stability and weight support.
To enhance your financial organization, consider utilizing bill tracking apps that can help you manage expenses, allowing you to allocate funds for home projects like this one.
Next, measure and mark the desired height for your shelf on the wall, keeping accessibility in mind, especially for children. Once you've marked the spots, drill holes for the brackets, using a level to confirm everything's straight.
Secure the brackets into the wall with drywall screws, and if needed, use wall anchors to enhance stability. Be sure to follow the weight capacity guidelines for your hardware to prevent any mishaps.
Once the brackets are installed, carefully place the wooden shelf onto them. Adjust as necessary to confirm it's level.
Design Inspirations
Designing your hanging bookshelf can be a fun and creative process that often sparks inspiration. You can transform your space with floating bookshelves that not only save floor space but also showcase your favorite book covers.
To enhance your design, reflect on different configurations. Staggered or vertical arrangements can add visual interest and make the most of your wall space. By being mindful of your materials and the companies you purchase from, you can also support ethical business practices that align with sustainable values.
Here are some design inspirations to contemplate:
- Bright Colors: Use playful designs or vibrant colors to make your bookshelf pop, especially in children's rooms.
- Unique Shapes: Experiment with unconventional designs, like geometric shapes, to create a standout piece.
- Decorative Elements: Incorporate plants or art pieces alongside your books to create an inviting reading nook.
- Online Inspiration: Explore DIY projects on platforms like Pinterest to discover unique designs that align with your style and budget.
Conclusion
You've just transformed your space with a stunning hanging bookshelf that cost less than your morning coffee! Picture it now, books floating like clouds in the sky, each one a portal to another world. Friends will marvel at your craftsmanship, convinced you've summoned magic from thin air. With just a few materials and your creativity, you've created a functional masterpiece that not only holds stories but also sparks conversations. Who knew such brilliance could hang right above your head?