
Repairing deck board seams isn't just essential for safety; it can also save you money. Start by inspecting for gaps and signs of rot, as these can lead to moisture issues. For small gaps, use waterproof wood filler or caulk, pressing it in smoothly. If boards are severely damaged, a pry bar and circular saw will help you replace them effectively. Always guarantee a 1/8-inch gap for wood expansion. Regular maintenance, like cleaning and sealing, can prolong your deck's life. Want to know more about cost-effective repair techniques and tips? You've got just the right place to find them!
Assessing Deck Board Seams
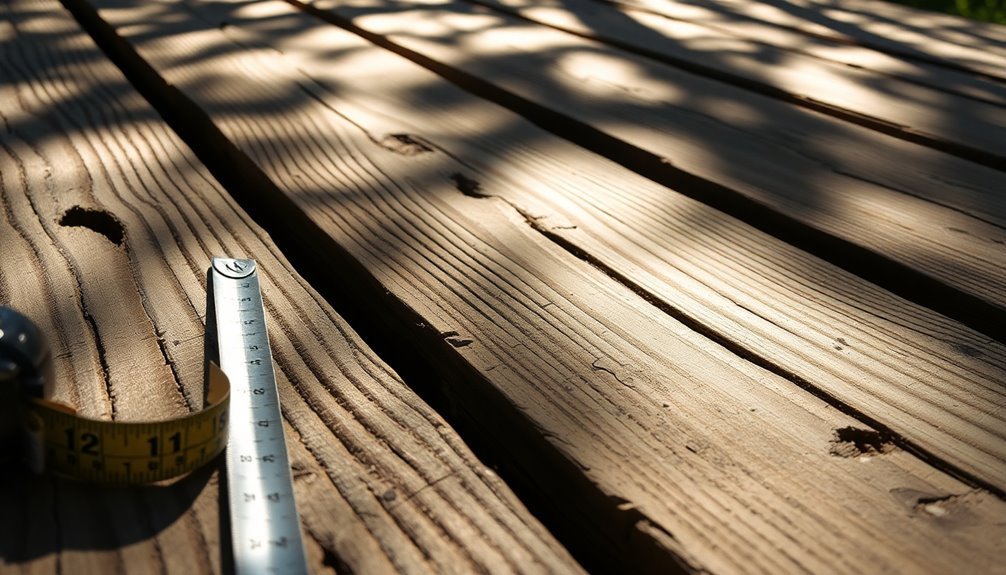
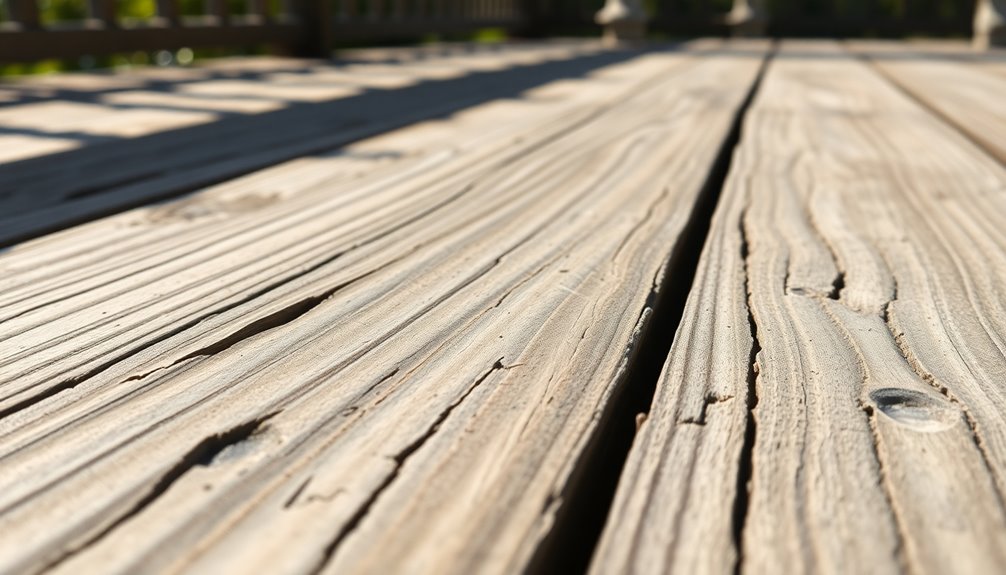
When evaluating deck board seams, how can you quickly identify potential issues? Start by inspecting for visible gaps, as these often indicate moisture retention that could lead to rot. It's also crucial to utilize advanced receipt scanning technology, which can help you keep track of repair costs efficiently. Additionally, using expense tracking apps can provide valuable insights into your overall spending on repairs and maintenance.
You should ascertain there's a proper 1/8 inch gap to allow for wood expansion, preventing cupping and warping.
Watch for signs of splintering or lifting at the seams, as these can create tripping hazards and signal underlying structural issues.
Regularly check for protruding nails or screws, which can cause injuries and further damage nearby boards.
If you find significant damage, consider replacing deck boards while ensuring new ones align with existing seams to maintain both appearance and structural strength across your deck. Additionally, using tools like expense tracking software can help you effectively manage repair costs and keep your budget on track.
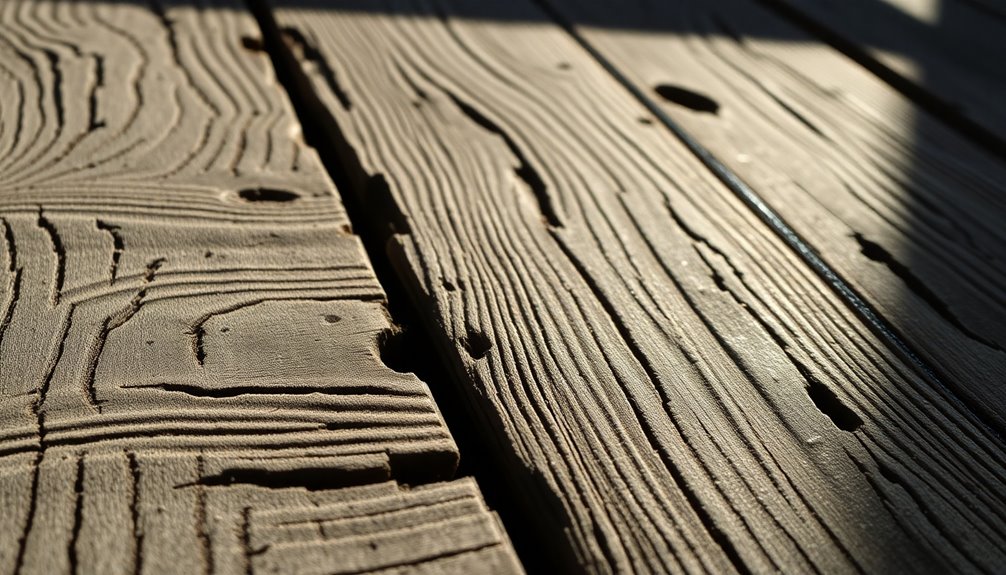
Common Issues With Deck Seams
Deck seams can present several common issues that not only affect the deck's appearance but also its safety and durability.
Gaps between deck boards often form due to natural wood movement, moisture fluctuations, or improper installation practices. These gaps can create tripping hazards and invite moisture penetration, leading to rot and decay. Furthermore, choosing to opt for slower delivery options when purchasing repair materials can significantly reduce the environmental impact associated with your home maintenance projects. Additionally, utilizing AI-driven tools can help you find cost-effective solutions for deck repairs, making the shopping process more efficient.
Regular maintenance is essential; inspect for signs of lifting, separation, or visible fasteners, as these may indicate underlying structural problems.
To prevent excessive movement and maintain consistent seam width, use adequate spacers during installation.
Finally, applying a high-quality sealant or stain to your deck seams protects against moisture penetration, enhancing the deck's longevity and helping you avoid costly repairs down the road. Additionally, maintaining your deck can support sustainable practices that contribute to a healthier environment.
Tools for Seam Repair
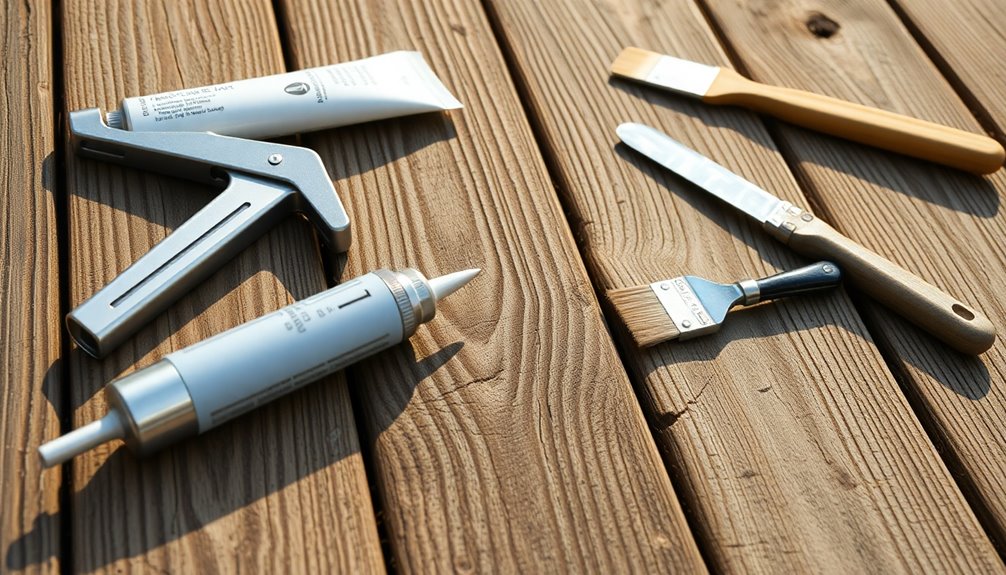
Addressing issues with deck seams requires the right tools to guarantee the repairs are effective and long-lasting.
Start with a pry bar to lift and access the deck boards, making it easy to remove any damaged sections. You'll also need a circular saw for cutting new boards to the correct size, ensuring they fit snugly into the gaps.
A drill or impact driver is essential for securing new boards and installing fasteners for stable seams. Additionally, using automated savings tools can help you budget for future repairs and maintenance. Implementing a budgeting app can further assist in tracking your expenses related to these repairs.
Don't forget to use a level to check the evenness of the surface after your repairs; this helps prevent tripping hazards.
Finally, applying a waterproof sealant is vital to protect the seams from moisture and extend the life of your deck. Additionally, consider implementing clear payment terms to ensure you have the necessary budget for ongoing maintenance and repairs.
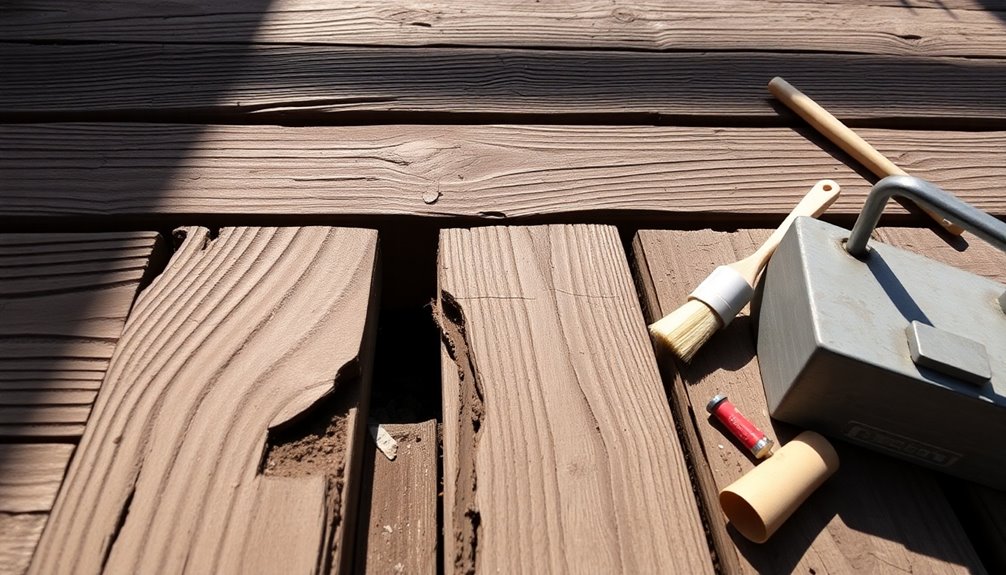
Repairing Small Gaps
Although small gaps between deck boards may seem trivial, they can lead to larger issues if left unaddressed.
To effectively tackle these gaps, start by cleaning them thoroughly to remove any dirt and debris; this guarantees better adhesion for your wood filler. Use a waterproof wood filler or caulk, which helps prevent moisture intrusion and further wood degradation. Additionally, incorporating budgeting apps into your maintenance routine can help you manage costs associated with deck repairs and upkeep. Tracking your expenses can be simplified with investment tracking tools, making it easier to allocate funds for home maintenance.
With a putty knife, press the filler firmly into the gaps and smooth it to match the surrounding wood for a seamless look. Allow the filler to cure for about 24 hours, following the manufacturer's instructions, before sanding and applying a protective finish. Implementing regular maintenance practices, such as streamlined bookkeeping processes, can greatly extend your deck's lifespan and prevent costly repairs down the line.
Replacing Compromised Boards
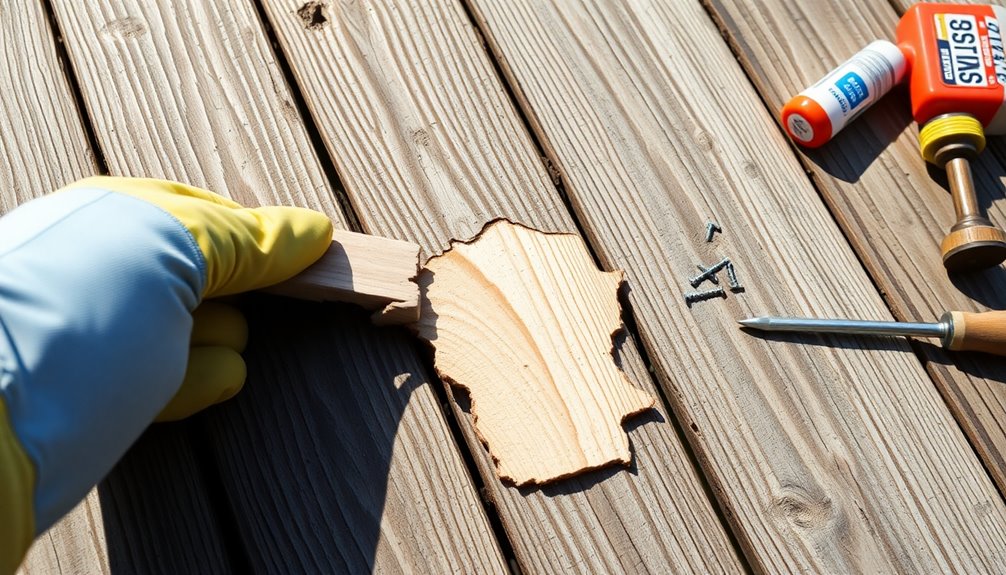
When you notice compromised deck boards, it's crucial to act quickly to maintain the safety and aesthetics of your outdoor space.
Start by evaluating the damage to determine if you can replace individual boards rather than the entire deck, which is more cost-effective. Use a pry bar to carefully remove the damaged boards, checking the underlying joists for any rot. Regular reviews of your savings and investments can help ensure you have the necessary funds for repairs. Establishing a solid budgeting framework can also provide the necessary structure for planning these expenses.
Measure and cut new boards to fit snugly, leaving a 1/8 inch gap for expansion. Secure the new boards using deck screws, drilling pilot holes to prevent splitting.
Stagger the seams for better structural integrity and appearance. Finally, sand any rough edges and apply a high-quality sealer or stain to protect your new boards from moisture and extend their lifespan. Additionally, keeping track of your repair expenses can be simplified with tools like expense tracking, helping you manage your overall budget effectively.
Cleaning and Preparing the Area
Before you start any repairs, make certain to clear away all furniture and debris from the area.
This not only gives you better access but also lets you inspect the deck for any damage.
Taking these steps guarantees a smooth repair process and maintains the integrity of your deck.
Clear Debris Thoroughly
To kick off the repair process, you'll want to clear away all furniture, planters, and other items from the deck. This gives you a clear working area to clean and prepare effectively.
Next, sweep the entire deck surface to eliminate loose dirt, leaves, and debris. This prevents contaminants from interfering with your cleaning solutions.
Use a stiff bristle brush to scrub between the decking boards and seams where dirt tends to accumulate.
Once you've done that, grab a pressure washer set to medium-high to rinse off any remaining dirt and cleaner. Make sure all surfaces are free from cleaning residue.
Finally, allow the deck to dry completely for 24 to 48 hours before applying any finishes, ensuring the best results.
Inspect for Damage
You'll want to carefully inspect your deck for any damage after clearing the area.
Start by using a paint scraper to remove loose finishes and a stiff bristle brush to clean out dirt from the seams. This will help you effectively inspect for damage.
Look for signs of rot, like soft or spongy wood, discoloration, or cracks, especially around the seams where moisture collects.
Don't forget to check the structural integrity of the joists beneath the deck boards, as hidden damage could compromise the seams.
If you find severe damage, you may need to replace deck boards or use appropriate decking materials for repairs.
Allow the area to dry completely before moving on to repairs for ideal adhesion.
Sealing Gaps for Longevity
Sealing gaps between deck boards is essential for ensuring the longevity of your deck, especially since moisture accumulation can lead to costly repairs down the line.
To protect your investment, consider these steps:
- Use a quality waterproof sealer or stain to create a protective barrier.
- Fill gaps with flexible sealant designed for outdoor use.
- Inspect and reseal annually to prevent future issues.
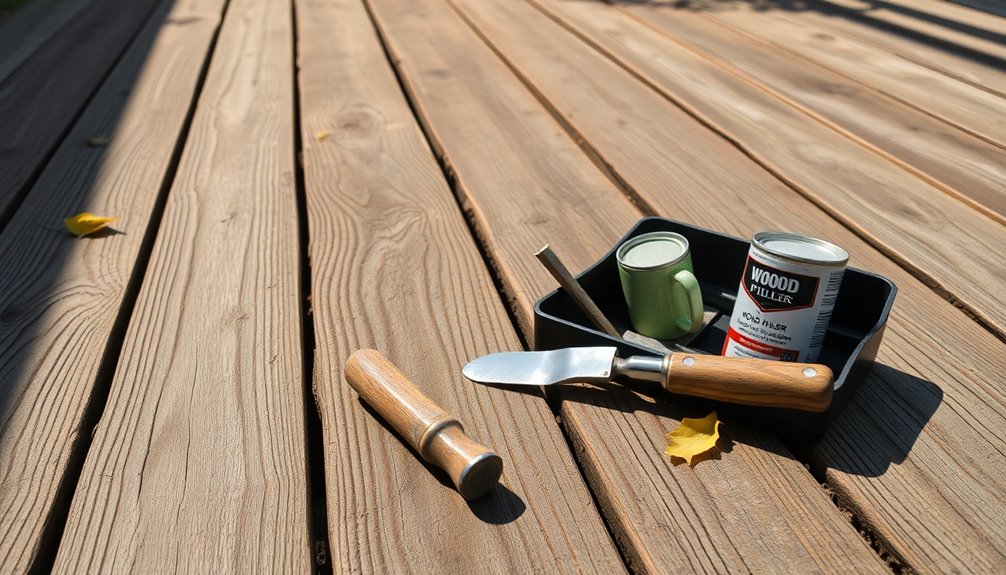
Choosing the Right Wood Filler
How do you choose the right wood filler for your deck board seams? Start by selecting a product specifically designed for exterior use; this guarantees it can handle moisture and temperature changes.
Look for a wood filler that's paintable and stainable, allowing it to blend seamlessly with your deck's finish. Quick drying time is essential, so aim for fillers that cure in under 30 minutes to keep your project moving.
Pay attention to adhesion properties; epoxy-based fillers usually offer superior bond strength. Finally, consider a flexible wood filler that accommodates the natural expansion and contraction of wood, which helps prevent cracking or separation over time.
With these tips, you'll have a solid foundation for your repairs.
Techniques for Smooth Finishing
To achieve a smooth finish on your deck board seams, start by sanding the edges with fine-grit sandpaper to eliminate roughness.
Make sure to stagger the seams by at least 12 inches for both stability and a polished look.
Finally, apply a high-quality sealant evenly along the seams to protect against moisture and enhance durability.
Sanding Techniques for Smoothness
While achieving a smooth finish on your deck boards may seem challenging, using the right sanding techniques can make the process straightforward and effective. Here are some tips to help you achieve that perfect smoothness:
- Start with coarse-grit sandpaper (60-80 grit) to remove rough edges.
- Use a power sander for large areas, but switch to manual sanding for corners.
- Always sand in the direction of the wood grain.
After sanding, make certain to clean the surface thoroughly with a stiff bristle brush or vacuum to remove dust.
Finally, finish with fine-grit sandpaper (220 grit) to create a smooth surface that enhances the absorption of sealers or stains.
This careful approach will guarantee a beautiful finish on your deck boards.
Staggering Seams for Stability
Achieving a smooth finish on your deck boards isn't just about sanding; the arrangement of the boards plays an essential role in overall stability. By staggering seams, you enhance the structural integrity of your deck, preventing weak points where boards meet.
This layout considerably reduces the risk of water pooling and moisture retention, which can lead to rot over time. When installing new boards, make certain the seams are spaced at least 1 foot apart for ideal stability and visual appeal.
Secure the boards tightly with proper fasteners, leaving a 1/8 inch gap for natural expansion. Using a level during installation guarantees that staggered seams align evenly, contributing to a visually pleasing surface and maintaining consistent deck height.
Proper Sealing Applications
A proper sealing application is essential for protecting your deck and guaranteeing a smooth finish. Follow these tips for the best results:
- Use a high-quality waterproof sealant designed for outdoor wood.
- Apply sealant generously along seams and edges.
- Check for water beading to confirm effective sealing.
Before you start, clean and dry the deck thoroughly. Wait 24-48 hours after washing to avoid trapping moisture.
When applying the sealant, use a back brushing technique—either with a wide brush or airless sprayer—to guarantee even absorption and prevent drips. Remember to apply pressure as you work along the seams, protecting your wood from the elements.
Reapply annually or as needed, preparing the surface with cleaning and light sanding for better adhesion.
Preventative Maintenance Tips
To keep your deck looking great and functioning well, regular maintenance is essential. Start with preventative maintenance by inspecting your deck boards for signs of wear, such as splintering or lifting. Address these issues early to avoid needing to replace the board later.
Clean your wood decking annually with a pressure washer and a suitable decking cleaner to remove dirt and prevent mold growth. Applying a high-quality waterproof sealant or stain every one to two years protects against moisture retention and UV damage.
Guarantee proper drainage by directing water away with gutters and downspouts, and maintain gaps between deck boards to enhance air circulation. This reduces moisture buildup, preventing wood decay and extending your deck's lifespan.
Cost-Effective Repair Options
Numerous cost-effective repair options are available when it comes to addressing deck board seams. You can tackle these issues without breaking the bank and even turn it into a rewarding DIY project.
Here are a few ideas to contemplate:
- Use wood filler for small gaps (around $10-$20) to create a seamless look.
- Apply timber sealant for larger gaps, costing about $15-$30, which protects against moisture.
- Replace only the most damaged boards at approximately $200 for 100 sq. ft., using treated wood priced at $2-$3 per linear foot.
Regular maintenance, like reapplying sealants annually ($20-$50), can save you from extensive repairs, ensuring your decking stays in great shape for years to come.
When to Seek Professional Help
While DIY repairs can be a great way to save money, there are times when seeking professional help becomes necessary.
If you discover extensive rot or structural damage in joists or beams, it's essential to contact a general contractor to guarantee your deck's safety and integrity.
When multiple deck boards show significant wear, their expertise can help determine if you should repair or replace them entirely.
Additionally, if you lack the right tools or experience, hiring a professional can save you time and prevent costly mistakes.
For complex issues like persistent moisture or insect infestations, a professional can provide tailored solutions.
Finally, if local building codes apply, involving an expert guarantees compliance with all legal standards.
Enhancing Deck Safety and Aesthetics
To enhance your deck's safety and aesthetics, start by evaluating the stability of the boards.
Sealing any gaps effectively not only prevents moisture damage but also improves the overall look of your deck.
Finally, consider how visual appeal can be boosted through thoughtful design choices, making your outdoor space both inviting and safe.
Assessing Board Stability
Evaluating board stability is essential for ensuring both safety and aesthetics on your deck. Regular checks can prevent accidents and maintain your deck's appearance.
- Inspect for gaps or unevenness in board seams.
- Use a level to identify tilting or movement underfoot.
- Secure any loose screws or protruding fasteners.
When examining board stability, pay close attention to old boards that may have deteriorated. Moisture can cause wood to swell, leading to cupping and further instability.
If you spot any loose screws, make sure to reinforce those areas with additional fasteners. This simple step will help maintain a snug fit, ensuring a safe walking surface and prolonging the life of your deck.
Don't neglect this vital maintenance task!
Sealing Gaps Effectively
Sealing gaps between deck boards is essential, as it not only prevents water infiltration but also enhances the overall safety and aesthetics of your outdoor space.
To effectively seal gaps, start by thoroughly cleaning the gaps to remove dirt and debris. This guarantees the waterproof sealant adheres well to the surfaces, creating a strong bond that helps prevent moisture retention.
Use a high-quality sealant designed for outdoor conditions, and consider adding a backer rod for wider gaps to improve fit and reduce sealant usage.
Regularly inspect the sealed areas and reapply sealant as needed, especially after harsh weather, to maintain the integrity of your deck and prolong its lifespan.
Your deck will thank you!
Enhancing Visual Appeal
After sealing gaps effectively, your next step is to focus on enhancing the visual appeal of your deck.
Here are some tips to contemplate:
- Stagger deck board seams for a more attractive and structurally sound layout.
- Use complementary colors for stains or sealers to minimize the visibility of seams.
- Commit to regular maintenance to preserve the deck's aesthetic and safety.
Conclusion
In the world of deck maintenance, a little attention goes a long way. By addressing those pesky seams and taking proactive measures, you can keep your deck looking sharp and safe for years to come. Think of your deck as a canvas—each repair is a brushstroke that enhances its beauty and functionality. So grab your tools, roll up your sleeves, and plunge into those repairs. With a bit of effort, you'll create an inviting space for family and friends alike!


