

Creating a DIY automatic shut-off tire inflator is a smart way to save money while enhancing your off-road adventures. By assembling components like an inline regulator, quick-release fittings, and a durable air hose, you can craft a custom inflator that meets your specific needs. This setup increases efficiency and comfort, allowing you to maintain ideal tire pressure effortlessly. Plus, with a cost of around $171 versus commercial options, you’ll discover both functionality and savings. Explore the essential steps and benefits ahead!
Understanding the Need for an Automatic Tire Inflator
When you’re out on an off-road adventure, the last thing you want is to struggle with inflating your tires in harsh weather.
An automatic tire inflator simplifies this process, allowing you to stay inside your vehicle while your tires inflate. This convenience saves time and lets you multitask—ideal for managing other maintenance tasks while monitoring your tire pressure gauge.
An automatic tire inflator lets you stay inside your vehicle, saving time and allowing you to multitask while inflating tires.
Regular adjustments are essential for peak performance on diverse terrains like sand, mud, and rocks. Plus, with its automatic shut-off feature, you can inflate your tires to the desired PSI without constant supervision, enhancing safety by preventing over-inflation. Tracking progress of your tire pressure is crucial for maintaining optimal performance and safety on various terrains.
Choosing a DIY setup can also save you money, costing around $171 compared to pricier commercial options.
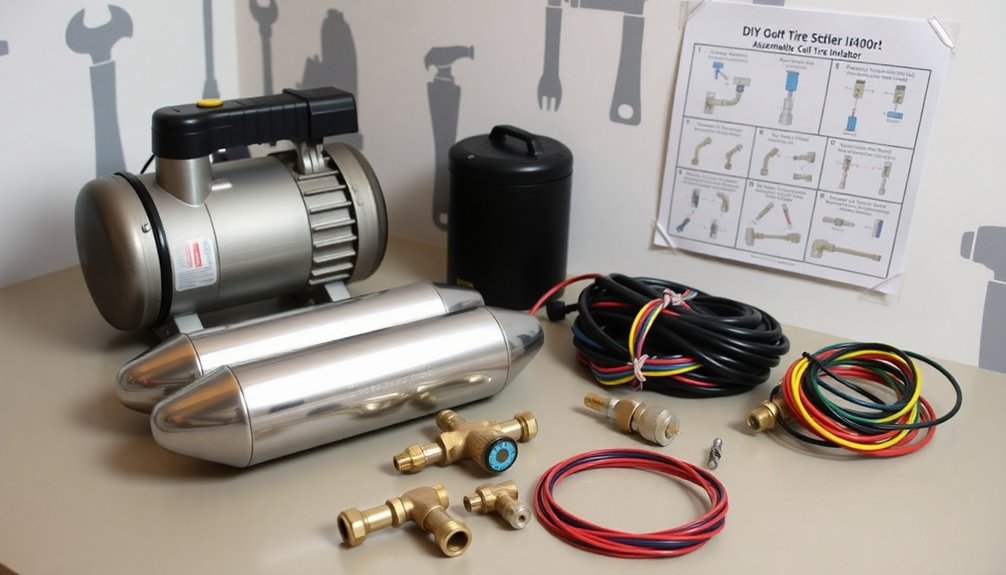
Essential Components for Your DIY Project
To guarantee your DIY automatic shut-off tire inflator operates effectively, you’ll need specific components that work together seamlessly.
An inline regulator, such as the Parker 14R118FC, provides precise pressure control within a 2-125 psi range. To facilitate easy connections, include a 1/4 in. NPT male brass quick release plug.
The Goodyear 3 x 3/8 Rubber Whip Hose, rated for 250 PSI, assures durability during inflation. Incorporating a CTA Tools 1930 Straight Lock-On Chuck allows for a secure attachment to tire valve stems, preventing air leaks.
Finally, a compatible air gauge is essential for accurately monitoring pressure, keeping your tires inflated to the desired PSI without over-inflating. Don’t forget Teflon tape to seal joints and maintain efficiency! Additionally, utilizing tools like expense tracking tools can help manage costs associated with your DIY projects effectively.
Step-by-Step Assembly Instructions
Now that you’ve gathered all the necessary components, it’s time to move on to the assembly process.
You’ll connect each part methodically, ensuring airtight seals and proper functionality.
Let’s break down the steps to create your efficient tire inflator system. Additionally, using receipt scanning technology can enhance your overall financial management while keeping track of expenses related to your DIY projects.
Required Components Overview
Building your own automatic shut-off tire inflator is an exciting project that combines practicality with technical skill. You’ll need a few essential components to get started:
- Inline regulator (recommended: Parker 14R118FC)
- 1/4 in. NPT male brass quick release plug
- Goodyear 3 x 3/8 Rubber Whip Hose rated for 250 PSI
First, attach the brass quick release plug to the regulator’s intake side.
Next, connect the air hose to the output side of the regulator.
Finally, secure a CTA Tools 1930 Straight Lock-On Air Chuck to the end of the whip hose for a reliable attachment to the tire valve stem.
Remember to seal all joints with Teflon tape to prevent air leaks before testing your setup!
Assembly Process Steps
As you commence the assembly of your automatic shut-off tire inflator, begin by cutting a 50-foot roll of 1/4” Flexzilla air hose into two 3-foot and two 12-foot pieces, ensuring the ends are threaded for easier connections.
Next, attach a brass barbed T fitting to connect a 10-foot hose from the 4-way system, securing it with hose clamps to prevent air leaks. Use Teflon tape on all threaded connections and secure the air chucks to the ends of the hoses for efficient inflation and deflation.
Assemble the manifold by modifying existing fittings, adding quick connects, and installing a pressure gauge to check pressure.
Finally, test the entire setup on a spare tire to verify functionality before using it on your vehicle’s tires.
Performance Benefits of an Automatic Tire Inflator
Using an automatic tire inflator markedly boosts your efficiency by handling both inflation and deflation without manual effort, freeing you up for other tasks during off-road trips.
You’ll enjoy enhanced comfort as you can set your desired PSI and let the system do the work, allowing you to relax in your vehicle while ensuring your tires are properly inflated. This combination of time savings and user comfort makes an automatic tire inflator a game-changer for any adventurer, especially when considering the potential for personalized shopping experiences that enhance your purchasing decisions for such products.
Time Efficiency Gains
When you opt for a DIY automatic tire inflator, you release significant time efficiency gains that enhance your maintenance routine.
This tool allows you to multitask during inflation, maximizing your time spent on other activities. Here’s how it boosts your efficiency:
- Uniform PSI: Achieve consistent pressure across all tires, improving both performance and safety.
- Simultaneous Inflation: Use additional hoses and gate valves to fill multiple tires at once, minimizing wait times.
- Reduced Monitoring: The automated system eliminates manual adjustments, so you can focus on other tasks while the compressor works.
Enhanced User Comfort
While your DIY automatic tire inflator streamlines maintenance and boosts efficiency, it also greatly enhances user comfort.
With its automatic shut-off feature, you can stay inside your vehicle during inflation, protecting yourself from harsh weather conditions like mud, cold, or darkness. This setup allows you to multitask or inspect other components of your vehicle, eliminating the boredom of waiting by the tires.
By setting and maintaining the desired down pressure, you guarantee uniform tire pressure, enhancing performance and safety.
Plus, when paired with an onboard air compressor, you can make quick adjustments on off-road adventures. Positive user experiences confirm that this convenience frees up your time and attention, allowing you to focus on other essential maintenance tasks.
Cost Analysis and Savings Compared to Commercial Products
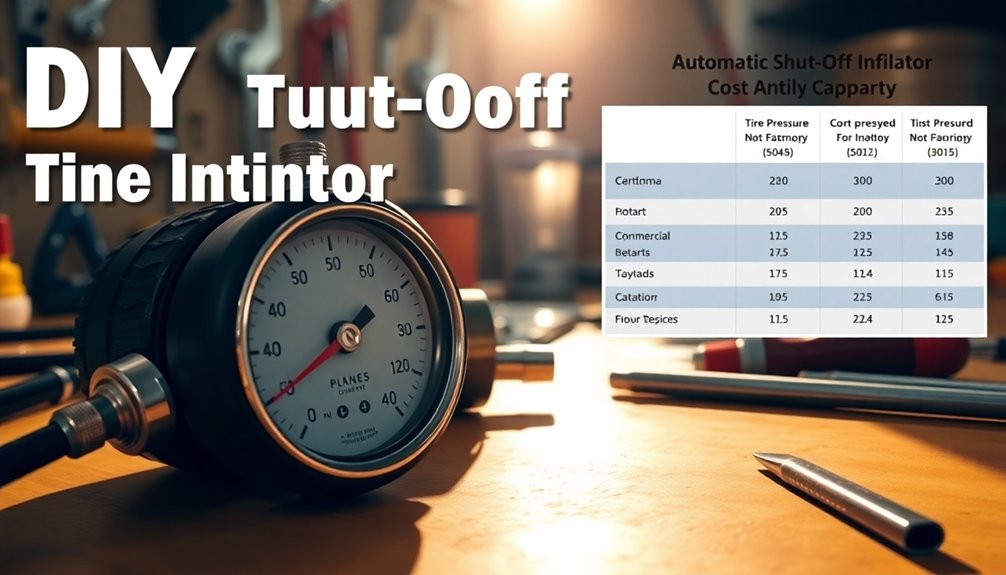
Building your own automatic shut-off tire inflator can save you a significant amount of money compared to commercial options. A cost analysis reveals that your DIY setup costs around $171, while the commercial Morrflate 4 tire inflator/deflator runs at $224.98.
By opting for a DIY approach, you’ll enjoy several benefits:
- Quality components: Use durable Flexzilla hoses for superior performance.
- Quick assembly: Put it together in about 20 minutes, making it perfect for off-road enthusiasts.
- Enhanced efficiency: Inflate multiple tires simultaneously, equalizing pressure with ease.
This not only cuts costs but also provides a custom solution tailored to your tire inflation needs, delivering both savings and satisfaction. Additionally, understanding the importance of financial literacy can help you make informed decisions about future DIY projects and investments.
Enhancing Functionality With Additional Features
To elevate your DIY automatic shut-off tire inflator, consider integrating features that enhance both convenience and efficiency.
A digital pressure gauge with an auto shut-off capability guarantees accurate readings, allowing you to set desired PSI levels and walk away without the worry of over-inflation.
You can also incorporate dual hose connections, enabling you to inflate two tires simultaneously, which is especially useful during off-road adventures.
Utilizing quick disconnect fittings in your design allows for rapid setup and adjustments, making it adaptable for various tire sizes and types.
Additionally, implementing a manifold system enables you to equalize pressure across multiple tires while inflating, improving your vehicle’s stability and performance on challenging terrains.
Moreover, integrating AI-driven tools can optimize product discovery for any additional components you may need, ensuring that you find the best options for enhancing your inflator’s functionality.
User Experiences and Community Feedback
Integrating additional features into your DIY automatic shut-off tire inflator not only enhances its functionality but also invites a wealth of user experiences and community feedback that can further refine your project.
Users rave about the efficiency of maintaining consistent tire pressure across all tires, enabling multitasking during inflation. Here are some key insights from the community:
- Many enjoy the satisfaction of creating a custom tool tailored to their needs.
- Some users have shared modifications that improve air flow and overall performance.
- Concerns about compatibility with beadlock rims have been addressed, confirming successful functionality with recessed valve stems.
- This project encourages financial discipline by reducing the cost of frequent trips to commercial tire inflators.
This supportive community fosters collaboration and innovation, enhancing your overall off-road experience.
Troubleshooting Common Issues
While using your DIY automatic shut-off tire inflator can be a game changer for maintaining tire pressure, issues may occasionally arise that require troubleshooting.
Start by ensuring all connections, including the inline regulator and air chucks, are securely tightened with Teflon tape to prevent air leaks.
If the automatic shut-off feature isn’t engaging, check that your pressure gauge is calibrated correctly; inaccuracies can lead to improper readings of the current PSI.
Regularly inspect hoses for kinks or damage that could restrict airflow, and replace any worn components.
For best results, test your setup on a spare tire before using it on your vehicle, ensuring you can accurately adjust pressure for both front and rear tires. Additionally, keeping track of your operational costs can help you assess the effectiveness of your DIY tool in saving money on tire maintenance.
Future Modifications and Improvements
As you explore future modifications for your DIY automatic shut-off tire inflator, consider how enhancements can elevate both performance and user experience.
Here are some ideas to think about:
- Integrate a more powerful air compressor to boost inflation speed, especially for larger tires.
- Experiment with larger locking chucks to enhance compatibility, particularly for users with beadlock rims.
- Incorporate a manifold system for simultaneous inflation of multiple tires, streamlining the process during off-road adventures.
Additionally, consider adding a pressure monitoring system for real-time feedback while inflating.
A quick-release feature for hose connections can also simplify setup and maximize convenience.
These future modifications can transform your inflator into a more efficient and user-friendly tool. Furthermore, integrating detailed insights and reporting can help you monitor the usage and efficiency of your inflator over time.
Getting Started With Your DIY Project
To kick off your DIY automatic shut-off tire inflator project, start by assembling an essential tools checklist to guarantee you have everything you need at hand. Follow a step-by-step assembly guide to piece together your system efficiently, and don’t forget to include testing and calibration tips to fine-tune your setup. With these foundational steps, you’ll be well on your way to creating a reliable tire inflator that meets your needs. Additionally, consider utilizing budgeting apps to help manage the costs associated with your DIY project effectively.
Essential Tools Checklist
Starting your DIY automatic shut-off tire inflator project requires a solid toolkit to guarantee a smooth assembly process. Here’s a checklist of essential tools and components you’ll need:
- Inline regulator (recommended: Parker 14R118FC)
- Reliable air gauge compatible with the regulator’s port
- EPAuto Closed Flow Straight Lock-On Air Chuck for hands-free operation
Don’t forget to include a PVC pipe cutter for precise cuts on your air hoses, and choose a manageable hose length for easy storage.
Be certain to secure connections with hose clamps and Teflon tape to prevent air leaks. With these tools, you’re ready to tackle valve stems and guarantee efficient inflation and deflation in your automatic tire inflator project!
Step-by-Step Assembly Guide
Starting on your DIY automatic shut-off tire inflator project involves assembling a few key components for best performance.
First, gather your parts list: an inline regulator, brass quick release plug, Goodyear rubber whip hose, and an air gauge.
Begin assembly by connecting the brass quick release plug to the regulator’s intake and attaching the whip hose to the output. Use Teflon tape on joints to prevent air leaks.
Cut a 50’ roll of 1/4” Flexzilla air hose into two 3’ pieces and two 12’ pieces for flexible inflation and deflation.
Then, connect the hoses to a T fitting, securing all connections with hose clamps.
Finally, test your setup on a spare tire to verify reliability before tackling your vehicle.
Testing and Calibration Tips
Once you’ve assembled your DIY automatic shut-off tire inflator, it’s essential to test and calibrate the system to guarantee peak performance.
Start by familiarizing yourself with the regulator on a spare tire, making sure you can set and maintain your desired PSI levels. Use a reliable air gauge compatible with your regulator to monitor pressure accurately.
Here are some tips for effective testing and calibration:
- Inflate and deflate a tire multiple times to ensure reproducibility.
- Fine-tune the regulator according to your specific tire requirements.
- Document your findings and adjustments for future reference.
Conclusion
By creating your own automatic tire inflator, you’re not just saving money; you’re also gaining a valuable skill that’ll keep you rolling smoothly. With the right components and a bit of ingenuity, you can tackle this project and reap the rewards. It’s a win-win situation—your tires stay properly inflated, and your wallet stays happy. So, roll up your sleeves and get started; you’ll be glad you did when you see the savings add up!


