
To cut a downspout like a pro, you need the right tools and a safety-first approach. Start by wearing cut-resistant gloves and using appropriate tin snips. Measure carefully, mark your cut, and score the line for precision. Cut cleanly for a snug fit, adjusting the height to guarantee proper drainage. Keep things tidy and check for alignment. Follow these steps, and you’ll be on your way to mastering downspout installation while discovering more essential tips along the way.
Safety First: Essential Gear for Cutting Downspouts
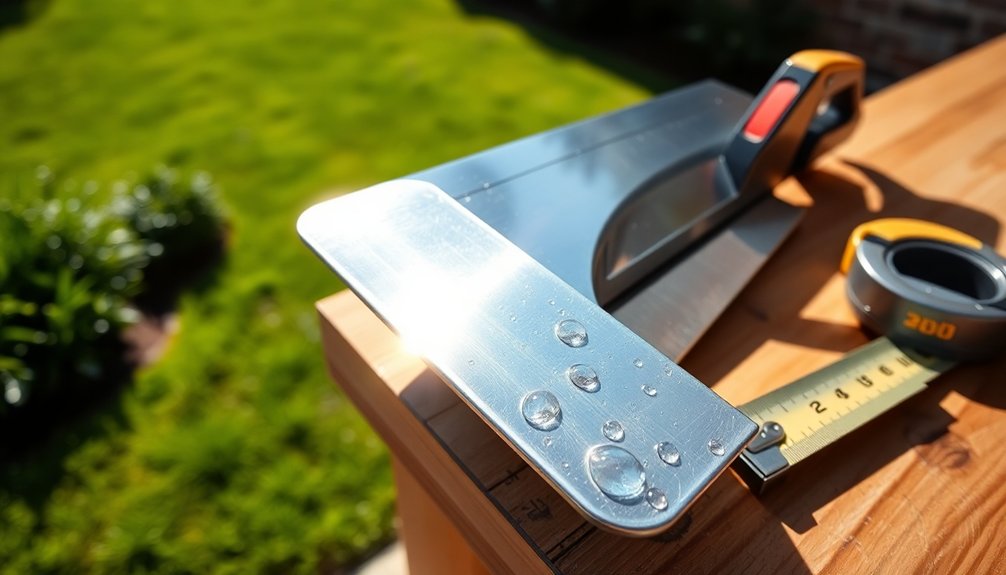
When you’re ready to cut downspouts, it’s essential to prioritize your safety. Start by wearing cut-resistant gloves to shield your hands from sharp edges and potential injuries.
Next, grab the right tin snips—red-handled for left cuts and green-handled for right cuts. This’ll help you achieve precise cuts for your finished product.
Choose the correct tin snips—red for left cuts and green for right—for precision in your downspout project.
Use a square to double-check that your cutting line is straight, ensuring an accurate fit for the downspout. Mark your cutting lines clearly with a pencil or Sharpie for visibility throughout the process.
Finally, keep your work area clean and free of obstructions. This’ll help you stay focused and minimize the risk of accidents while handling your tools.
Additionally, considering sustainable and ethical shopping options for your materials can enhance both your project and your environmental impact.
Safety is key to a successful project!
Accurate Measurements: The Key to Success
When it comes to cutting downspouts, accurate measurements are everything.
You’ll need the right measuring tools and effective marking techniques to avoid common mistakes that could throw off your project.
Let’s explore how to get those measurements spot on for a perfect fit. Incorporating user-friendly interfaces in your measurement tools can further enhance precision and ease in your project.
Measuring Tools Needed
Accurate measurements are the backbone of a successful downspout cutting project. To achieve this, you’ll need a reliable tape measure, preferably at least 25 feet long, to guarantee flexibility for various projects.
Familiarize yourself with different tape measure types to find the one that suits your needs best. When you’ve got your measurements, use marking tools like a pencil or Sharpie for clear visibility, which is essential for maintaining measurement accuracy.
Don’t forget to employ a square to check your right angles and verify even markings around the downspout. If possible, have a helper hold one end of the tape measure to avoid misalignment.
Always recheck your measurements before cutting to confirm everything’s accurate.
Marking Techniques Explained
After you’ve taken the time to measure carefully, the next step is marking your cut line on the downspout. Use a tape measure to determine the desired length and mark it around the entire circumference with a pencil or Sharpie for high visibility.
This marking tools comparison will help you choose the best option for clear visibility. Employ a square to create straight lines, ensuring proper alignment—this alignment strategies overview is vital for a clean cut.
Make sure each mark is clear and visible, as this will guide your cutting process. Double-check your measurements one last time to avoid mistakes, since even slight inaccuracies can lead to improper fitting of the downspout.
Common Measurement Mistakes
How often do you find yourself second-guessing your measurements? It’s easy to fall into measurement pitfalls, especially when cutting downspouts. Common errors like forgetting to account for connection points can lead to cuts that don’t fit.
Always measure from the attachment point to the gutter for accuracy. Use a square to guide your markings; this keeps your angles perpendicular, ensuring clean cuts. Mark the desired cut length all the way around the downspout for a straight line and avoid uneven edges.
Make sure your marks are clear and visible—faint markings can result in miscalculations and wasted materials. By adopting these correction strategies, you’ll enhance your measuring skills and cut like a pro.
Marking Techniques: Getting It Right
Once you’ve nailed down your measurements, it’s time to focus on marking techniques.
Use a pencil or Sharpie to clearly highlight your cutting line, ensuring it’s visible and precise.
Don’t forget to check your marks with a square to keep everything straight and aligned for a perfect cut. Additionally, utilizing user-friendly interfaces in your tools can enhance your overall cutting experience and accuracy.
Accurate Measurement Importance
Accurate measurement is critical when cutting a downspout, and getting it right starts with precise marking techniques. Always measure the desired length of the cut section and mark it around the downspout to guarantee even cuts.
For the best results, use a tape measure laid flat against the surface, avoiding discrepancies. Compare measurement tools to find what works best for you. Clearly mark the cutting line with a pencil or Sharpie for visibility, as this reduces common cutting errors.
When using a square, adjust it to maintain alignment and ascertain your marks are straight. Double-check your measurements and marks before cutting; even small errors can lead to improper fitting and costly adjustments.
Precision cutting techniques will save you time and effort.
Clear Marking Techniques
Getting your measurements right sets the stage for effective marking techniques. Use a tape measure to determine the desired length of your downspout section, ensuring it lies flat for accuracy. Mark all the way around with a pencil or Sharpie to create a clear cutting guideline.
A marking tools comparison reveals that a square can help align your marks, ensuring they’re straight. Adjust the square as needed for the best fit.
Next, score the marked line with a utility knife, positioned gently behind the line, creating a clean groove. With these precision marking techniques, your marks will be distinct and visible, which is essential for achieving an accurate, clean cut.
Follow these effective marking strategies for professional results!
Cutting Techniques: Tools and Methods
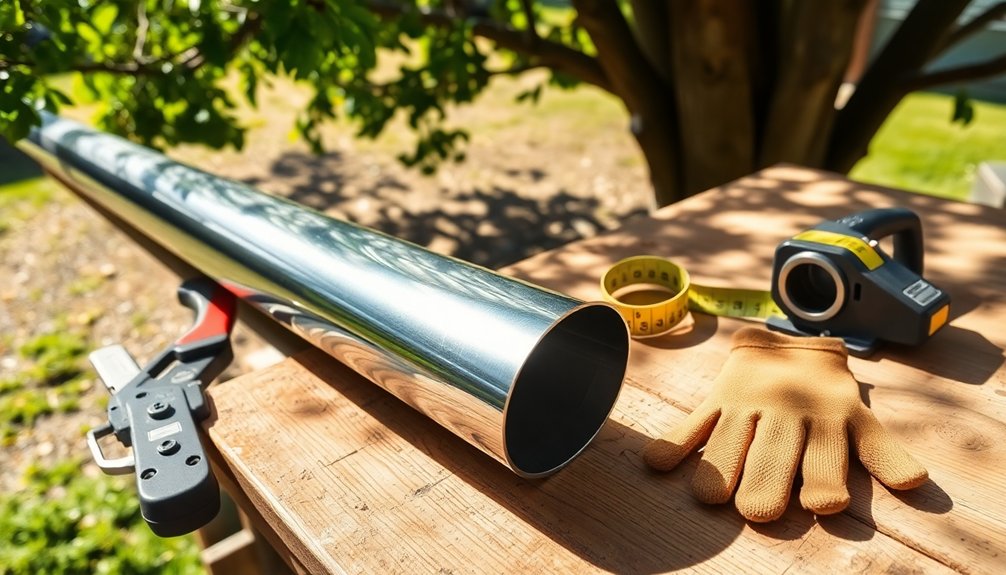
Cutting a downspout like a pro requires the right tools and techniques to guarantee clean, precise results. Start with proper tool selection: use tin snips with red handles for left cuts and green handles for right cuts. Prioritize safety by wearing cut-resistant gloves.
Cutting downspouts effectively demands the right tools and safety precautions for precision and clean results.
Before making any cuts, measure and mark the desired length accurately, using a square for alignment. Score the marked line with a utility knife to create a guide, positioning the knife behind the line and rocking it gently.
Follow the scored line with tin snips, bending down barbs to avoid catching. For adjustments, five blade crimpers help fit sections snugly, ensuring your downspout is correctly oriented for ideal water flow. Additionally, consider utilizing bill tracking apps that can help you manage your finances as you invest in home maintenance.
Don’t forget maintenance tips for your tools!
Finalizing Cuts: Ensuring Clean Edges
To guarantee your downspout installation is safe and effective, focus on finalizing your cuts for clean edges.
After cutting, use red handle tin snips for precise edge finishing that aligns perfectly with your marked line. Check the fit of the cut section against the gutter before making any final adjustments.
If you notice rough edges, don’t hesitate to lightly file them down or use a utility knife to smooth out imperfections. Proper tool selection is essential; using five blade crimpers will help you crimp the downspout section securely, minimizing gaps that could lead to leaks. Additionally, accurate categorization of expenses can streamline your budgeting process, ensuring that you have the resources needed for home improvement projects.
Fitting Adjustments: Making It Snug
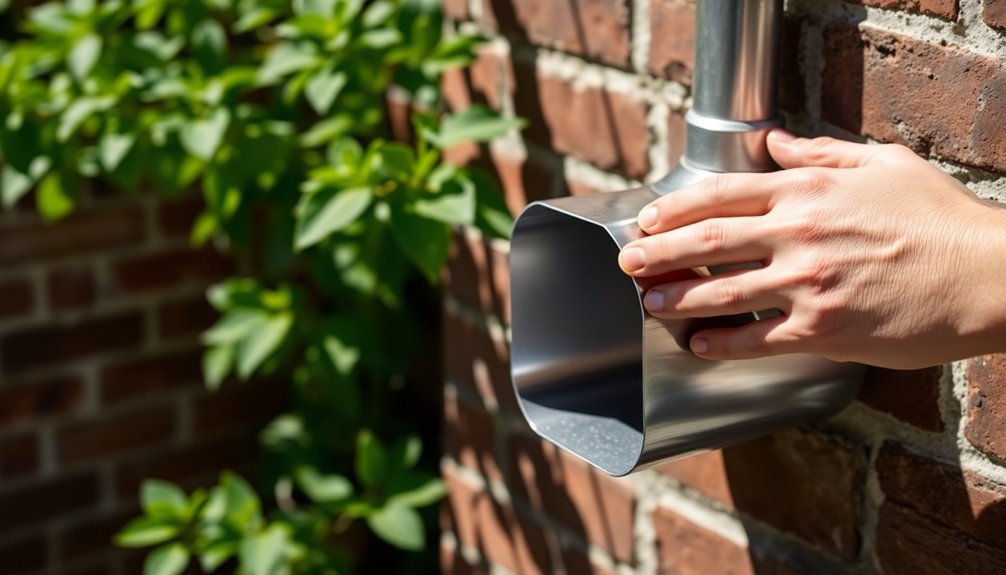
As you work on fitting adjustments, it’s vital to guarantee that each downspout section fits snugly against the gutter or connecting pieces.
Use crimping techniques with five blade crimpers, positioning two blades on the inside and five on the outside. This method reduces the diameter of the downspout section, allowing for that snug fit you need to prevent leaks.
Crimp downspout sections using five blade crimpers for a secure, leak-free fit.
Once you’ve crimped, insert the downspout into the gutter to check for proper downspout alignment. If it’s not secure, make minor adjustments to the crimped area to ensure it holds firmly in place, especially during heavy rain.
A well-fitted downspout not only enhances functionality but also protects your home from water damage. Additionally, consider using sustainable packaging solutions to minimize waste during your home improvement projects.
Installation Tips: Positioning for Proper Flow
When installing a downspout, ensuring proper positioning is essential for effective water flow. You want to avoid water pooling around your foundation, which can lead to damage.
Here are some key tips for ideal downspout angles:
- Angle the downspout away from your home to prevent water pooling.
- Position it to direct water into the gutter system for enhanced drainage efficiency.
- Make sure the downspout’s outlet is at least 3 to 4 feet from the house to manage runoff effectively.
- Adjust the height to match the gutter, ensuring a seamless connection for ideal flow.
Additionally, utilizing price comparison tools can help you find the best deals on downspout materials and accessories, ensuring you save money while making your home maintenance improvements.
Maintaining Your Downspout: Best Practices
Maintaining your downspout is essential for preventing water damage to your home, especially during heavy rainfalls.
Regular downspout maintenance involves inspecting for clogs, leaks, or damage to guarantee effective water flow. Aim for seasonal cleaning at least twice a year, particularly in the fall, to remove debris that could block your downspouts.
Regularly inspect and clean your downspouts to ensure optimal water flow and prevent blockages. Aim for biannual maintenance, especially in fall.
If you encounter stubborn blockages, use a leaf blower or a plumber’s snake to clear them out. Additionally, make certain your downspouts extend 3-4 feet away from your foundation to prevent water pooling.
Installing downspout filters or screens can further minimize debris entry, reducing the frequency of maintenance required. To enhance your maintenance efforts, consider implementing detailed billing statements to ensure all service charges are clear and prevent payment disputes.
Stay proactive, and your downspouts will keep your home safe from water damage.
Conclusion
By mastering downspout cutting, you’re not just saving money; you’re contributing to your home’s efficiency. Did you know that proper drainage can reduce water damage risk by up to 30%? With the right tools and techniques, you’re ensuring that rainwater flows away from your foundation, protecting your investment. So, gear up, measure accurately, and install with care. You’ll not only feel accomplished but also safeguard your home for years to come. Happy DIYing!


