
To install a wall drain for your raised patio, start by evaluating the slope to guarantee it directs water away from your foundation. You’ll need tools like a shovel and level, plus materials like perforated PVC pipe and gravel. Dig a trench, install the drain pipe surrounded by gravel, and cover it with geotextile fabric. Regular maintenance is key to prevent clogs and guarantee functionality. Want to know more about installation tips and maintenance?
Understanding the Importance of Raised Patio Drainage
When it comes to raised patios, understanding proper drainage is vital to avoid serious issues down the line. A well-designed drainage system prevents water pooling, which can cause foundation damage and costly repairs due to soil saturation and hydrostatic pressure.
You’ll want to guarantee the installation includes a slope away from the foundation to direct water runoff effectively. Incorporating elements like wall drains and weep holes, along with gravel backfill and filter fabric, enhances water flow and protects the foundation from damage. Additionally, proper insulation around ducts can help maintain a stable temperature in your home, reducing the risk of foundation issues related to temperature fluctuations.
Regular maintenance of your drainage systems is important, as keeping them clear of debris guarantees they function properly. This proactive approach not only maintains your patio’s stability but also safeguards your home’s structural integrity for years to come.
Key Signs That Your Patio Needs a Wall Drain
How can you tell if your patio needs a wall drain? If you see water pooling on your patio after a heavy rain, that’s a clear sign of inadequate drainage.
Cracks or settling in the surface indicate that water isn’t being directed away properly, suggesting a wall drain could be beneficial. A musty odor or mold growth points to excessive moisture, highlighting the need for effective drainage solutions like a wall drain.
Cracks, settling, musty odors, and mold indicate poor drainage—consider a wall drain for effective moisture control.
Additionally, if you notice soil erosion or washout around the patio perimeter, it’s time to contemplate installing a wall drain.
Regularly check for water stains or discoloration on adjacent walls; these can signal drainage issues that require immediate attention.
Moreover, improper drainage can lead to moisture intrusion, which may also compromise the integrity of surrounding insulation materials, such as foam board insulation.
Don’t wait until it’s too late!
Assessing Your Patio’s Slope for Effective Drainage
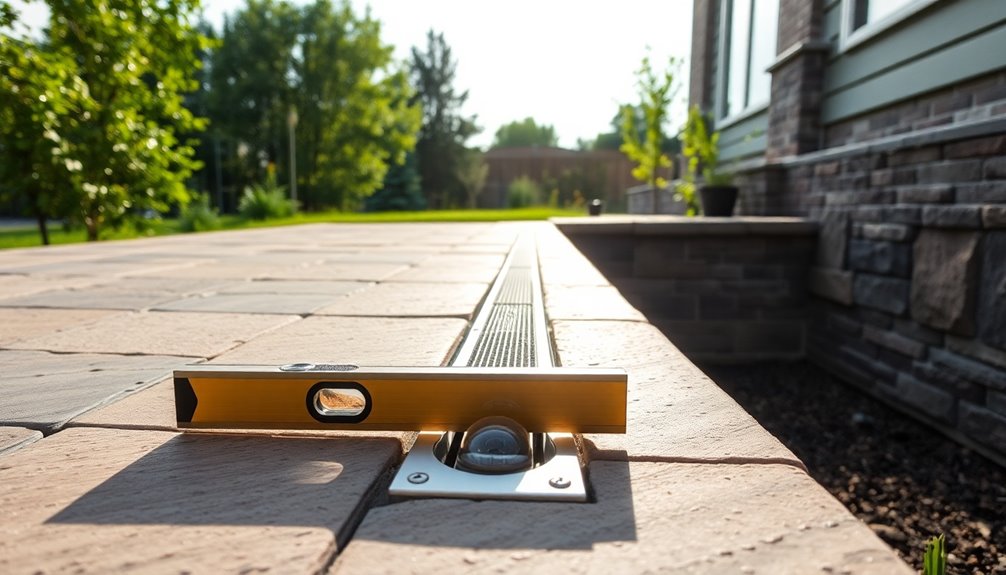
After identifying the signs that your patio needs a wall drain, it’s time to evaluate the slope of your patio for effective drainage. Ideally, your patio should have a minimum slope of 1-2% away from the house to facilitate proper water runoff and prevent pooling.
Use a level or a string line to check for a consistent slope across the surface, ensuring water drains towards designated areas. Incorporating this slight slope helps direct water flow to channel drains, minimizing risks near your foundation.
After rain, regularly inspect your patio for pooling, as this indicates insufficient slope. Additionally, be mindful of seasonal temperature fluctuations that can affect drainage patterns in your area. Finally, consider your landscape’s overall features to make sure the slope doesn’t redirect water to unwanted areas, preventing erosion or flooding.
Materials Needed for Installing a Wall Drain
When you’re ready to install a wall drain, you’ll need some essential tools and materials. Focus on selecting the right pipe types and drainage fabric options to guarantee your system works effectively. Having everything on hand will make the installation process smoother and more efficient. Additionally, consider using a moisture barrier to prevent water damage to your foundation during the installation.
Essential Tools Required
To successfully install a wall drain, you’ll need a few essential tools to guarantee the process goes smoothly.
Having the right tools will help you create an effective drainage system that protects your patio and foundation. Here’s what you’ll need:
- Shovel – For excavation and creating a trench.
- Level – To make certain proper slope for water flow.
- Tape Measure – For accurate measurements of the trench and pipe.
- Rubber Mallet – To securely set drainage components without damage.
Additionally, don’t forget to have geotextile fabric and gravel on hand for maximum drainage efficiency.
With these tools, you’ll be well-equipped to tackle your wall drain installation.
Recommended Pipe Types
With the right tools in hand, choosing the appropriate pipe materials is the next step in installing a wall drain for your raised patio.
Start with perforated PVC pipe to guarantee effective subsurface drainage, allowing water to flow freely away from your foundation. You’ll also need solid PVC pipe to transport the water from the perforated pipe to the designated drainage area, guaranteeing efficient moisture removal.
Flexible corrugated drain pipes are another option, especially if your landscape has various contours.
Remember to install the drainage pipe at a slope of at least 1% to promote gravitational flow and prevent pooling.
Although not yet discussed, incorporating geotextile fabric around the drainage pipe can help maintain ideal drainage performance over time.
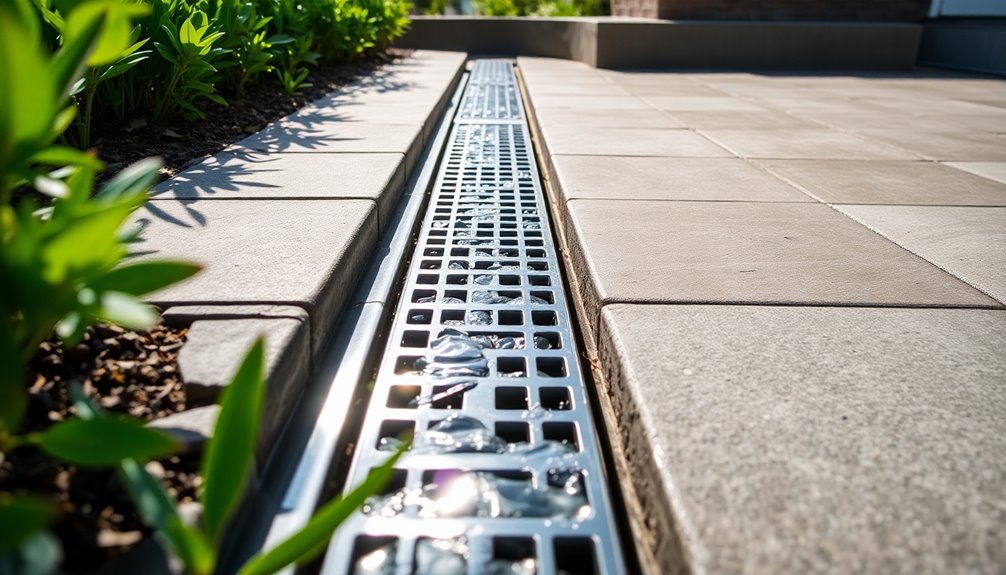
Drainage Fabric Options
Selecting the right drainage fabric is essential for guaranteeing your wall drain functions effectively. Here are some key drainage fabric options to take into account:
- Nonwoven Geotextile Fabric: Recommended for its ability to prevent soil migration into gravel backfill.
- High Permeability Fabrics: Choose options that allow water flow while blocking fine particles that could clog the system.
- Durable Materials: Look for fabrics that can withstand freezing and thawing cycles to avoid degradation over time.
- Full Coverage: Make sure the fabric covers the entire area where gravel backfill is placed, promoting consistent drainage and reducing water buildup behind the wall.
Step-by-Step Guide to Digging a Trench
When you’re ready to dig a trench for your raised patio’s drainage system, it’s important to first outline the path clearly, guaranteeing it slopes away from your foundation at a minimum gradient of 0.5%.
Use a trenching shovel or mini-excavator to dig a trench that’s 12-16 inches deep and 12 inches wide, depending on your drainage pipe size and soil conditions. As you dig, remove any large rocks or debris to prevent clogs and guarantee smooth water flow.
Once your trench is ready, install a perforated drain pipe at the bottom, surrounding it with 3/4 inch clear or 1 inch crushed rock for enhanced drainage. Regular monitoring of your drainage system can help in identifying any potential water usage spikes that may indicate blockages or inefficiencies.
Finally, cover the trench with nonwoven geotextile fabric to protect against soil infiltration.
How to Properly Place a Perforated Pipe
To guarantee effective drainage for your raised patio, place the perforated pipe at the lowest point of the area.
Follow these key steps to secure proper installation:
- Dig a trench that’s at least 12-16 inches deep, sloping away from the patio.
- Surround the perforated pipe with at least 12 inches of gravel backfill to enhance drainage efficiency.
- Install filter fabric around the gravel and perforated pipe to prevent soil migration, securing longevity.
- Regularly check and maintain the perforated pipe to keep it clear of debris, as clogged pipes can lead to water pooling and potential foundation damage. Additionally, ensuring proper moisture management in your patio area will help prevent structural issues related to excess water accumulation.
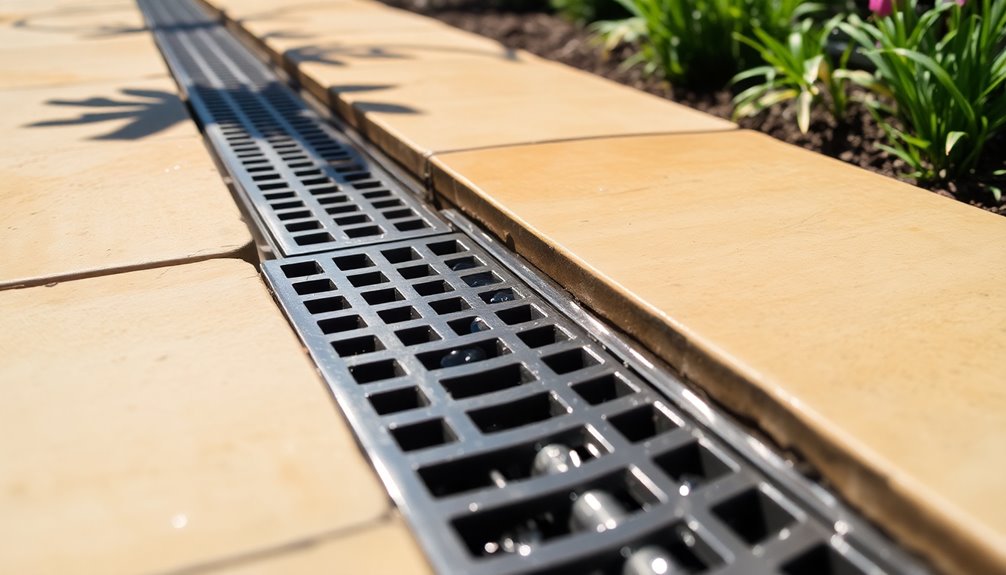
The Role of Gravel in Enhancing Drainage
When it comes to enhancing drainage, selecting the right type of gravel is essential. You’ll want to focus on proper installation techniques to create a stable and effective drainage layer. Additionally, incorporating proper insulation techniques can further improve the overall drainage effectiveness and prevent water accumulation.
Gravel Type Selection
Choosing the right type of gravel is crucial for enhancing drainage around your raised patio. The right gravel backfill guarantees water flows freely, preventing soil retention and protecting your structure.
Here’s what to take into account:
- Size: Use 3/4 inch clear or 1 inch crushed rock for ideal drainage.
- Compaction: Compact the gravel backfill to reduce hydrostatic pressure against walls, maintaining structural integrity.
- Depth: Verify at least 12 inches of gravel backfill is used for effective moisture management.
- Layers: Add gravel in 4-inch lifts and compact each layer to achieve ideal density and efficiency.
Don’t forget to use nonwoven geotextile fabric to prevent soil migration and keep your drainage system functioning effectively.
Proper Gravel Installation
After selecting the right gravel type, proper installation plays an essential role in maximizing its drainage capabilities.
You should place a minimum of 12 inches of gravel behind retaining walls to guarantee effective drainage and reduce hydrostatic pressure. Add the gravel in 4-inch lifts and compact it as you go to create a stable drainage layer that promotes water movement away from your foundation.
To prevent soil migration and clogging, lay nonwoven geotextile fabric over the compacted gravel.
Finally, maintain a slight slope—at least half a percent—away from the wall to facilitate proper drainage and prevent water pooling.
Using Geotextile Fabric to Prevent Soil Infiltration
To guarantee effective drainage around your raised patio and retaining walls, using geotextile fabric is essential. This durable barrier prevents soil migration into gravel backfill, ensuring your drainage system works efficiently.
Using geotextile fabric is crucial for effective drainage around raised patios and retaining walls, preventing soil from clogging gravel backfill.
Here’s how to incorporate geotextile fabric into your project:
- Choose nonwoven geotextile fabric for its durability.
- Cover compacted gravel with the fabric, ensuring it’s fully wrapped around the wall.
- Separate soil from drainage materials to maintain consistent drainage flow.
- Mitigate hydrostatic pressure buildup behind retaining walls, reducing potential damage.
- Additionally, monitor humidity levels to ensure that drainage systems function effectively and prevent moisture issues in surrounding areas.
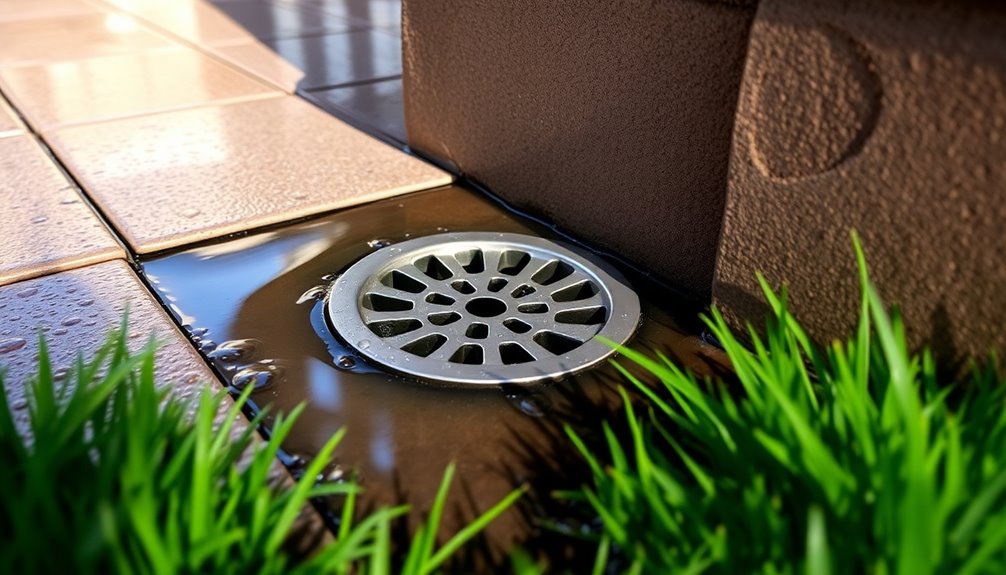
Installing Weep Holes for Additional Moisture Relief
Installing weep holes is essential for managing moisture in your raised patio area.
By placing them every 4 to 6 feet, you can effectively reduce hydrostatic pressure and prevent potential damage. Regular maintenance of air filters can lead to significant savings in HVAC efficiency.
Let’s explore the placement guidelines and the benefits these openings offer for long-term drainage success.
Weep Hole Placement Guidelines
When you’re looking to relieve hydrostatic pressure behind a retaining wall, proper weep hole placement is crucial.
Follow these guidelines for effective drainage:
- Intervals: Place weep holes every 4 to 6 feet along the wall to let trapped water escape.
- Size: Use holes ranging from 1 to 2 inches in diameter, depending on the wall height and soil conditions—larger holes improve drainage capacity.
- Elevation: Position weep holes at least 6 inches above the base to avoid clogging from sediment.
- Alignment: Make sure weep holes align with your drainage system, such as perforated pipes, for ideal water flow.
Benefits of Weep Holes
While you may not think about it often, weep holes play an essential role in maintaining the integrity of retaining walls by preventing water buildup.
These openings allow accumulated underground water to escape, reducing hydrostatic pressure that could lead to wall failure. By incorporating weep holes at strategic intervals, you can maintain balanced moisture levels, which minimizes the risk of soil erosion and structural issues behind the wall.
The size and spacing of weep holes should be tailored to your wall’s height and site conditions; more holes generally improve drainage efficiency.
If you have existing walls, you can retrofit weep holes using a core drill, ensuring effective drainage when paired with filter fabric to prevent clogging.
Common Mistakes to Avoid When Installing a Wall Drain
Proper wall drain installation is essential to prevent water damage, so it’s important to avoid common mistakes that can undermine your efforts.
Here are four key errors to watch out for when setting up retaining wall drainage:
- Improper Slope: Failing to create a proper slope away from the wall leads to water pooling and increased hydrostatic pressure.
- Neglecting Filter Fabric: Skipping this step can cause soil and debris to clog the drainage system, risking wall failure.
- Overlooking Weep Hole Spacing: Inadequate sizing may prevent effective water escape, building pressure behind the wall.
- Inadequate Gravel Backfill: Confirm at least 12 inches of compacted gravel for proper moisture management.
Additionally, proper drainage can help mitigate the impact of water damage on your foundation, ensuring long-term structural integrity.
Avoid these pitfalls to guarantee a successful wall drain installation.
How to Maintain Your Wall Drain System Over Time
After successfully installing your wall drain system and avoiding common pitfalls, maintaining it over time is key to ensuring long-lasting performance.
Regularly inspect your wall drain for clogs, debris buildup, or any signs of damage. This helps prevent water to seep into unwanted areas.
Clean the perforated pipes and weep holes at least once a year to keep drainage effective and avoid soil migration.
Make sure the surrounding landscape slopes away from the wall drain to facilitate proper water runoff and reduce pooling near the foundation.
Replace any damaged filter fabric to maintain drainage efficiency.
Finally, monitor your system’s performance after heavy rainfall to catch potential issues early, saving you from costly foundation repairs later.
Signs of Drainage Issues After Installation
Recognizing the signs of drainage issues early can save you from costly repairs down the line. Here are four key indicators to watch for after installing your raised patio:
- Water pooling around the patio area, signaling inadequate slope or drainage systems.
- Cracks in the patio surface or walls, which may indicate excess moisture retention and hydrostatic pressure.
- Soil erosion near the foundation or retaining walls, a sign of improper water management that can threaten structural stability.
- Unpleasant odors or mold growth in adjacent areas, often pointing to stagnant water or drainage failures.
Regularly inspecting weep holes and drainage pipes is also essential to prevent blockages that can lead to further issues.
When to Call a Professional for Help With Drainage?
When you’re faced with persistent drainage issues or signs of water damage around your raised patio, it’s time to contemplate calling in a professional.
If you’re unsure about the drainage requirements due to complex site conditions, a drainage expert can prevent costly mistakes. They assess the slope and soil type, ensuring your drainage system efficiently directs water away from your foundation.
Hiring a contractor is especially beneficial when planning the installation of weep holes and perforated drainage pipes, which help avoid hydrostatic pressure build-up behind retaining walls.
If you notice mold or structural cracks, a professional can diagnose the problem and recommend effective remediation strategies, ultimately saving you time and money by ensuring everything is designed and installed correctly from the start.
Conclusion
By taking the time to install a wall drain, you’re not just protecting your foundation; you’re safeguarding your home from the relentless tide of water damage. Remember, a well-drained patio is like a sturdy umbrella in a storm—it keeps your space safe and sound. Stay vigilant for signs of drainage issues, and don’t hesitate to call in a professional if needed. With proper care and maintenance, your wall drain can be a steadfast guardian against costly repairs.


Average Rating