
Restoring your century-old home with horsehair plaster and 1920s trim can be both budget-friendly and rewarding. Start by evaluating your walls and ceilings, focusing on patching rather than removing materials. Learn DIY techniques to repair plaster and source reclaimed wood for trim. Incorporate modern updates while preserving the home’s vintage charm. Prioritize safety, especially when handling any hazardous materials. Embracing this journey will deepen your emotional connection to the home’s rich history and character—there’s more to explore!
The Allure of Vintage Aesthetics in Home Restoration

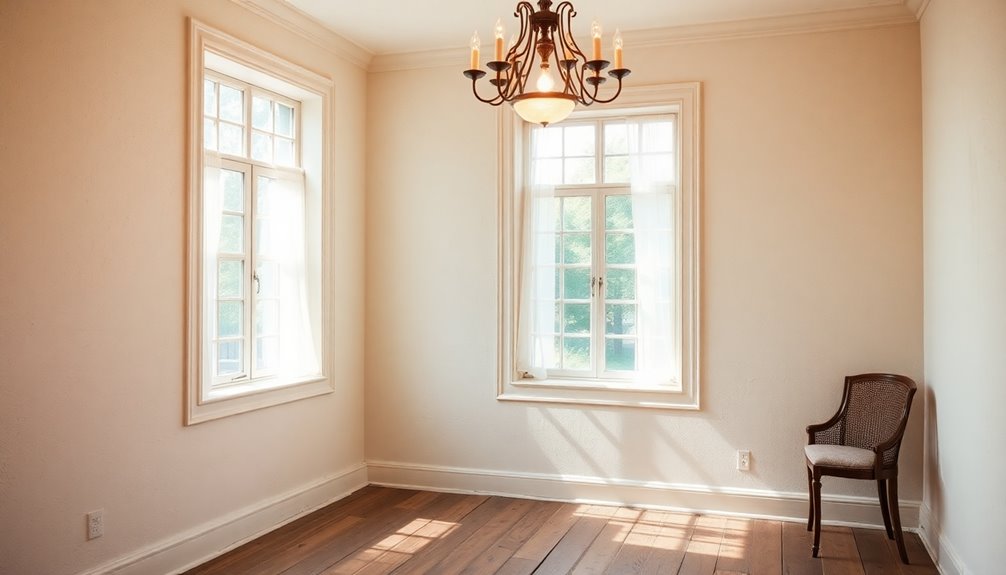
When you step into a century-old home, the allure of its vintage aesthetics immediately captivates you, drawing you into a world where original features like horsehair plaster and classic wood trim tell stories of the past.
Restoring older homes can be budget-friendly when you focus on preserving those unique materials. By retaining original plaster walls and trim, you avoid the high costs of modern replacements.
Homeowners cherish the historical significance of these vintage aesthetics, as they offer authenticity that new constructions often lack. Utilizing period-appropriate finishes, like lime-based plaster, enhances the vintage appeal while maintaining architectural integrity.
Engaging in DIY projects not only saves money but also connects you personally to the craftsmanship and history embedded in your home. Additionally, embracing frugal habits like thrift shopping for restoration materials can lead to significant savings and a more sustainable approach to home improvement.
Understanding Horsehair Plaster: A Historical Perspective

When restoring your century home, understanding horsehair plaster is essential. This traditional material not only adds historical charm but also offers benefits like durability and energy efficiency. Let’s explore its origins, advantages, and common repair techniques to keep your home’s character intact. Additionally, ensuring proper moisture barriers during restoration can prevent moisture-related issues that may compromise the integrity of your home’s structure.
Origin of Horsehair Plaster
Horsehair plaster, a unique building material, emerged in the 19th century and gained popularity through the mid-20th century. This innovative mix of plaster and horsehair provided homes with strength and flexibility, making it especially favored in the 1920s.
As you look to restore your century home, you’ll appreciate its durability and resistance to cracking, which allows it to endure the natural settling of older structures.
Historically, horsehair plaster was applied in multiple coats, enhancing its textured finish and showcasing the craftsmanship of the time.
Many homes from the 1920s still feature this distinctive element, reflecting the vintage aesthetic that adds character and value to your restoration project.
Benefits of Plaster Walls
Restoring a century home often means appreciating the unique benefits of plaster walls, particularly horsehair plaster. This material, used in early 20th-century homes, offers remarkable durability and breathability, which helps manage moisture better than modern drywall.
The incorporation of horsehair enhances its strength and creates a distinctive texture that appeals to many vintage homeowners. By choosing horsehair plaster for your restoration, you preserve the historical integrity of your home, reflecting the craftsmanship of its era.
Additionally, maintaining these walls is often more cost-effective than modern materials, as they require less frequent repairs and replacements. Plus, horsehair plaster is environmentally friendly, contributing to sustainable practices in your home’s restoration.
Common Repair Techniques
Understanding the common repair techniques for horsehair plaster can make a significant difference in maintaining the historical charm of your century home.
To repair cracks, use a compatible plaster mix and consider a bonding agent for better adhesion. For larger holes or signs of delamination, you might need a different approach, so assess the plaster’s condition first.
When you apply a veneer plaster finish, it’ll give you a smooth surface while preserving breathability, allowing moisture to escape and protecting the integrity of your walls.
Essential tools like trowels, hawks, and plastering floats will help you achieve quality repairs.
Don’t forget to wear safety gear to guard against dust and debris during this restoration process.
Why Preserve 1920s Trim in Your Renovation?

While you might be tempted to replace outdated features during your renovation, preserving the 1920s trim can greatly enhance your home’s historical integrity.
The original trim showcases unique craftsmanship and design details that are hard to replicate, making it a valuable aspect of your home’s aesthetic. By retaining vintage trim, you not only honor the architectural style, but you also increase your property’s market value, as many buyers appreciate authenticity and craftsmanship in older homes.
Additionally, the restoration of trim is often budget-friendly compared to full replacements, allowing you to allocate resources to other projects. Embracing the original trim through careful preservation creates a cohesive look that celebrates your home’s history while ensuring it remains durable for years to come. Moreover, preserving historical elements can help you avoid more expensive fixes that might arise from neglecting foundational issues in the home.
Assessing the Condition of Your Walls and Ceilings
Evaluating the condition of your walls and ceilings is essential for a successful renovation of your century home.
Start by reviewing for typical signs of wear like cracks, delamination, and especially water damage, particularly around chimneys. If you’ve got horsehair plaster, take extra care; it has unique vulnerabilities compared to modern drywall.
Look for any potential hazards, like asbestos, which may require professional removal. Before diving into repairs, check the existing lath structure to see if it needs re-nailing or replacement with metal lath for better support. Additionally, be cautious of using materials like tempered glass lids in your home renovation, as they can pose risks if not handled properly.
A thorough evaluation will help you determine the best repair method—whether patching plaster, covering with drywall, or fully replacing the plaster system. This careful review sets the stage for a durable restoration.
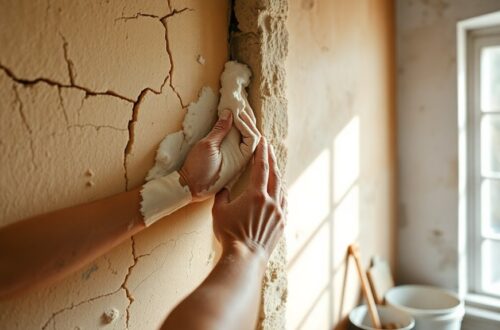
DIY Techniques for Repairing Horsehair Plaster
After you’ve assessed the condition of your walls and ceilings, it’s time to tackle the repairs, especially if you have horsehair plaster.
Start by cleaning and patching cracks with a gypsum-based plaster that matches your wall’s texture. To enhance adhesion when applying new plaster, use a bonding agent like Plaster Weld.
Clean and patch cracks with gypsum-based plaster, using a bonding agent like Plaster Weld for better adhesion.
For larger holes, reinforce the area with metal lath or re-nail existing wood lath, ensuring stable support.
When applying new plaster, work in small sections and maintain consistent pressure to avoid seams and promote an even finish.
If you’re unsure, practice your plastering techniques on less visible areas or a garden shed first to build your confidence before addressing more prominent spaces in your home. Additionally, investing in basic tools can empower you to handle various repairs independently and save money in the long run.
Choosing the Right Materials for Plaster Restoration
When restoring horsehair plaster, selecting the right materials is essential for achieving a lasting and seamless finish.
Using high-quality products will guarantee durability and compatibility with your existing structure.
Consider these key components for your plaster restoration:
- USG RedTop Plaster or GoldBond Two Way Hardwall for strength
- Gypsum plaster for the first coat, providing a solid foundation
- Proper bonding agents like Plaster Weld or Weld Crete to enhance adhesion
- Topcoats that match original composition, possibly wood fiber or lime-based
- Metal lath (20ga woven wire or 2.5 diamond mesh) for areas lacking lath support
Additionally, regular maintenance of indoor air quality through effective filtration can significantly contribute to the longevity of your restoration efforts, as indoor air pollutants can exceed outdoor levels.
Budget-Friendly Options for Plaster and Trim Upgrades
Restoring your century home can be done without breaking the bank, especially when it comes to plaster and trim upgrades.
Consider using gypsum plaster for repairs; it’s often more affordable and adheres well to existing horsehair plaster. Check local supply houses for budget-friendly options like USG RedTop Plaster or GoldBond Two Way Hardwall.
Instead of removing old plaster, make sure to prioritize patching and repairs to save on costs. You can also learn plastering techniques through DIY videos, allowing you to tackle repairs yourself.
When it comes to trim, look for reclaimed or salvaged wood to maintain your home’s historical charm while keeping expenses low. Implementing money-saving strategies like these can help enhance your restoration project while staying within budget.
Tools You’ll Need for Successful Plastering
Successful plastering hinges on having the right tools at your fingertips. To guarantee a smooth and effective process, gather the following essentials:
Successful plastering relies on having essential tools ready for a smooth and effective project.
- Hawk: Holds plaster for easy application.
- Trowel: Applies and smooths the plaster onto surfaces.
- Plastering Float: Finishes the surface for a professional look.
- Mixing Paddle: Attaches to a drill for a consistent plaster mix.
- Chisels and Scrapers: Prepares and repairs existing plaster surfaces.
Don’t forget your safety gear! Dust masks, goggles, and gloves protect you from dust and debris while you work. Regular inspections can catch potential issues early, ensuring your plastering project remains on budget and on track.
With these tools and safety measures in place, you’ll be ready to tackle any plastering project in your century home. Happy restoring!
Tips for Maintaining the Character of Your Home
To maintain the character of your century home, focus on preserving its original features, like horsehair plaster and 1920s trim, which add historical charm.
Prioritize careful patching and repair of existing plaster instead of complete removal to keep the authentic texture intact.
When it comes to materials, use lime-based plasters to maintain compatibility with your home’s original construction, guaranteeing breathability.
Consulting local restoration experts or historic preservation societies can offer valuable advice on best practices and materials that align with your home’s era.
While you may want to integrate modern upgrades, like contemporary lighting, make certain these enhancements don’t overshadow the beauty of your original features, creating a harmonious blend of old and new. Additionally, regular inspections for moisture damage can help prevent severe deterioration of your home’s structure.
Integrating Modern Upgrades With Vintage Features
Here are some ideas to reflect upon:
- Install energy-efficient windows that complement your vintage aesthetic.
- Use veneer plaster over horsehair plaster for durability and a smooth finish.
- Update electrical systems while retaining architectural details like crown molding.
- Source period-appropriate fixtures that honor the home’s history.
- Embrace DIY restoration techniques for budget-friendly upgrades.
- Consider utilizing expense tracking apps to manage restoration costs effectively and keep your budget on track.
Safety First: Handling Asbestos and Other Hazards
When renovating your century home, identifying asbestos materials safely is key to protecting your health.
Make certain you wear proper personal protective equipment, like respirators and gloves, to minimize exposure.
Also, follow strict disposal and cleanup procedures to guarantee everything is handled correctly and safely.
Identifying Asbestos Materials Safely
Identifying asbestos materials safely is essential for homeowners tackling renovations in older homes, particularly those built before the 1980s.
Asbestos was widely used in materials like plaster and ceiling tiles, posing potential health risks. To guarantee your safety, follow these guidelines:
- Avoid disturbing suspected asbestos-containing materials.
- Consult with a licensed professional for proper inspection and testing.
- Familiarize yourself with safety guidelines from the EPA and OSHA.
- If asbestos is suspected, wear appropriate personal protective equipment.
- Follow local regulations for safe disposal of asbestos materials.
Proper Personal Protective Equipment
Handling materials in older homes requires a strong focus on safety, especially when there’s a chance of encountering asbestos. To protect yourself during your restoration project, always wear proper personal protective equipment (PPE). This includes a high-quality respirator to filter out harmful particles, gloves to prevent skin exposure, and goggles to shield your eyes from dust and debris.
Asbestos, often found in homes built before the 1980s, can lead to severe health issues, so it’s essential to approach suspected materials with caution. Before beginning any work, have a certified professional conduct an asbestos inspection.
Make sure your workspace is well-ventilated and consider using a HEPA filter air purifier to further reduce airborne hazards. Prioritize safety to create a successful restoration experience.
Disposal and Cleanup Procedures
Before you engage in cleanup and disposal after handling materials that may contain asbestos, it’s crucial to understand the proper procedures to protect yourself and the environment.
Always start with an asbestos inspection to identify hazardous materials.
Follow these guidelines for safe disposal and cleanup:
- Wear appropriate personal protective equipment (PPE) like respirators and gloves.
- Use HEPA vacuum cleaners to maintain a clean work area.
- Dispose of asbestos-containing materials according to local regulations.
- Seal materials in clearly labeled, leak-proof bags.
- Consider hiring a licensed professional for extensive asbestos removal.
Learning From Community Experiences in Restoration
While maneuvering through the complexities of restoring a century home, you’ll find that engaging with community experiences can be a game-changer.
Homeowners who’ve tackled similar projects share invaluable insights into repairing original plaster, helping you make informed decisions. By discussing cost estimates and labor experiences, you can weigh the pros and cons of plaster versus drywall.
Many recommend starting small—practicing plaster techniques on garden sheds can build your confidence before you plunge into larger areas.
Also, tapping into local suppliers suggested by fellow restorers guarantees you get quality materials tailored for your vintage home.
Collaborating with others can lead you to innovative solutions and cost-effective methods that preserve your home’s historical features beautifully.
The Emotional Rewards of Restoring a Historic Home
Restoring a historic home brings a profound sense of connection and nostalgia, transforming not just the physical space but also the emotional landscape of those who dwell within.
As you invest time and effort, you’ll likely experience:
- A deep emotional connection to the home’s unique character
- The pride of revitalizing original features like horsehair plaster
- A sense of accomplishment when restoring deteriorated elements
- Strengthened family bonds through collaborative projects
- The joy of creating new memories in a lovingly restored environment
Each step in the restoration process enhances your relationship with the home, allowing you to honor its history while crafting a space that reflects your family’s story.
Embrace the journey; the emotional rewards are worth it.
Conclusion
Restoring a century-old home on a budget isn’t just about preserving its charm; it’s about reviving history and creating a space that tells your unique story. By embracing horsehair plaster and 1920s trim, you’re not only enhancing your home’s value but also keeping its soul alive. Isn’t it rewarding to breathe new life into a piece of history? With the right techniques and a little creativity, you can transform your vintage aesthetic into a comfortable, modern haven.


Average Rating