
Yes, you can install a vapor barrier made of plastic over a dirt floor crawl space. This barrier effectively blocks moisture from seeping in, protecting your home from mold and wood rot. Make sure to use thick polyethylene sheeting, extending it up the walls, and sealing any seams for airtightness. Additionally, regular inspections and maintenance are essential for long-term performance. If you’re curious about the installation process and other important details, there’s more to discover.
What Is a Crawl Space Vapor Barrier and Why Do You Need One?
A crawl space vapor barrier is an essential defense against moisture that can wreak havoc on your home. This thick plastic liner, usually made of polyethylene, blocks moisture from the ground, helping you prevent moisture from seeping into your crawl space.
By installing a crawl space vapor barrier, you can greatly reduce the risk of mold and mildew growth, protecting your family’s health and improving indoor air quality. Additionally, it safeguards your home’s structural integrity by preventing wood rot and insulation damage caused by moisture intrusion. Proper installation is crucial for effective moisture control, requiring the barrier to extend up the walls with overlapped, sealed seams. With this simple measure, you can also lower energy costs and maintain a stable indoor temperature. Furthermore, adopting frugal living strategies can help you make informed decisions about home maintenance, ensuring that you protect your investment effectively.
How Does a Vapor Barrier Work in a Dirt Floor Crawl Space?
How does a vapor barrier function in a dirt floor crawl space? A vapor barrier installation is vital for blocking moisture that seeps from the soil into the air.
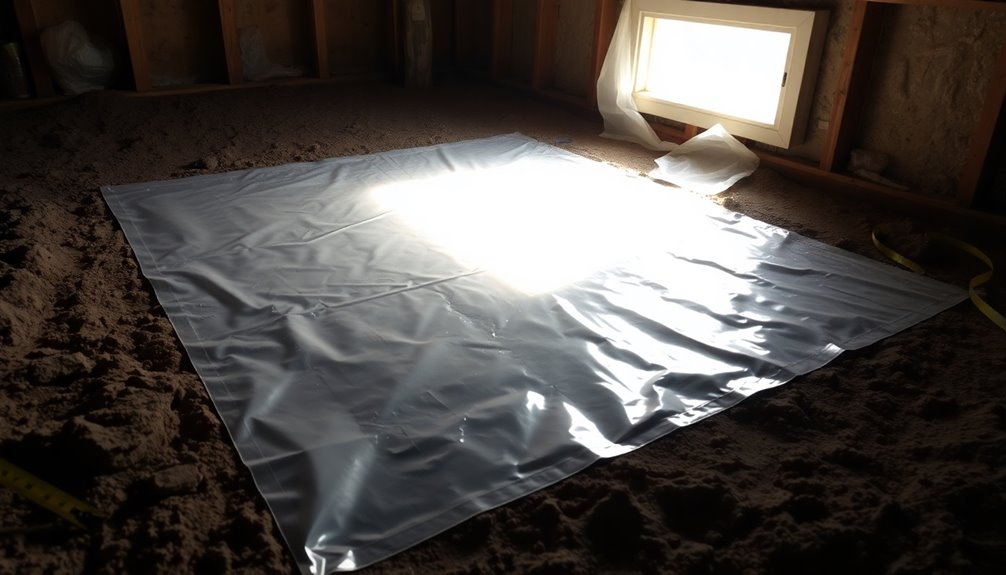
Made from thick polyethylene sheeting, this barrier effectively prevents moisture problems like mold and wood rot. To install it properly, lay the vapor barrier on the dirt floor, extending it up the walls by at least 6 inches.
Confirm seams overlap by 12 inches and seal them with tape for airtightness. By interrupting the natural path of vapor migration, the barrier enhances the overall dryness of your crawl space, improving air quality and energy efficiency. Additionally, ensuring proper insulation techniques can further protect your pipes from freezing in cold temperatures.
Signs Your Crawl Space Needs a Vapor Barrier
If you notice musty odors wafting through your living area, it’s a clear sign your crawl space might need a vapor barrier.
Visible mold or mildew in the crawl space indicates persistent moisture issues, making a vapor barrier essential to prevent mold growth.
Additionally, if you’re experiencing unusually high energy bills, it may be due to crawl space problems linked to poor insulation and damp conditions.
Pests like rodents or insects often thrive in humid environments, so a vapor barrier can help create an inhospitable space for these infestations.
Finally, if you see signs of structural damage, such as wood rot or rusted metal, it reinforces the urgent need for a vapor barrier to safeguard your home’s integrity. Incorporating a vapor barrier not only mitigates moisture but also supports a healthier living environment by reducing exposure to harmful chemicals.
Step-by-Step Guide to Installing a Vapor Barrier
Before diving into the installation process, it’s essential to gather all necessary materials and prepare your crawl space. Start by measuring the crawl space floor area to determine how much 20-mil polyethylene plastic sheeting you’ll need, accounting for overlaps and obstacles.
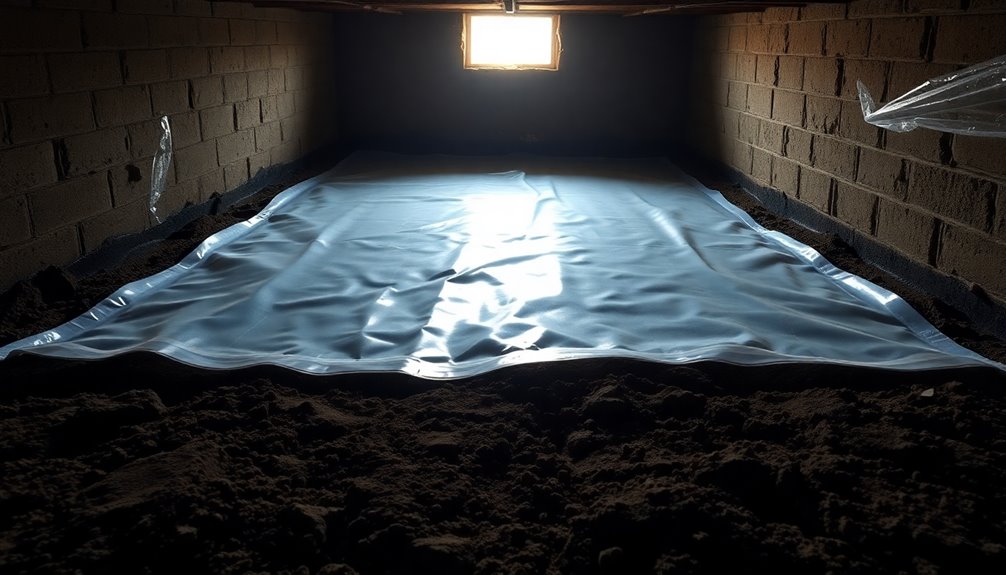
Clear the dirt floor of any debris and rocks to create a smooth surface. Next, position the vapor barrier sheet over the dirt, extending it up the walls by at least 6 inches.
Clear away any debris from the dirt floor and lay the vapor barrier sheet, extending it up the walls by at least 6 inches.
Overlap seams by 12 inches and secure them with tape, as recommended by the U.S. Department of Energy, to prevent moisture ingress. Additionally, ensuring a proper vapor barrier installation helps protect against moisture intrusion and mold growth in the crawl space.
Finally, regularly inspect the installed vapor barrier for any signs of damage or wear to maintain its effectiveness and longevity.
Choosing the Right Material for Your Vapor Barrier
Selecting the right material for your vapor barrier is essential for effective moisture control in your crawl space.
Polyethylene is the most common choice due to its excellent moisture resistance, with thicknesses typically ranging from 6 to 20 mils.
If you’re in a high-traffic area, consider reinforced polyethylene, which has an added mesh layer for enhanced strength and puncture resistance.
For superior durability and tear strength, cross-laminated polyethylene is ideal for crawl spaces compared to standard options.
Always verify your chosen vapor barrier complies with local building codes to avoid issues later on.
Additionally, check product warranties, as they can range from 10 years to lifetime coverage, reflecting the manufacturer’s confidence in their moisture resistance. Furthermore, maintaining a clean air environment can contribute to overall health and comfort in your home.
How Thick Should Your Vapor Barrier Be?
When choosing a vapor barrier, thickness plays a significant role in its effectiveness.
You’ll typically want at least a 6 mil barrier, but options like 10 mil and 20 mil offer better durability and moisture resistance. It’s important to take into account both your local building codes and your specific moisture conditions when making your selection. Additionally, using a vapor barrier can simplify the expense management process for homeowners by preventing costly damage from moisture-related issues.
Thickness Options Available
Choosing the right thickness for your vapor barrier is essential, as it directly impacts its effectiveness in preventing moisture intrusion.
You’ll want to take into account the following options:
- 6 mil: Basic protection, suitable for low-moisture areas.
- 10 mil: A minimum recommendation for crawl space moisture barriers, offering decent durability.
- 20 mil: Ideal for high-moisture environments, providing superior tear strength and puncture resistance.
Opting for thick plastic barriers, like 20 mil cross-laminated polyethylene, guarantees greater durability against moisture in your crawl space.
Always evaluate your local climate and soil moisture levels to select the best thickness for your needs. A well-chosen vapor barrier helps maintain a dry and healthy crawl space.
Recommended Mil Specifications
For ideal moisture protection, your vapor barrier should ideally be at least 6 mil thick, especially in dirt floor crawl spaces. This thickness offers adequate moisture resistance and durability.
However, if you want superior protection, consider options like 10 or 20 mil. The U.S. Department of Energy even recommends a minimum of 20 mil polyethylene for crawl space applications, ensuring long-lasting effectiveness against moisture infiltration.
Cross-laminated polyethylene stands out as the best choice for durability and tear strength among vapor barrier materials. Choosing the right thickness is essential; thicker barriers generally perform better in preventing moisture issues, keeping your crawl space dry and protected.
Always prioritize the recommended mil specifications for best results.
Common Mistakes to Avoid When Installing a Vapor Barrier
Installing a vapor barrier might seem straightforward, but several common mistakes can compromise its effectiveness.
Installing a vapor barrier may appear simple, yet several frequent errors can diminish its effectiveness.
To guarantee your crawl space remains moisture-free, avoid these pitfalls:
- Neglecting debris removal: Failing to clear the crawl space floor can lead to punctures in the vapor barrier, allowing moisture intrusion.
- Improper seam overlap: Overlapping seams by less than the recommended 12 inches and not sealing gaps properly can let moisture seep through.
- Insufficient wall extension: Not extending the vapor barrier at least 6 inches up the walls allows moisture to bypass the barrier entirely.
Additionally, using a vapor barrier can significantly enhance financial management practices for homeowners by preventing costly repairs associated with moisture damage.
Benefits of Using a Vapor Barrier in Your Crawl Space
Using a vapor barrier in your crawl space offers significant benefits, like preventing mold growth and enhancing energy efficiency.
By blocking moisture from the ground, it helps maintain a healthier environment while also reducing your energy costs.
You’ll notice a difference in air quality and comfort levels throughout your home. Additionally, tracking spending on energy bills may reveal savings over time due to improved insulation and reduced humidity levels.
Mold Prevention Benefits
While you may not think much about the moisture lurking beneath your home, installing a vapor barrier in your crawl space is essential for mold prevention. By effectively blocking moisture from the ground, it considerably reduces the risk of mold growth.
Here are some key benefits:
- Lowers indoor humidity levels, making it harder for mold spores to thrive.
- Protects fiberglass insulation from absorbing moisture that can lead to mold and mildew.
- Enhances indoor air quality by preventing mold-related health issues.
Regular maintenance of your vapor barrier can provide long-term protection against moisture problems, ensuring a healthier environment for you and your family.
Investing in a vapor barrier is a smart step toward safeguarding your home from mold.
Energy Efficiency Improvement
A vapor barrier not only helps prevent mold but also plays a crucial role in enhancing your home’s energy efficiency.
By installing a vapor barrier in your crawl space, you can greatly reduce energy bills. It minimizes the entry of cold or humid air, keeping your living areas comfortable.
Properly installed, a vapor barrier blocks moisture from the ground, preventing your heating and cooling systems from working overtime to maintain desired indoor temperatures. This not only improves insulation but also helps maintain consistent humidity levels, leading to better indoor air quality.
Additionally, a vapor barrier protects your insulation from dampness, ensuring it remains effective for longer, further boosting your home’s overall energy efficiency.
The Role of Insulation in Conjunction With Vapor Barriers
Insulation plays an essential role when paired with vapor barriers, as it greatly enhances your home’s energy efficiency. Proper insulation keeps your indoor temperatures consistent and helps prevent moisture issues in crawl spaces.
Here’s how they work together:
- Cold air stays out in winter, keeping your home warm.
- Humid air is reduced in summer, leading to lower energy bills.
- Air sealing limits movement, maximizing moisture control and energy savings.
When insulating a crawl space with a dirt floor, remember to install a vapor barrier first. This combination not only protects your insulation material from moisture but also creates a stable environment that improves your home’s air quality and maintains its structural integrity. Additionally, using energy-efficient designs can further lower your overall energy consumption, contributing to a more sustainable living environment.
How to Maintain Your Vapor Barrier for Long-Term Performance
To guarantee your vapor barrier performs well over the long term, regular maintenance is essential.
Inspect your vapor barrier every 6 to 12 months for any tears, punctures, or signs of moisture intrusion. Make certain the seams are properly sealed with tape to prevent vapor escape.
Keep your crawl space clean by removing debris and organic material, as these can promote mold growth and compromise the barrier’s integrity. Additionally, maintaining proper ventilation in your crawl space can help prevent conditions that lead to mold issues.
If you notice persistent humidity or mold issues, consider using a dehumidifier to help manage moisture levels effectively.
Additionally, monitor for standing water or leaks, as these conditions can overwhelm your vapor barrier’s protective capabilities and may require additional waterproofing measures to guarantee its longevity.
Cost Breakdown: DIY vs. Professional Vapor Barrier Installation
When deciding between DIY and professional vapor barrier installation, it’s crucial to evaluate the costs and benefits of each option.
Here’s a quick cost breakdown to reflect upon:
- DIY installation for a 1,500-square-foot home could cost around $640, excluding supplies.
- Professional installation typically ranges from $2 to $4 per square foot, potentially costing two to three times more.
Long-term benefits of professional installation include proper sealing and compliance with local codes, justifying the higher cost.
Ultimately, if you opt for DIY, you can save money upfront, but weigh that against the expertise and reliability a professional can provide.
Reflect on your unique situation and the potential need for repairs or additional work.
Addressing Moisture Sources Beyond the Vapor Barrier
Even with a vapor barrier in place, you still need to identify other moisture sources that could impact your crawl space, like plumbing leaks or high humidity.
Monitoring humidity levels is essential to prevent mold growth and guarantee a dry environment.
Don’t overlook these factors if you want long-lasting moisture control.
Identify Additional Water Sources
While a vapor barrier plays an essential role in moisture control, it’s important to recognize that other water sources can still undermine your efforts.
To keep your crawl space dry, consider these additional water sources:
- Plumbing leaks: Inspect for any visible leaks or drips; even small ones can introduce excess moisture.
- Groundwater seepage: Heavy rainfall or poor drainage can cause groundwater to rise, leading to moisture accumulation. Confirm proper grading around your foundation.
- High humidity levels: In humid climates, humidity can be a persistent issue. You might need a dehumidifier to effectively manage moisture levels, even with a vapor barrier in place.
Regular inspections are crucial to identify these issues and take appropriate action.
Monitor Humidity Levels
To maintain a dry crawl space, it’s vital to monitor humidity levels regularly, as moisture can infiltrate from various sources like plumbing leaks or inadequate drainage.
Use a hygrometer to keep track of humidity, aiming for levels between 30% and 50%. If humidity rises above this range, you may need a dehumidifier, especially in humid climates.
Regular checks help identify moisture from evaporating water or other issues early, allowing for timely crawl space repair.
Addressing poor ventilation and standing water is important for controlling moisture and ensuring your vapor barrier remains effective.
Understanding Local Building Codes for Vapor Barriers
Understanding local building codes for vapor barriers is essential, as regulations can differ greatly from one municipality to another.
Understanding local building codes for vapor barriers is crucial, as regulations vary significantly between municipalities.
Before you start your vapor barrier installation, check your local requirements to avoid potential issues. Here are a few key points to reflect on:
- Polyethylene thickness: Some areas require at least 6 mil, while others recommend 10 or 20 mil for better durability.
- Installation guidelines: Many codes mandate overlapping seams and secure sealing with tape to prevent moisture infiltration.
- Additional measures: Some jurisdictions may require insulation or air barriers to enhance moisture control and energy efficiency.
Failing to comply with these local building codes can lead to fines, costly rework, or complications during future inspections and property sales.
Always stay informed!
FAQs About Crawl Space Vapor Barriers
When it comes to installing a crawl space vapor barrier, you probably have a lot of questions.
Understanding the installation process and addressing common misconceptions can help you make informed decisions.
Let’s tackle some of those frequently asked questions to clear up any confusion.
Installation Process Overview
Installing a vapor barrier in your crawl space is a straightforward process that can greatly enhance your home’s moisture control.
To get started with the installation process, follow these key steps:
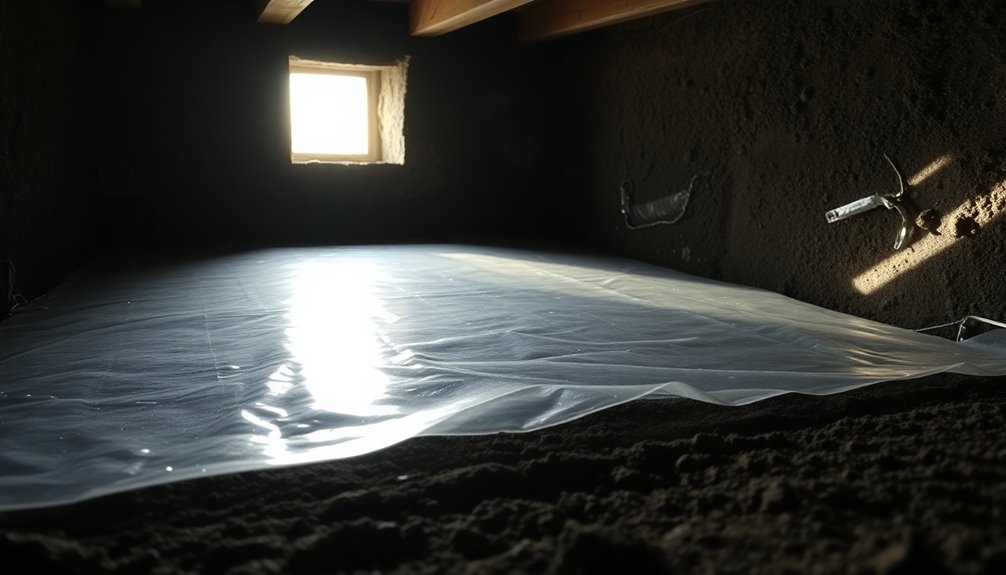
- Clear debris from the crawl space floor to prepare the area.
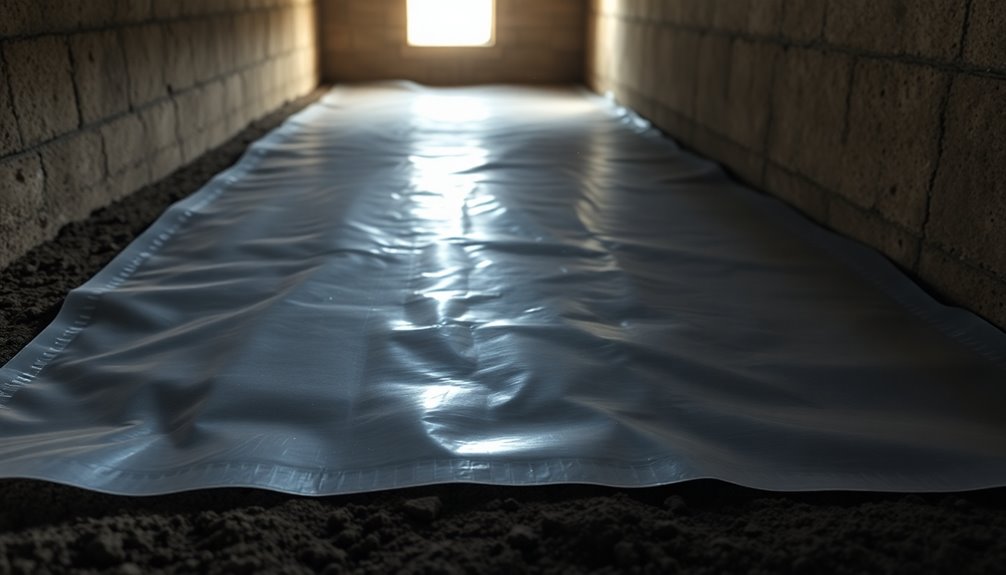
- Lay out a minimum 6 mil polyethylene sheet evenly across the floor, extending it 6 inches up the walls.
- Secure corners with rocks and overlap seams by 12 inches, sealing them with appropriate tape.
This effective vapor barrier prevents moisture ingress, protecting your home from mold growth, wood rot, and structural damage.
Common Misconceptions Addressed
What misconceptions do homeowners have about crawl space vapor barriers?
Many think a vapor barrier alone is enough to control moisture, but it needs to be paired with proper insulation and air sealing for best results.
Some believe crawl space vents help, yet these can actually bring in humid air, worsening moisture issues.
Additionally, fiberglass insulation isn’t effective in damp conditions since it can retain moisture, losing its insulating properties.
Not all vapor barriers are created equal; thickness and material matter, with thicker options (like 20 mil) offering better protection.
Finally, many underestimate the importance of professional installation—improper sealing can create air gaps, allowing moisture vapor to seep through, negating the barrier’s protective benefits.
When to Consider Professional Help for Vapor Barrier Installation?
Considering a professional for vapor barrier installation can be wise if your crawl space presents challenges like uneven floors or persistent moisture problems.
Here are a few scenarios when consulting a professional makes sense:
- Uneven Floors: If your crawl space isn’t level, a contractor can guarantee proper installation and sealing of the vapor barrier.
- Claustrophobia: If you’re uncomfortable working in tight spaces, hiring a contractor can ease the process.
- Expertise Needed: Professionals can assess your crawl space conditions and implement additional measures like air sealing or insulation effectively.
Professional installation often comes with a warranty, giving you peace of mind about the durability and effectiveness of the vapor barrier over time.
Professional installation typically includes a warranty, ensuring long-lasting durability and effectiveness of your vapor barrier.
Plus, obtaining multiple estimates helps you make an informed decision that fits your budget.
Conclusion
To sum up, installing a vapor barrier over your dirt floor crawl space is a game-changer for your home’s health. Not only does it combat moisture, but it also helps prevent mold and structural damage, making it feel like a superhero against dampness! By following the steps outlined and choosing the right materials, you can protect your space effectively. If you’re ever unsure, don’t hesitate to call in the pros—they can turn your crawl space from a nightmare into a dream!


Average Rating