If you're looking to cut your energy costs, an affordable DIY geothermal heat pump could be the answer. You'll start by evaluating your property for proper installation. Then, dig trenches about four feet deep to install underground loops. Using durable 3/4 inch HDPE piping, guarantee proper connections and seals. After that, you'll connect the geothermal heat pump, circulate the antifreeze mixture, and test the system for efficiency. Plus, you can benefit from federal tax credits to offset costs. Keep going to discover essential components and techniques that will help you maximize your geothermal system's performance!
Understanding Geothermal Systems
When it comes to heating and cooling your home, geothermal systems offer a remarkably efficient solution by tapping into the earth's stable underground temperatures. Typically ranging from 50-55°F, the ground serves as a natural resource for your HVAC needs.
Through a closed loop system, a water/antifreeze mixture circulates in buried pipes, absorbing or dissipating heat from the ground depending on the season. This process achieves energy efficiencies of 3.5 to 5 times that of conventional electric heaters, making it an attractive option for homeowners. Utilizing budgeting tools can help you allocate funds effectively toward your geothermal system. Furthermore, employing automated investment management strategies can assist homeowners in financing their geothermal systems over time.
The U.S. EPA estimates that geo-exchange systems can reduce heating costs by 30-70% and cooling costs by 20-50%. While the initial installation might seem challenging, federal tax credits of 30% on qualifying expenses can greatly offset your investment. Monitoring savings and investments is essential to ensure that you can afford the initial setup and continue benefiting from the reduced utility costs over time.
If you're handy, consider exploring DIY methods for geothermal installation to further reduce costs. Components like HDPE piping are readily available at home improvement stores for around 10 cents per foot.
Assessing Your Property
Evaluating your property's suitability for a DIY geothermal heat pump installation is a key step in the process.
Start by examining your property's size, orientation, and existing landscaping to determine the best type of ground loop system—horizontal or vertical—based on the available space and soil conditions. Additionally, utilizing bill tracking apps can help you manage any related expenses throughout the installation process. Budgeting effectively can align expenses with your overall financial goals, ensuring a smoother project experience.
Conduct a Manual J calculation to appraise your heating and cooling needs, which will help you select the appropriate heat pump size for your home.
Next, investigate local zoning laws and obtain any necessary permits to guarantee compliance with regulations before moving forward. It's vital to know what you're allowed to do on your property.
Performing a soil test is also essential, as it determines the thermal conductivity of the ground. Different soil types can greatly impact the efficiency of your geothermal system, so you want to be well-informed.
Lastly, identify any existing underground utilities or structures that could interfere with your installation by conducting utility scans. This step will help prevent any unexpected complications during the installation process, ensuring a smoother experience overall. Additionally, keeping track of your project expenses with accurate categorization can help you stay within budget and manage financial resources effectively.
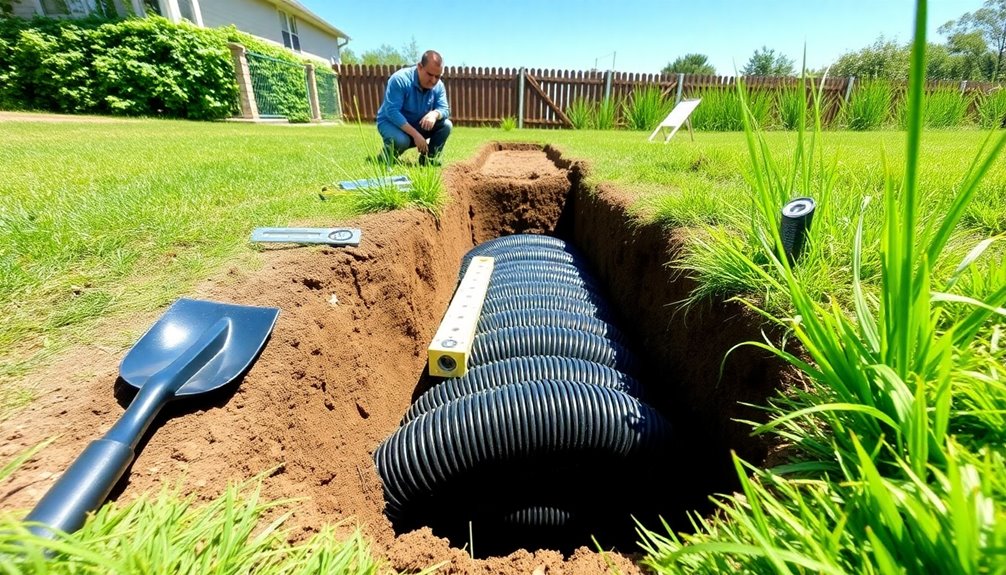
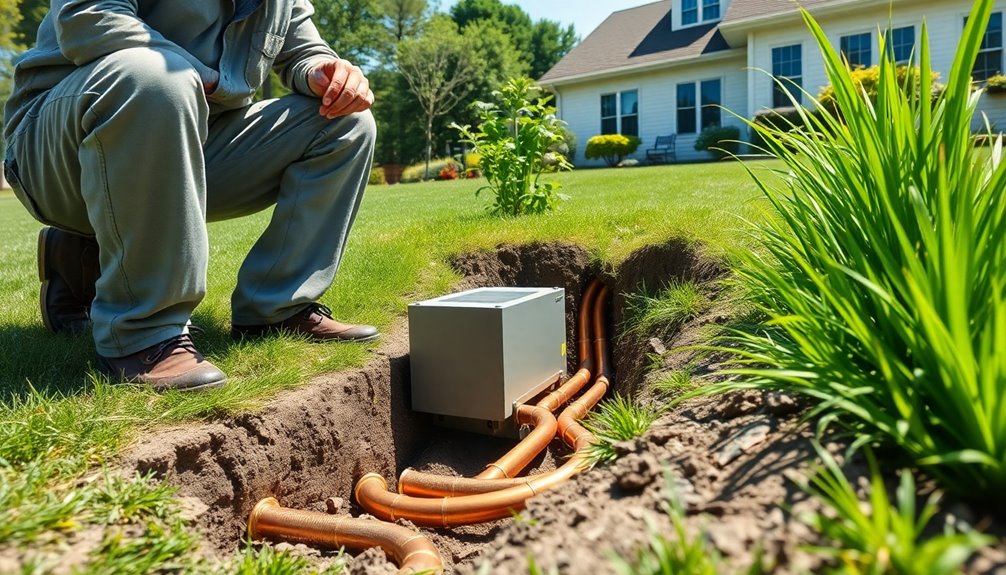
Digging Your Hole
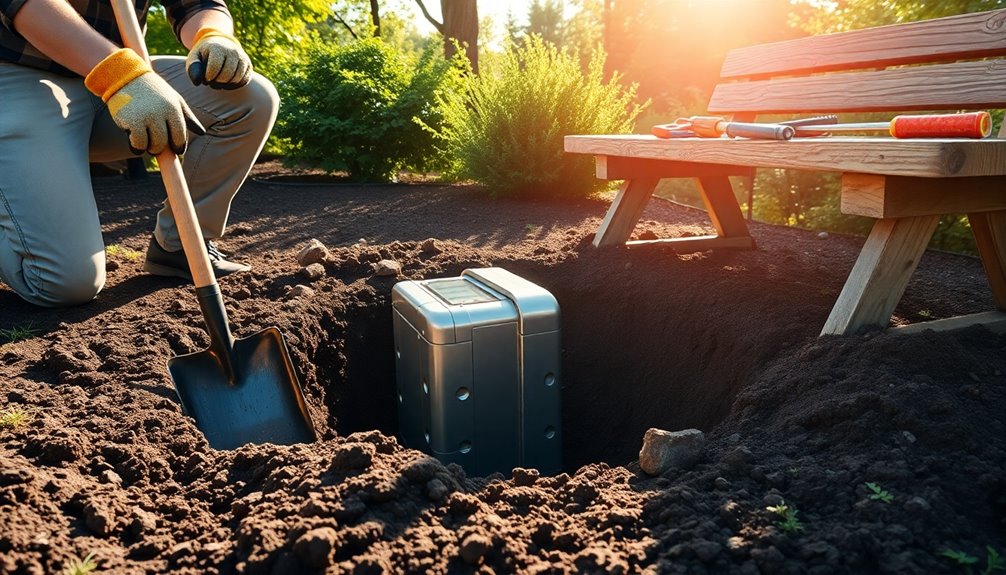
Digging your hole for a geothermal heat pump is an important step that requires careful planning and execution. Typically, you'll need to dig a trench around four feet deep, though the ideal depth can vary based on local soil conditions and your temperature efficiency needs. Additionally, utilizing an expense tracking app can help you manage the costs associated with this phase of your project.
Before you start digging, research the soil type and any underground water sources; encountering water at depths around eight feet can greatly boost your ground-source heat exchange efficiency.
Safety is paramount during this process. Collapses can be dangerous, so it's essential to use proper equipment and possibly hire professionals if you're digging deeper holes.
Using a backhoe can help guarantee you achieve the correct trench dimensions while mitigating the risks associated with manual digging.
Finally, don't forget to check local regulations and permitting requirements before you begin excavation. This step is imperative to avoid any legal complications during your geothermal system installation. Additionally, utilizing tools for expense tracking can help you budget for the costs associated with your geothermal project effectively.
Constructing the Loop
When constructing the loop for your geothermal heat pump, you'll want to choose cost-effective 3/4 HDPE pipes, as they're both durable and budget-friendly. It's important to consider using budgeting apps to effectively monitor your expenses throughout the project. Think about the loop length carefully; while a standard setup might need around 3,600 feet, you can start with just 200 feet for testing. Proper sealing of connections is essential, so make sure to use reliable fittings to prevent leaks. Additionally, consider utilizing expense management apps that can help you track and manage costs associated with your geothermal project. Using budget apps can also empower you to set financial goals and monitor your progress efficiently throughout the duration of your project.
Choosing Pipe Materials
Choosing the right pipe materials is vital for constructing an efficient geothermal heat pump loop. For your DIY system, 3/4 inch high-density polyethylene (HDPE) piping is a popular choice. Its durability and resistance to corrosion make it ideal for underground installations.
The inside diameter of the HDPE tubing should be about 0.86 inches, ensuring optimal flow rates for effective heat exchange.
When planning your loop lengths, consider that around 200 feet of piping is often sufficient for smaller systems. You can find cost-effective options for HDPE piping at home improvement stores, typically priced at around 10 cents per foot—great for keeping your project budget-friendly.
It's essential to pay attention to the connections in your system. Proper sealing is key to preventing leaks, so use double hose clamps on fittings.
This extra measure will help maintain system integrity during operation. By choosing the right pipe materials and ensuring solid connections, you'll set the foundation for an efficient and reliable geothermal heat pump system that meets your heating and cooling needs.
Loop Length Considerations
Determining the right loop length is essential for maximizing your geothermal heat pump's performance. The loop length can vary considerably based on soil conditions and the capacity of your heat pump.
For smaller systems, 200 feet of piping is generally sufficient for initial testing. However, if you're working with a closed-loop system, you'll typically need between 400 to 600 feet of piping per ton of heating or cooling capacity. For example, a 5-ton system could require around 3,000 feet of pipe.
Using 3/4 inch HDPE pipe is common for loop construction, as it provides the necessary surface area for effective heat exchange.
Before you start digging, take the time to research your local soil characteristics. This can greatly enhance your system's efficiency by helping you determine the ideal loop length needed for effective heat absorption.
Don't hesitate to adjust the loop length based on your available resources and assistance. This flexibility encourages experimentation and innovation in your DIY geothermal projects.
Ultimately, thorough planning will guarantee your geothermal heat pump operates at its best, saving you energy and costs in the long run.
Essential System Components
When setting up your DIY geothermal heat pump, you'll need to focus on key system components that guarantee efficiency and cost-effectiveness.
Start with the HDPE tubing, QT Flow Center, and the 5-ton McQuay heat pump, as these elements play an essential role in the system's performance. Additionally, considering sustainable materials in your components can further enhance the eco-friendliness of your geothermal setup. Moreover, opting for sustainable packaging solutions when sourcing your materials can significantly reduce the environmental impact during installation. This approach not only supports sustainable businesses but also encourages a shift towards more responsible consumption practices.
Key System Elements
Key system elements play an essential role in the efficiency and effectiveness of DIY geothermal heat pumps.
First, you'll need HDPE tubing with an inside diameter of 0.86 inches for effective fluid circulation and heat exchange, critical for your installation process. The geothermal heat pump, like the 5-ton McQuay model, is another key component. It's equipped with an ECM blower and desuperheater option, enhancing heating efficiency and making your ground heating system more effective.
Additionally, a QT Flow Center with two pumps, costing around $699, is essential for ideal fluid circulation. Proper setup is necessary to guarantee these pumps work effectively.
You may want to take into account using an aftermarket radiator as a heat exchanger, while the stock radiator can serve as an air handler. This dual functionality can maximize your system's performance.
Finally, don't forget about the antifreeze mixture—10 gallons mixed with water is required, alongside a total capacity of over 100 gallons to maintain proper operation.
If you feel uncertain about any component, consulting an HVAC contractor can provide valuable guidance and support.
Cost-Effective Components
Finding cost-effective components for your DIY geothermal heat pump can greatly reduce overall expenses while maintaining efficiency. Here are some essential components to take into account for your geothermal system:
1. Piping: You can source cost-effective Piping from home improvement stores for about 10 cents per foot.
Around 200 feet should suffice for initial testing, allowing you to make adjustments as needed.
2. Pump: A pump from a 90s model Honda Civic can be a budget-friendly option for circulating fluids in your geothermal system.
It's reliable and can save you money.
3. Heat Exchangers: Aftermarket radiators can serve as efficient Heat Exchangers.
They optimize performance while being considerably cheaper than new equipment, making them ideal for DIY installations.
4. Power Supply: Your geothermal system can operate on a 12-volt Power Supply.
This guarantees compatibility with common electrical setups, reducing installation complexity.
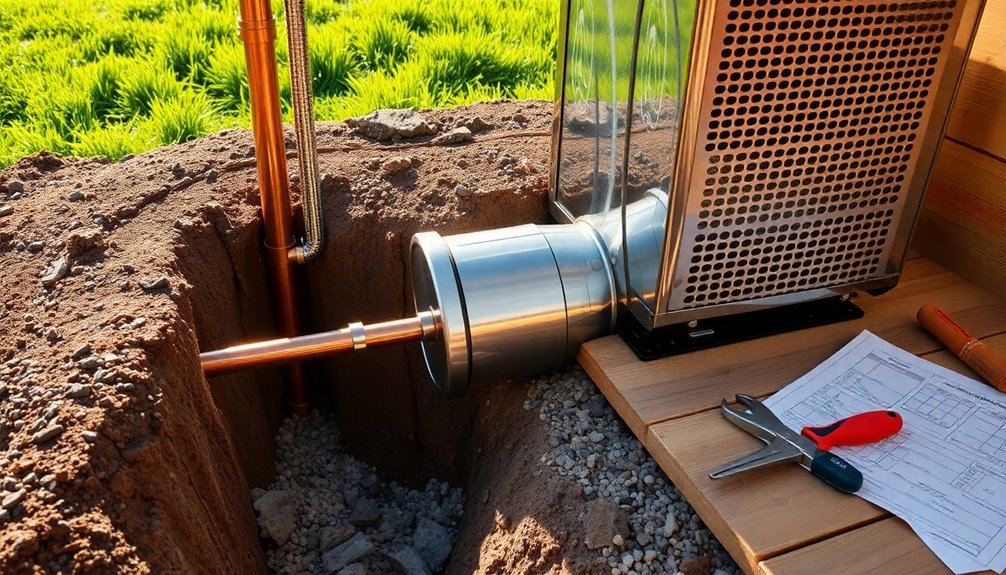
Installing the Heat Pump
Installing a geothermal heat pump is a rewarding endeavor that can greatly enhance your home's energy efficiency.
First, choose a heat pump suitable for your home size and climate; a common DIY option is the 5-ton McQuay heat pump, priced around $4,566.
Begin by connecting the heat pump to the loop system, confirming all fittings are secure to prevent leaks.
To facilitate efficient fluid circulation, use a QT Flow Center with two pumps, which costs about $699.
Next, connect a PEX tube from the heat pump to the water tank. This setup allows for quick heating of the water, and your system can exceed 100 gallons with a 10% antifreeze mixture for peak performance.
Once everything is installed, conduct a thorough system test. This vital step confirms all components operate smoothly and efficiently, validating proper heat exchange and circulation. Utilizing price comparison tools during your shopping process can help you find the best deals on all necessary equipment.
By following these steps, you'll be well on your way to enjoying the benefits of your new geothermal heat pump, ultimately reducing energy costs and increasing comfort in your home.
Happy installing!
Connecting Ductwork
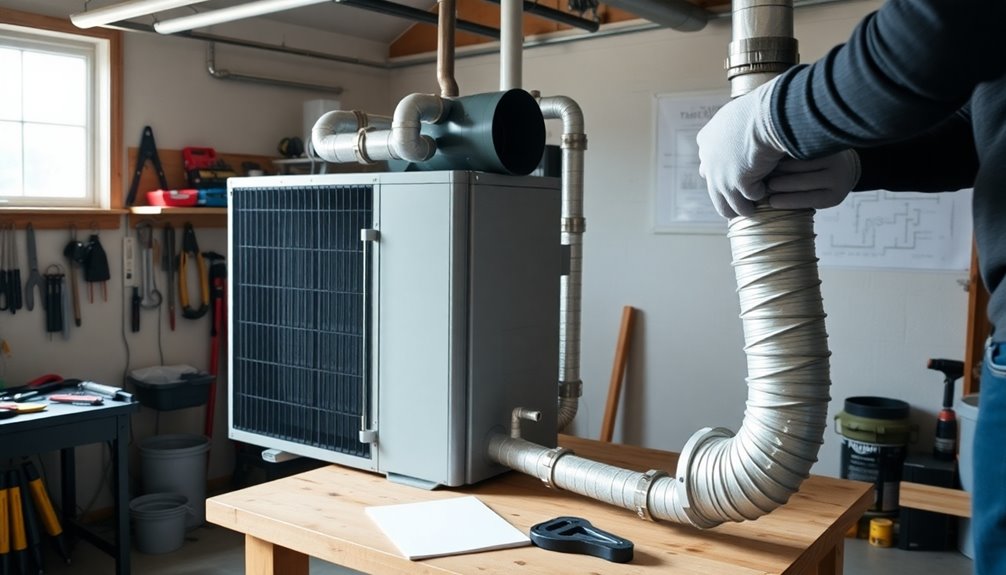
When connecting ductwork to your geothermal heat pump, sealing all seams is essential to avoid air leaks that can hurt efficiency and raise energy costs.
You'll also need to guarantee the duct size matches your heat pump's specifications for balanced airflow.
Properly sizing and sealing your ducts can make a significant difference in your system's performance.
Duct Sealing Techniques
Sealing ducts properly is essential for maximizing the efficiency of your geothermal heat pump system. If you neglect duct sealing, you could face energy losses of up to 20% or more.
Here's how to guarantee your ductwork is tight and well-insulated:
- Use the Right Sealant: Apply mastic sealant or foil tape to all seams and joints in your ductwork. This creates a strong barrier against air leakage.
- Conduct a Pressure Test: Utilize a duct blaster to identify any leaks. This tool helps you pinpoint areas that need extra sealing to optimize performance.
- Insulate Ductwork: If your ducts run through unconditioned spaces like attics or crawl spaces, make sure they're insulated. This minimizes heat loss or gain, improving overall system efficiency.
- Regular Maintenance: Inspect your sealed ducts periodically. Wear and tear can lead to new leaks over time, which can increase your energy bills.
Proper Sizing Considerations
Guaranteeing your ductwork is properly sized is vital for the efficiency of your geothermal heat pump system. If your ducts are too small or too large, you could face significant energy losses, leading to inadequate heating or cooling.
To achieve proper sizing, perform a Manual J calculation, which takes into account your home's square footage, insulation levels, and occupancy patterns. This calculation will guide you in determining the right dimensions for your ductwork.
Additionally, insulating your ductwork is important to prevent heat loss, especially in unconditioned spaces. Aim for R-6 or R-8 insulation for best performance.
Don't forget to seal your ducts tightly using mastic or metal tape; air leaks can account for up to 20% of energy losses in a typical HVAC system.
When connecting ductwork to your geothermal heat pump, opt for flexible ducting where possible. This choice not only minimizes noise and vibration but also enhances your overall comfort.
Implementing the Circulating System
To implement the circulating system in your DIY geothermal heat pump, start by selecting a QT Flow Center, which features two pumps for efficient fluid movement. This setup is essential for ideal heat exchange and ensuring your geothermal systems operate effectively.
Follow these steps for a successful installation:
- Prepare the Fluid: Mix 10 gallons of antifreeze with water, ensuring your total system capacity exceeds 100 gallons to protect against freezing.
- Install HDPE Tubing: Use standard HDPE tubing with an inside diameter of 0.86 inches. This tubing provides a suitable pathway for the water-based solution used in the heat exchange process.
- Connect the Heat Pump: Securely connect the heat pump to the water tank with a PEX tube. This connection allows for quick temperature increases during operation.
- Monitor Fluid Flow: Listen for auditory feedback from the water flow. This serves as a diagnostic tool, indicating proper functionality and circulation efficiency within your circulating system.
Evaluating Performance

After setting up your circulating system, it's time to evaluate its performance to confirm everything operates as intended. Start by using energy meters to measure the voltage and current in your geothermal heat pumps. These readings will give you a clear picture of your system's efficiency during operation.
During performance evaluation, pay attention to the power consumption—around 2600 watts in cooling mode and about 4000 watts in heating mode. This data helps confirm your system operates efficiently, especially during extreme outdoor conditions.
You should also monitor your monthly heating costs. In extreme cold climates, many users have reported keeping these costs capped at $210, highlighting the cost-effectiveness of geothermal systems compared to traditional heating methods.
Don't forget the activation delay of three minutes before cooling begins, a standard feature that prevents immediate energy spikes while maintaining comfort during high occupancy events. This capability demonstrates how effectively your geothermal heat pump can handle significant cooling demands.
Navigating Tax Incentives
Maneuvering the world of tax incentives can feel overwhelming, but taking advantage of available benefits for geothermal heat pump installations can lead to significant savings.
Here's how you can make the most of the tax benefits available:
- Claim the Federal Tax Credit: You can receive a 30% federal tax credit on the total costs of your geothermal installation, with no maximum limit, as long as your system meets Energy Star requirements.
- Complete the Right Forms: To claim your geothermal tax credits, fill out the Renewable Energy Credits subsection on your tax return. This can effectively reduce your overall installation costs.
- Consider State and Local Incentives: Many states and localities offer additional rebates and incentives for geothermal installations, further lowering your upfront costs.
- Calculate Your Savings: With installation costs averaging between $18,000 and $30,000, you could save between $5,400 and $9,000 with the federal tax credit alone.
Long-Term Savings and Benefits
Capitalizing on tax incentives can greatly ease the financial burden of installing a geothermal heat pump, but the savings don't stop there. When you switch to geothermal heating and cooling, you can expect long-term savings that substantially impact your monthly energy bills.
Geothermal systems deliver cost savings of 30-60% on heating and 20-50% on cooling compared to conventional systems. Over time, these energy savings can help your initial investment pay for itself within just 3 to 5 years.
Additionally, the long lifespan of geothermal components means you won't have to worry about frequent replacements. Indoor units can last up to 25 years, while ground loops can last 50 years, ensuring consistent performance and ongoing savings.
Installing a geothermal heat pump can also boost your property value, making your home more attractive to potential buyers who appreciate energy efficiency.
Beyond the financial benefits, utilizing geothermal energy contributes to a reduced carbon footprint and less air pollution, making it an eco-friendly choice.
In the long run, investing in a DIY geothermal system provides not just savings, but a sustainable lifestyle choice that benefits both your wallet and the environment.
Conclusion
By diving into DIY geothermal heat pumps, you're not just digging a hole; you're planting the seeds for a greener future. With each step, from evaluating your property to implementing the circulating system, you're crafting a sustainable solution that pays off in comfort and savings. So, roll up your sleeves and embrace the challenge—your home will thank you with lower bills and a smaller carbon footprint, turning your space into a cozy, eco-friendly haven.