You can easily build a durable and cost-effective DIY roof platform using EMT conduit, enhancing your vehicle's cargo capacity for just $80 to $120. Start by measuring your vehicle's roof and cutting the conduit to size. Use connectors to assemble the frame and install secure mounting brackets for stability. Be sure to apply a protective coating to prevent rust. Regular inspections and maintenance will guarantee your platform lasts. Plus, the customizable nature of the build lets you tailor it to your needs. If you're curious about more detailed construction steps and tips, there's plenty more to explore!
Project Overview and Goals
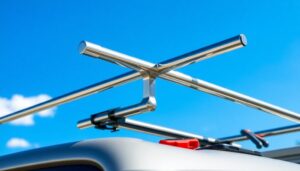
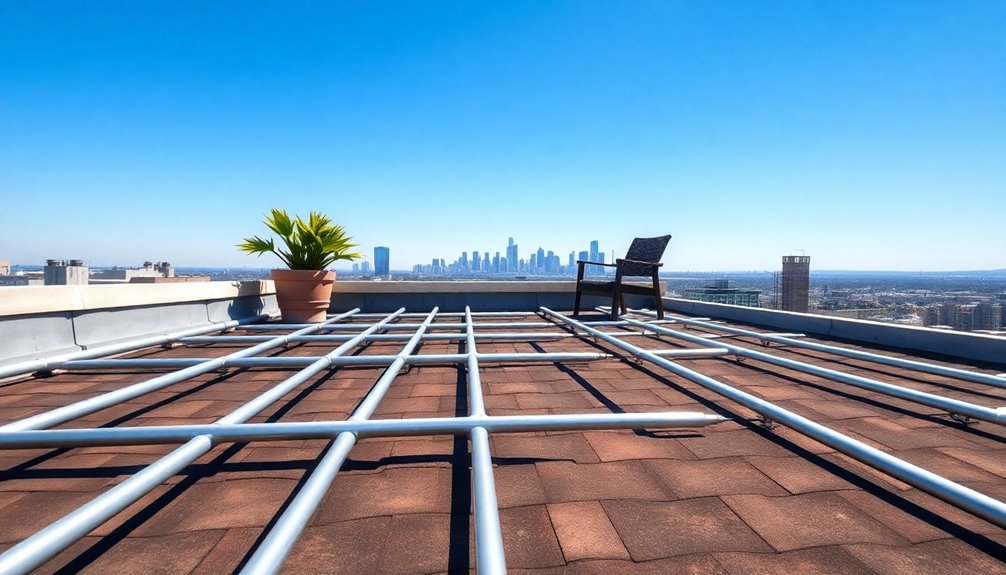
When you commence the DIY roof platform project, you'll be enhancing your vehicle's cargo capacity with a custom-built rack measuring 49 x 65 inches.
This roof rack, constructed from EMT conduit, is designed for durability and functionality, making it perfect for outdoor enthusiasts and tradespeople alike. By utilizing a budgeting tool, you can effectively track the expenses involved in your project. Automating savings can also be beneficial in setting aside funds for your project, ensuring you have the necessary budget when you need it.
Your goal is to create a cost-effective solution, with a total projected cost ranging from $80 to $120, depending on your choice of materials and tools.
You'll have the flexibility to customize the design, incorporating features like lights to meet your specific needs. Additionally, managing your budget effectively can ensure that you stay within your projected cost, similar to how budgeting tools help freelancers track their expenses and financial goals.
Essential Materials and Tools
To build your DIY roof platform effectively, you'll need a selection of essential materials and tools.
Start with EMT conduit, available in 10-foot sticks for about $7 each, and don't forget conduit connectors for easy assembly. Expense tracking tools can help monitor costs associated with your project. Additionally, using expense tracking apps will allow you to streamline your budgeting process.
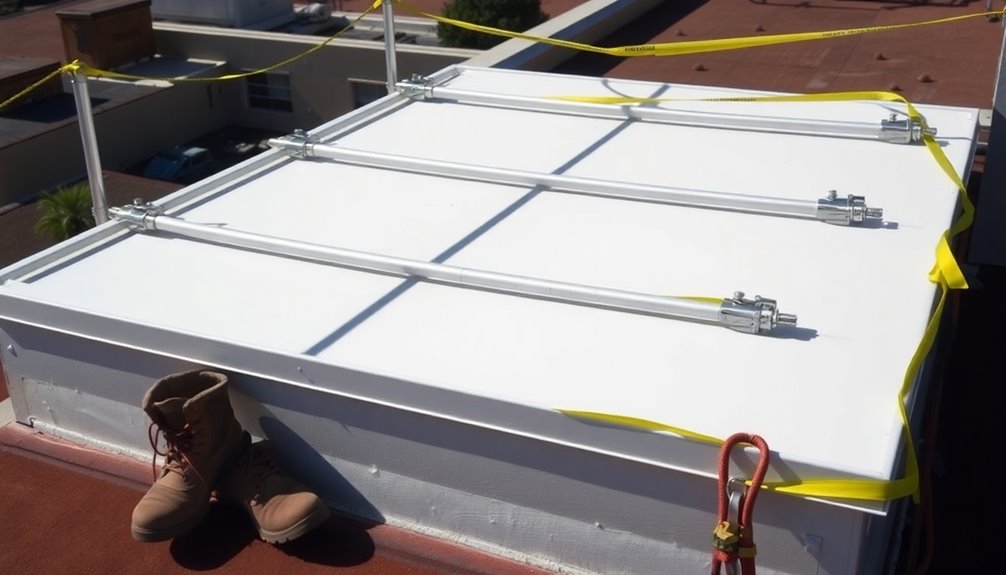
Mounting brackets are vital for securing the platform to your vehicle, and pre-bent corners can be found for approximately $2 each.
A protective coating or paint is recommended to prevent rust and enhance durability.
For tools, grab a hacksaw to cut the EMT, a drill for making holes, wrenches for securing bolts, and a measuring.
Fabrication Techniques

After gathering your materials and tools, it's time to focus on the fabrication techniques that will bring your roof platform to life.
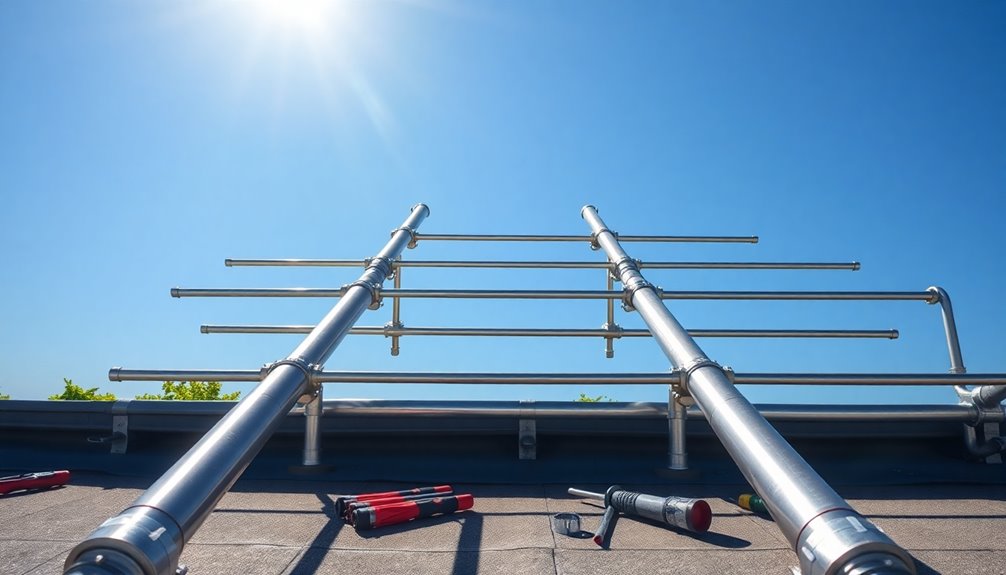
Start by using butt joints or sleeved connections to assemble your EMT (Electrical) conduit, guaranteeing a strong and rigid structure. Grounding the tube sizes will help create a snug fit, enhancing stability and minimizing movement. Additionally, establishing a routine for checking your payment alerts can contribute to your overall project organization. Implementing clear payment terms can also ensure that all costs related to your project are well understood.
Secure your connections with couplings featuring set screws for extra reinforcement, preventing disassembly under load. Incorporate steel mounts or flat bars in critical weight distribution areas for added support.
For a more efficient assembly process, consider using Maker Pipe fittings, which allow for quick and durable connections without the need for welding. Utilizing accurate categorization can also streamline your project budgeting and prevent overspending on materials.
These strategies will guarantee your platform is robust and reliable.
Step-by-Step Construction
Start your DIY roof platform by accurately measuring your vehicle's roof dimensions. You'll need to guarantee a fit of 49 x 65 inches for your roof racks. Additionally, utilizing budgeting apps can help you manage costs related to materials and tools for this project.
Next, cut the EMT conduit into specified lengths with a hacksaw, keeping in mind the necessary connections and joints for stability.
Assemble the frame by connecting the conduit pieces with connectors, using couplings and set screws to secure the joints tightly.
Then, attach mounting brackets to your vehicle's roof for a secure installation, followed by bolting the conduit frame to these brackets for maximum support.
Finally, inspect all connections for tightness and stability before applying paint or a protective coating to prevent rust and enhance your DIY roof platform's aesthetic. Additionally, consider using budget apps to effectively monitor your expenses while completing this project.
Safety Precautions
- Confirm all connections are tight and secure to prevent movement during transport.
- Regularly conduct inspections for signs of wear and tear, especially after heavy use.
- Use reflective tape or lights on the roof rack to enhance visibility in low-light conditions. Additionally, consider using automated savings features to ensure you have the funds for any unexpected repairs or upgrades. Budgeting tools can also help you allocate funds effectively for future projects.
- When welding galvanized EMT conduit, wear a respirator and confirm proper ventilation in your workspace.
- Implementing safety measures, such as timely reminders for automated bill payments, can help ensure that you have the necessary funds for maintenance and repairs. Establishing a budget can significantly improve your ability to manage expenses and save for unforeseen costs.
Design and Customization Options
When designing your DIY roof platform, you'll want to take into account material selection to guarantee durability and weight efficiency.
Adjustable design features can help you create a setup tailored to your specific needs, whether that means fitting gear or accommodating unique accessories.
With a bit of creativity, you can craft a platform that not only performs well but also reflects your personal style. Additionally, consider incorporating sustainable materials to enhance both functionality and eco-friendliness in your design.
Material Selection Strategies
Choosing the right materials for your DIY roof platform can greatly impact both its functionality and appearance. By employing effective material selection strategies, you can create a sturdy and attractive structure.
Here are four key materials to ponder:
- EMT Conduit: Lightweight yet strong, it's perfect for the framework.
- Wood Decking: Adds aesthetic appeal and works well with EMT conduit.
- Connectors: Use T-Connectors and 90 Degree Connectors for versatile assembly without welding.
- Pre-Bent Corners: Simplify construction by enabling rounded edges and angles easily.
Combining these materials allows for customization, like adding crossrails or attaching accessories, enhancing both utility and style.
Adjustable Design Features
Adjustable design features play an essential role in maximizing the versatility of your DIY roof platform, allowing you to tailor it to your specific needs.
Using EMT conduit, you can easily modify the height or width of your roof rack. Incorporating T-connectors and adjustable brackets enhances customization, letting you create different configurations for various gear options.
Want to carry bikes or kayaks? You can experiment with crossbars or side rails by adding removable sections to the framework.
Plus, the lightweight EMT conduit means you can add features like wind deflectors or road showers without added weight.
Don't forget, custom painting or protective coatings can match your vehicle's aesthetics while protecting against rust and wear.
Mounting and Installation Methods
To guarantee your DIY roof platform is securely mounted, it's essential to choose the right installation methods. Consider these effective mounting techniques:
- Use GE connectors for direct roof mounting to confirm stability and prevent movement during transit.
- Attach flange connectors to your vehicle's frame, providing a robust anchor point for the EMT conduit while distributing weight evenly.
- Employ crossover conduit clamps that work with both OEM and aftermarket bars, simplifying installation and confirming a strong connection.
- Align mounting points properly to fit your vehicle dimensions snugly, minimizing vibrations and enhancing stability.
For added security, consider using U-bolts or off-the-shelf pipe straps to create a reliable attachment between the roof rack and your vehicle structure.
Community Advice and Support
When you're working on your DIY roof platform, tapping into community advice can be a game-changer.
You'll find a treasure trove of design ideas and construction tips shared by fellow enthusiasts who've been in your shoes.
Engaging with others not only enhances your project but also builds a supportive network ready to help troubleshoot any challenges you face.
Sharing Design Ideas
While diving into community forums, you'll discover a wealth of design ideas and techniques for creating EMT conduit roof platforms that cater to your vehicle and personal preferences.
Engaging with fellow DIY enthusiasts can spark your creativity and inspire unique features. Here are some popular ideas to reflect upon:
- Use T-Connectors for versatile configurations.
- Incorporate 90 Degree Connectors for added stability.
- Share sketches or photos of your projects for feedback.
- Discuss weight limits and mounting points to guarantee safety.
These discussions often highlight the benefits of connectors, making assembly easier and allowing for design adjustments.
Construction Tips Exchange
As you commence your roof platform project, exchanging construction tips with fellow DIYers can greatly enhance your experience and results.
Using T-connectors and 90-degree connectors will provide a versatile and sturdy assembly for your EMT conduit, making adjustments easier as you work.
It's essential to cut and measure your EMT conduit accurately to fit your vehicle perfectly, ensuring stability and proper weight distribution.
After assembly, consider painting or applying a protective coating to prevent rust and extend the platform's life.
Regularly check your connections and mounting brackets for tightness, as any loose components can compromise safety.
Finally, engage with online forums to share your progress and learn from others' experiences, gaining valuable insights for your project.
Benefits of a DIY Roof Platform
Creating a DIY roof platform brings a sense of empowerment and practicality to outdoor enthusiasts and tradespeople alike. By using EMT conduit, you can enjoy several benefits:
- Increased Cargo Capacity: Transport larger items like camping gear or tools efficiently.
- Cost-Effective Solution: Total costs range from $80 to $120, much lower than commercial alternatives.
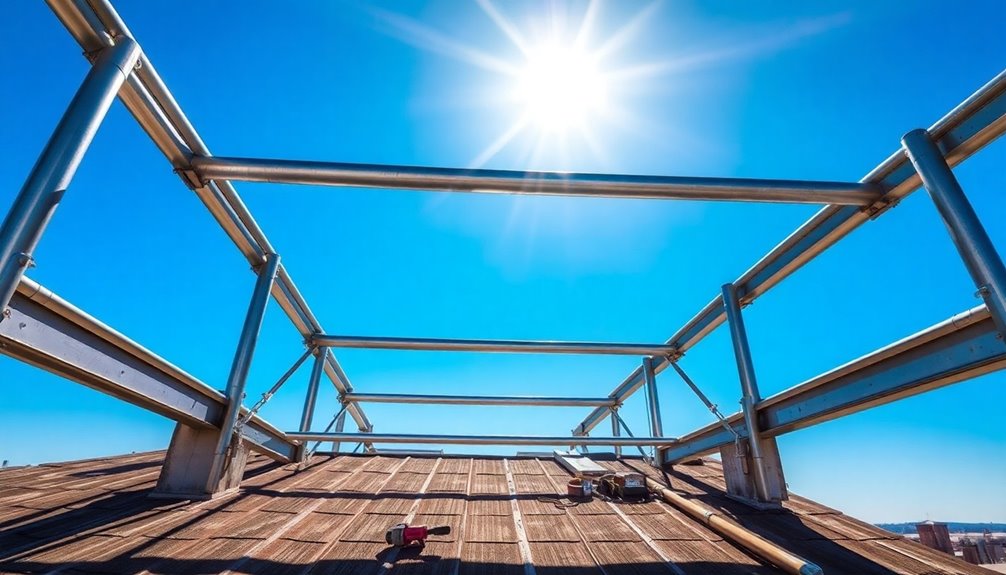
- Lightweight Durability: EMT conduit provides a strong structure that's safe enough to walk on.
- Customizable Design: The modular nature allows easy adjustments and unique features tailored to your needs.
Building your own roof platform not only enhances your vehicle's functionality but also sparks creativity, enabling you to incorporate features that elevate your outdoor experience.
Maintenance and Care Tips
To keep your DIY roof platform in top shape, you need to conduct regular inspections of all connections and bolts.
Don't forget to apply a protective coating to prevent rust, especially in harsh weather.
Regular Inspections Required
Regular inspections are essential for guaranteeing the safety and longevity of your DIY roof platform.
By routinely checking various components, you can maintain the integrity of your setup and prevent potential failures.
Here are some key areas to focus on during your inspections:
- Connections and Joints: Guarantee all connections on the EMT conduit are secure and tight.
- Signs of Wear: Look for cracks or bending in the conduit that could compromise safety.
- Mounting Brackets: Periodically check that mounting brackets are firmly attached to the vehicle.
- Weight Limits: Verify that your load doesn't exceed the vehicle's roof and rack specifications.
Rust Prevention Techniques
Maintaining the integrity of your DIY roof platform goes beyond inspections; it's also about taking proactive steps to prevent rust from forming.
Start by applying a rust-resistant paint or protective coating to the EMT conduit right after construction. This creates a barrier against moisture and corrosion.
Regularly inspect your roof rack for any wear or scratches, and touch up these areas promptly. When not in use, store the roof rack indoors or cover it to minimize exposure to harsh weather.
Use silicone sealant on all joints and connectors to prevent water ingress that can lead to rust.
Don't forget to clean the roof rack periodically with mild soap and water to remove debris that may trap moisture and promote rust.
Secure Fasteners Check
Every few months, check all fasteners on your DIY roof platform to verify they're tight and secure.
This routine inspection is essential for safety and reliability.
Here are four key steps to guarantee your secure fasteners are in prime condition:
- Inspect Fasteners: Look for signs of wear or corrosion and replace any compromised components.
- Use a Torque Wrench: Confirm all bolts are tightened to the manufacturer's specifications for maximum security.
- Apply Thread-Locking Adhesive: Prevent loosening from vibrations by applying adhesive to bolts and screws.
- Document Inspections: Keep a record of inspection dates and findings to maintain an effective maintenance schedule.
Conclusion
Building your own roof platform using EMT conduit is not only a rewarding project but also a practical solution for various needs. With the right materials and techniques, you can create a sturdy space that enhances your home. Aren't you excited to elevate your outdoor experience? By following safety precautions and maintenance tips, you'll guarantee your platform lasts for years. So gather your tools, get creative, and enjoy the satisfaction of your DIY achievement!