Fixing a hole in your door on a budget is doable with the right approach. First, identify whether you have a solid or hollow core door. For solid doors, use wood filler to fill holes, then sand and paint for a smooth finish. If it's a hollow door, remove it from the hinges, fill with expanding foam, and cover with joint compound. Gather essential tools like a putty knife and sandpaper, and allocate your budget wisely—most materials cost under $30. Keep your door in good shape with preventative measures that can save you time and money in the future. There's more to explore!
Understanding Door Types
When it comes to home repairs, understanding door types is essential for effective maintenance and upgrades. Knowing whether you have a hollow core or solid core door can make all the difference, especially when you need to fix a hole.
Hollow core doors are lightweight and cost-effective, often made with a thin veneer over a cardboard or honeycomb core, making them easy to handle. In addition, selecting the right materials for repairs can be more efficient if you're familiar with top expense tracking tools that help manage costs associated with home maintenance.
Solid core doors, however, offer denser construction, providing better sound insulation and security, as they're typically made from solid wood or composite materials.
If you're dealing with a hole in your door, it's important to first identify which type of door you have. Hollow core doors require different repair techniques compared to solid core doors. For instance, you might need to use a patching compound for a hollow door, while a solid door might require wood filler and sanding.
Additionally, regular maintenance can help prevent extensive damage, extending the lifespan of both types. By understanding your door's construction, you can select the right materials and techniques to effectively fix a hole and guarantee your door remains functional and aesthetically pleasing.
Assessing Damage
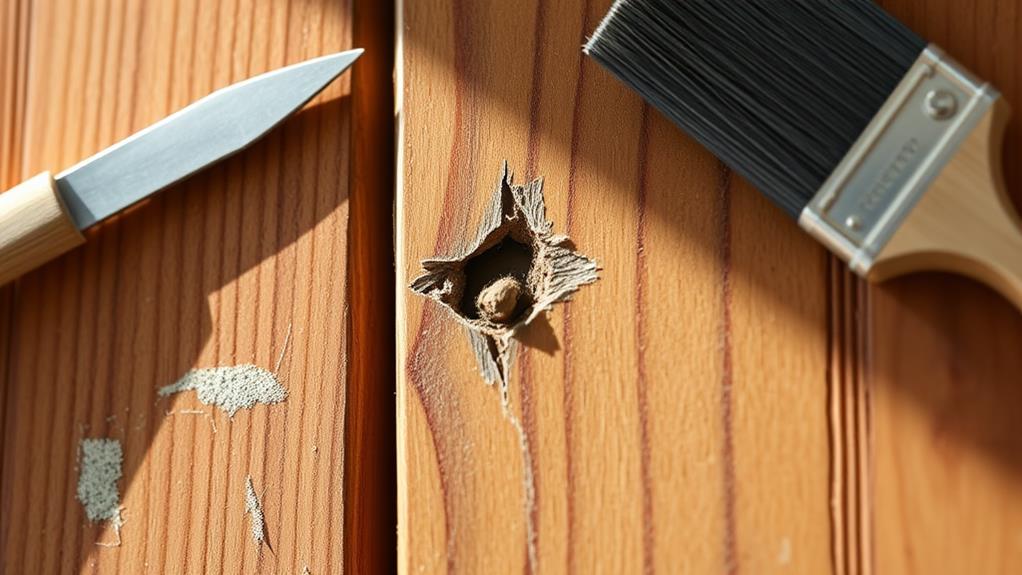
Before diving into repairs, it's vital to evaluate the damage to your door accurately. Start by closely inspecting the hole. You'll need to evaluate the size and shape of the hole, as this will determine the most appropriate repair method. Larger or irregular holes often require different materials than smaller, round ones. Utilizing tools for expense tracking can help you budget for your repair costs effectively.
Next, identify the door material—whether it's solid or hollow. This understanding is important, as the structural integrity and best approach for repair will vary greatly. Look for any additional damage that could affect the door's functionality, like misalignment or warping. If you notice these issues, it might indicate a need for more extensive repairs beyond simply filling the hole.
Also, consider the hole's location. If it's in a high-traffic area, you may need to reinforce the repair to prevent future problems.
Preparing for Repair
As you gear up for the repair, it's essential to create a proper workspace and gather your materials.
Begin by evaluating the damage to your core door. Identify the size and location of the hole, as well as whether the door is solid or hollow. This will guide you in choosing the right repair method. Consider using a reliable app for tracking your repair expenses, as this can aid in maintaining an organized budget and enhance your overall financial management, similar to how expense management apps streamline financial organization.
Next, remove the door from its hinges and lay it on a stable work surface. This setup makes it easier to access the damaged area during repairs.
Before diving into the actual repair, clean the door with a damp rag and mild soap. This step eliminates dirt and grime, ensuring a better bond for any repair materials you'll use.
Once cleaned, grab some 120-grit sandpaper and sand both sides of the door to create a smooth surface. Follow up with 220-grit sandpaper for a fine finish.
After sanding, wipe away any remaining dust to prepare the surface for the application of repair materials and paint. With everything prepped, you're well on your way to successfully repairing that hole!
Tools and Materials Required
When tackling home repairs, having the right tools and materials on hand makes all the difference.
It's crucial to create a budget for your repairs, much like using a budgeting app such as YNAB (You Need a Budget) to allocate funds effectively.
You'll need essentials like a putty knife, cordless drill, and sandpaper, along with repair materials such as wood filler and drywall screws.
Gathering these items beforehand guarantees you're ready to address any issue that arises efficiently.
Essential Tools Needed
To successfully tackle home repairs, you'll need a solid set of essential tools and materials at your disposal. Having the right tools can make all the difference when fixing a hole in your door.
Here's a quick list of what you'll need:
- Putty Knife: Perfect for applying and smoothing out wood filler or plaster.
- Cordless Drill: Useful for driving screws into the door for added support.
- Sharp Utility Knife: Essential for trimming excess foam or filler before painting.
- Sandpaper: Various grits will help prep surfaces for a smooth finish.
You'll also want some construction adhesive to reinforce your repairs.
For smaller holes, wood filler is ideal, while larger holes might require plywood or a patch for durability.
Don't forget drywall screws—they'll provide extra stability for your patched area, ensuring it stays intact over time.
A hammer or catspaw can help reshape any damaged areas, making your repair look more seamless.
With these essential tools and materials, you'll be well-prepared to handle any door repair project on a budget!
Required Repair Materials
Gathering the right repair materials is vital for successfully fixing holes in your door. If you're dealing with small holes, wood filler or epoxy will do the trick. For larger holes in hollow core doors, you might need plywood or a patch for effective repairs.
You'll also need some important tools. A putty knife is great for applying filler, while a drill is necessary for securing patches. Sandpaper will help you smooth the surfaces before finishing touches. Don't forget drywall screws, which provide support for your repair, and construction adhesive to bridge any gaps.
To guarantee a seamless finish, have primer and paint on hand that matches your door's original color. This step is significant for making your repair look professional.
For enhanced longevity and effectiveness, consider using quality materials like BONDO All-Purpose Putty and a spreader tool.
With these materials at your disposal, you're well-equipped to fix that hole in your door and restore its appearance without breaking the bank. So, gather your supplies, and get ready to tackle that repair!
Steps for Repairing Solid Core Doors
Repairing solid core doors is often straightforward, and with a bit of patience, you can restore their integrity while also considering eco-friendly practices in your home improvement projects.
For instance, using sustainable materials and sustainable packaging solutions can greatly reduce your environmental impact.
Here are the steps you'll need to follow:
- Remove the Door: Take the door off its hinges for easier access and a stable working surface.
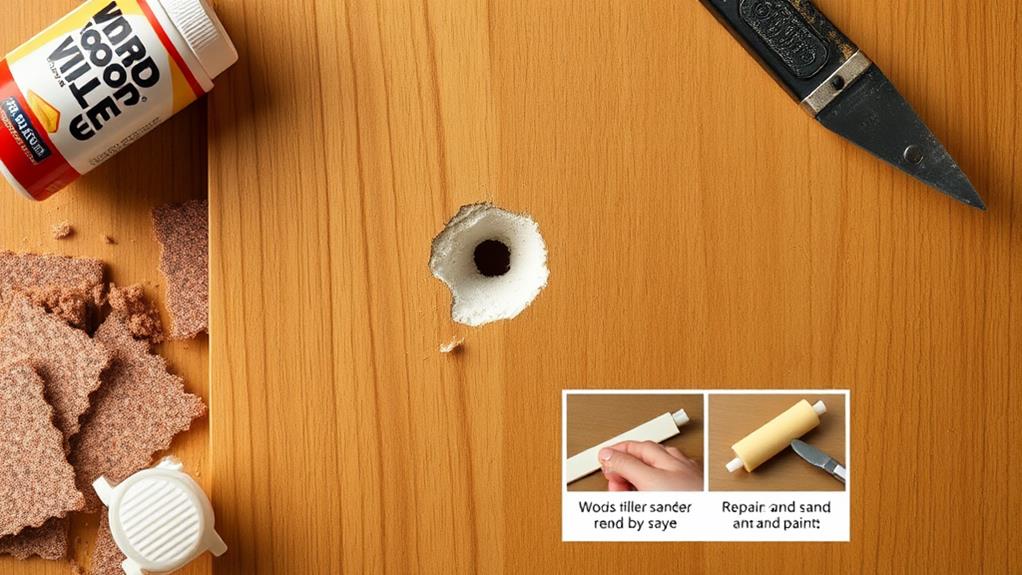
- Fill the Hole: For round holes, use a wooden dowel that matches the hole's diameter. Cut it to the door width plus one inch, coat it with carpenter's glue, and insert it flush into the hole. For irregular holes, mix wood filler with hardener and clamp wood over the hole.
- Sand and Smooth: Once the filler or dowel is dry, sand the area smooth. This will guarantee a seamless look.
- Prime and Paint: Finally, prime and paint the repaired area to match the door's original color.
Steps for Repairing Hollow Core Doors
Hollow core doors can be a bit tricky to fix, but with the right approach, you can restore them to their former glory. Start by removing the door from its hinges and laying it flat on a stable surface. This makes it easier to access the hole you need to fix.
For those managing their finances closely, utilizing a budgeting tool like YNAB can help guarantee you have the funds for DIY repairs.
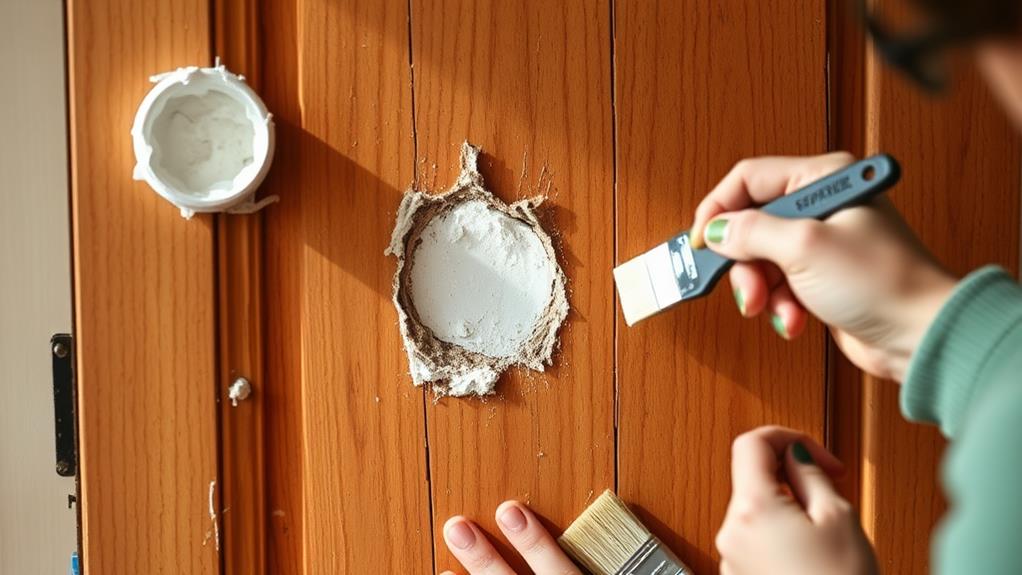
If the hole goes through both sides of the door, clamp a piece of wood over one side. This provides support while you fill the hole with expanding foam insulation. Spray the foam into the hole, letting it expand and fill the cavity.
Once it's fully cured, trim any excess foam with a utility knife.
Next, apply drywall joint compound over the patched area. Sand it smooth between layers to create a level surface. This step is essential for making sure the repair looks seamless.
Cost-Effective Repair Solutions
When it comes to home repairs, cost-effective solutions can save you time and money without sacrificing quality.
By tackling door repairs yourself, you can greatly cut costs compared to hiring a professional.
Additionally, understanding how to balance savings and investments can help you allocate funds for home maintenance without straining your budget.
Here are four effective options to evaluate:
- Wood Filler or Epoxy: For small holes, these materials can cost as little as $5 and provide a smooth finish.
- Plywood Patches: If you're dealing with larger holes, plywood patches are sturdy and available for around $10-$20.
- Drywall Screws and Construction Adhesive: These essentials can be combined for under $15, reinforcing your repairs effectively.
- Primer and Paint: Investing $10-$30 in quality primer and paint will enhance your door's appearance and longevity.
Preventative Measures for Longevity
Maintaining your doors not only helps you avoid costly repairs but also guarantees they last longer and function properly. To achieve this, implement some key preventative measures.
Start by installing door stoppers to absorb impacts from swinging doors. This simple addition can greatly reduce the occurrence of holes and dents. Additionally, consider using bill tracking apps to manage financial responsibilities associated with home repairs, ensuring you stay on budget.
Regularly inspect your doors for signs of wear and tear. Early detection allows you to address minor issues before they escalate into major repairs.
Additionally, create a home maintenance schedule that includes checking door alignment and functionality. Proper door alignment prevents stress on hinges and maintains the structural integrity of your doors.
In high-traffic areas, reinforce hollow doors with wooden shims or additional support. This enhances their durability and helps them withstand daily use.
Educate everyone in your household about proper door usage to minimize slamming and rough handling, which can lead to damage over time.
Conclusion
Fixing a hole in your door doesn't have to drain your wallet or your spirit. Imagine the satisfaction of transforming a damaged door into a seamless part of your home, all while saving money. With a little effort and the right tools, you can restore not just the door, but also your sense of accomplishment. Embrace this DIY project and turn a frustrating blemish into a demonstration of your resourcefulness and creativity. Your home deserves it!