
Upgrading your garage to a 60A service lets you power your workshop efficiently without hiring a pro. You can manage basic tools, lighting, and multiple 1.5 hp tools all at once. To verify this upgrade suits your needs, evaluate your future tool requirements. Planning your electrical layout is essential for ease of use and safety. Plus, knowing when to choose between 110V and 220V circuits can help too. There’s much more to reflect on for setting up your ideal workspace!
Understanding the Benefits of a 60A Garage Upgrade
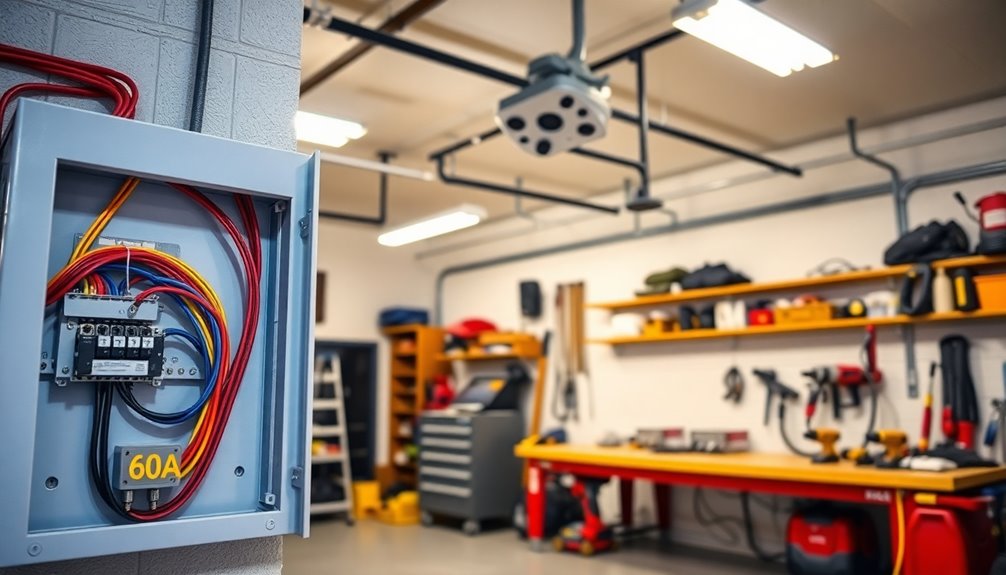
When considering a garage upgrade, have you thought about the advantages of a 60A service? This option can power basic woodworking tools, lighting, and general outlets effectively, making it perfect for hobbyists and small-scale operations.
Many users have successfully run multiple 1.5 hp tools simultaneously on a 60A service, proving it can handle typical workshop demands. You can easily support essential tools like a dust collector and table saw, but you’ll need to manage your load carefully to prevent overload.
Plus, upgrading to a 60A main panel is often less expensive than a 100A one, offering a balance between performance and cost. Just remember to plan for future equipment needs to maximize your garage’s potential. Additionally, having a reliable expense tracking app can help you manage the costs associated with your garage upgrades effectively.
Assessing Your Power Needs: Is 60A Enough?
How do you know if a 60A service meets your power needs? Start by evaluating your tools. If you’re using basic woodworking equipment, 60 amps might be sufficient.
However, if you plan to run high-demand tools like air compressors or welders simultaneously, you could exceed this limit quickly. For example, a 1.5 hp Craftsman hybrid saw and dust collector each draw around 15-20 amps. When combined, those numbers can add up fast.
Running high-demand tools like air compressors or welders can quickly exceed a 60A service limit.
Additionally, if you’re looking to use a kiln that requires 29 amps plus 20% for extended use, the total can surpass 60 amps. To guarantee your workshop is future-proof, evaluate the total amperage draw based on your anticipated simultaneous usage. Furthermore, consider the financial benefits of used cars as an alternative source of funds for upgrades, should you need to invest more in electrical capacity.
Upgrading to a 100A service may be wise.
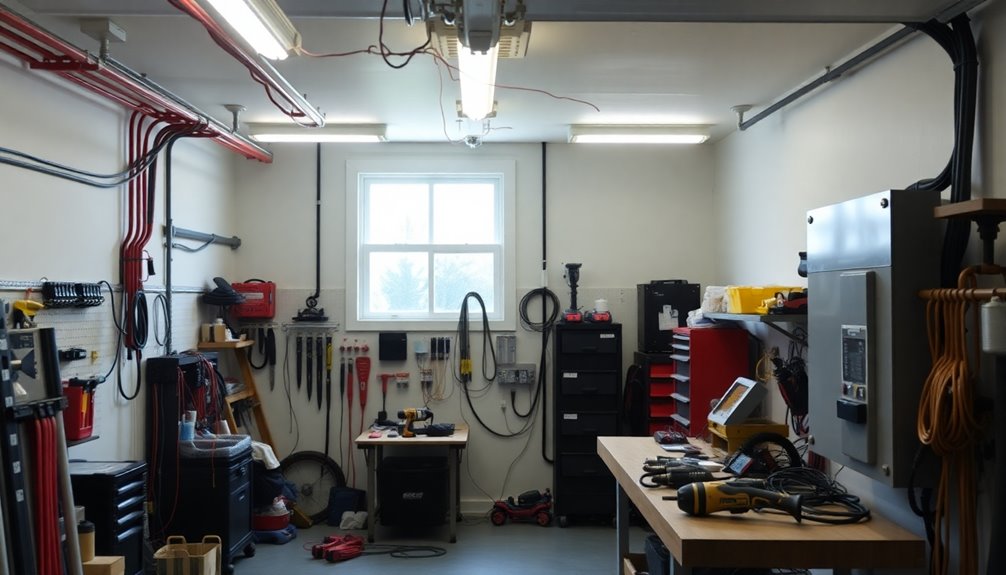
Essential Tools for Your Garage Workshop
To create an efficient garage workshop, you need to invest in essential power tools like a table saw, planer, and sander. Don’t forget about safety equipment, which is just as important for protecting yourself while you work. Additionally, regular maintenance of your tools ensures they function optimally, extending their lifespan and improving overall efficiency.
Essential Power Tools
A well-equipped garage workshop is essential for tackling a variety of woodworking and fabrication projects, and having the right power tools makes all the difference.
You’ll want to invest in a table saw, planer, sander, and dust collector, with a 1.5 hp Craftsman hybrid saw and a 1.5 hp Delta dust collector being great options.
If you’re using high-demand tools like a 60-gallon air compressor or welding equipment, you’ll need to carefully consider your electrical load. Verify your panel can handle the total amperage draw, especially when multiple tools are running simultaneously.
Dedicated circuits for larger stationary tools, connected to a suitable amp breaker, can prevent overload and keep your workshop operating safely and efficiently.
Safety Equipment Necessities
Having the right power tools in your garage workshop is just the beginning of creating a safe and efficient workspace.
You need to prioritize safety equipment to protect yourself from potential hazards. Start with safety goggles to shield your eyes from dust and flying debris when using tools like saws and sanders.
Dust masks are essential too, especially when sanding or working with materials that generate harmful dust. Don’t forget hearing protection, such as earplugs or earmuffs, to guard against loud equipment like table saws.
Keep a first-aid kit stocked with bandages and antiseptics easily accessible for minor injuries.
Finally, make certain a proper fire extinguisher is on hand for emergencies involving wood and flammable liquids.
Safety first!
Planning Your Electrical Layout: Key Considerations
Crafting an efficient electrical layout is essential for maximizing the functionality of your garage workspace. Begin by determining where your major tools and equipment will go, ensuring easy access to power sources while avoiding tripping hazards.
Identify each tool’s power requirements, including amperage, to set up dedicated circuits for high-demand equipment. For convenience, install 120-volt duplex outlets every five feet, about four feet off the ground.
Document your layout with a visual diagram, marking outlet locations and obstacles to enhance safety and efficiency. Finally, check that your electrical panel inside has enough capacity for future expansion, considering the total load and the potential need for multiple circuits as you add new tools to your workspace. Additionally, consider implementing regular maintenance to ensure your electrical system remains safe and efficient over time.
Choosing Between 110V and 220V Circuits
When you’re choosing between 110V and 220V circuits, consider the power requirements of your tools and how often you’ll be using them. Higher-demand equipment may need 220V for peak performance, while smaller tools can easily work with 110V. Also, think about installation complexity, as setting up dedicated circuits for 220V might require more planning and effort. Additionally, opting for more efficient systems, such as heat pumps with high energy efficiency, can help you save on long-term operational costs.
Power Requirements Comparison
Choosing the right voltage for your garage setup can greatly impact your efficiency and safety. If you’re using standard household appliances and smaller tools, a 110V circuit is usually sufficient.
However, for high-demand equipment like air compressors and welders, you’ll need a 220V circuit. These tools require less amp draw to deliver the same power, making them more efficient and reducing the risk of tripped breakers.
A 220V circuit typically needs a dedicated breaker rated between 20A and 60A, depending on your equipment’s power requirements.
When planning your workshop, calculate the total load of all tools to guarantee you choose the right voltage and circuit to avoid any electrical issues.
Tool Compatibility Considerations
Understanding the compatibility of your tools with 110V and 220V circuits is essential for optimizing your garage’s efficiency. Here’s what to evaluate:
- 220V tools generally draw less amperage, making them ideal for high-demand equipment.
- Larger tools, like a 60-gallon air compressor, often require a dedicated 220V circuit.
- Using 110V outlets may limit simultaneous device usage, risking overloads.
- Verify the amperage and voltage requirements of each tool before planning circuits.
- Remember that 220V circuits typically need larger gauge wire (6 AWG or 4 AWG).
Installation Complexity Factors
Deciding whether to install 110V or 220V circuits can greatly impact your garage’s efficiency, especially if you’re dealing with power-hungry tools.
For heavy-duty equipment like welders or air compressors, a dedicated 220V circuit is often the better choice. It uses less amperage while providing the same power output, helping to prevent overloads on your main breaker.
If you’re considering multiple high-draw tools, assess whether your current 60A service is sufficient or if you’ll need to upgrade. Installing a sub panel can also help distribute power effectively.
Installing Dedicated Circuits for High-Demand Tools
When you’re setting up a garage workshop, installing dedicated circuits for high-demand tools is essential for ideal performance and safety.
Here are some key points to take into account:
- Each 220-volt tool, like a plasma cutter or 60-gallon air compressor, needs its own dedicated circuit.
- Aim for a minimum of 20A for these circuits to prevent overloads.
- Calculate the total amperage draw of all tools for proper circuit sizing.
- Install GFCI breakers for circuits near moisture to enhance safety and meet electrical codes.
- Use 6 AWG or 4 AWG wire for feeder runs based on load and distance.
Additionally, ensure to monitor humidity levels in your workshop to prevent moisture-related issues that can compromise both tool performance and safety.
Safety First: Wiring Techniques and Best Practices
To guarantee a safe and efficient workshop, you must employ proper wiring techniques and best practices. Safety first is essential when determining the right wire gauge; for a 60A service, use 6 AWG or 4 AWG wire based on the run’s distance.
Protect all circuits in damp areas with GFCI breakers to prevent electrical shock and comply with local codes. Install dedicated circuits for high-draw tools like air compressors or welders, ensuring you won’t overload or trip breakers during use.
Opt for metal boxes and flex conduit to enhance durability and flexibility. Regularly assess your power needs and circuit loads to eliminate hazards and accommodate future upgrades safely. Additionally, using rigid foam board insulation can help maintain optimal temperature in your workshop, improving overall energy efficiency.
How to Document Your Electrical Layout Effectively
To effectively document your electrical layout, start by creating clear visual diagrams that show the placement of tools, outlets, and lighting. Incorporate photographs of your installation process to serve as a helpful reference down the line. Don’t forget to use consistent wiring color codes to improve clarity and facilitate future modifications. Additionally, ensure financial clarity by utilizing essential categorization tools that can help in managing any expenses related to your workshop upgrades.
Visual Layout Diagrams
Creating a visual layout diagram for your workshop can greatly enhance your efficiency and safety. By mapping out your space, you’ll guarantee ideal power access while minimizing tripping hazards.
Here are some key elements to include in your diagrams:
- Mark locations of tools and workstations
- Indicate existing electrical outlets
- Document amperage requirements for each tool
- Use color coding for 110V and 220V circuits
- Label each circuit as general-use, dedicated, or lighting
With these visual layout diagrams, you’ll not only plan effectively but also make future upgrades easier.
Remember to keep your diagrams accessible for troubleshooting and modifications, guaranteeing your workshop remains a safe and efficient workspace.
Photographic Documentation Techniques
A well-organized visual layout diagram sets the stage for effective documentation of your electrical setup.
Use a digital camera or smartphone to capture clear, well-lit photos of your electrical layout at each stage, highlighting outlets, junction boxes, and circuit breakers. Label each photograph with descriptions, measurements, and wiring details to create a thorough record.
Don’t forget before and after photos of any modifications; these help track changes and troubleshoot future issues. Additionally, document the amperage requirements for each tool near its corresponding photo.
Finally, organize your photographic documentation into a binder or digital folder categorized by workshop areas, making it easy to reference specific sections of your electrical layout when needed.
Wiring Color Codes
Properly documenting your electrical layout requires a clear understanding of wiring color codes, as these codes not only enhance safety but also simplify troubleshooting.
Here’s how you can effectively document your setup:
- Use standardized colors: Black for hot wires, white for neutral, green or bare for ground.
- Create a detailed schematic of your workshop, marking outlets, switches, and circuits with their amperage ratings.
- Label all circuit breakers and outlets clearly to match their specific functions.
- Maintain a log of wire types and sizes, like 12 AWG for 20A and 10 AWG for 30A circuits.
- Take photographs of your wiring layout before covering walls, capturing junction box and conduit positions for future reference.
This approach will guarantee you manage your amp panel efficiently.
Understanding Local Electrical Codes and Permits
Before diving into your garage upgrade, it’s vital to understand local electrical codes and permits, as they can greatly impact your project’s success.
Local requirements often dictate whether you need a building permit for tasks like installing new circuits or upgrading your service panel. Ignoring these regulations can lead to fines, delays, and safety hazards.
Compliance with the National Electrical Code (NEC) is fundamental, but remember that your area may have additional amendments. For significant upgrades, like increasing service size or adding multiple circuits, expect to arrange professional inspections to guarantee safety and compliance. Additionally, consider utilizing budgeting apps like YNAB that can help you manage your expenses during the upgrade process.
Always check with local authorities first to avoid complications and make sure your garage functions efficiently and safely.
Selecting the Right Wiring and Components
Selecting the right wiring and components can make all the difference in your garage upgrade, especially when it comes to safety and efficiency.
Choosing the appropriate wiring and components is crucial for a safe and efficient garage upgrade.
Here’s what you need to take into account:
- Use 6 AWG or 4 AWG wire for feeders to comply with load requirements.
- Implement dedicated circuits for high-amperage tools, like 220-volt equipment.
- Install multiple 30A 220-volt outlets for heavy machinery to enhance flexibility.
- Utilize GFCI breakers for general use receptacles, especially in damp areas.
- Verify your new panel has at least 20 spaces for future expansion.
- Additionally, ensuring timely replacement of electrical components can prevent costly failures and enhance overall safety.
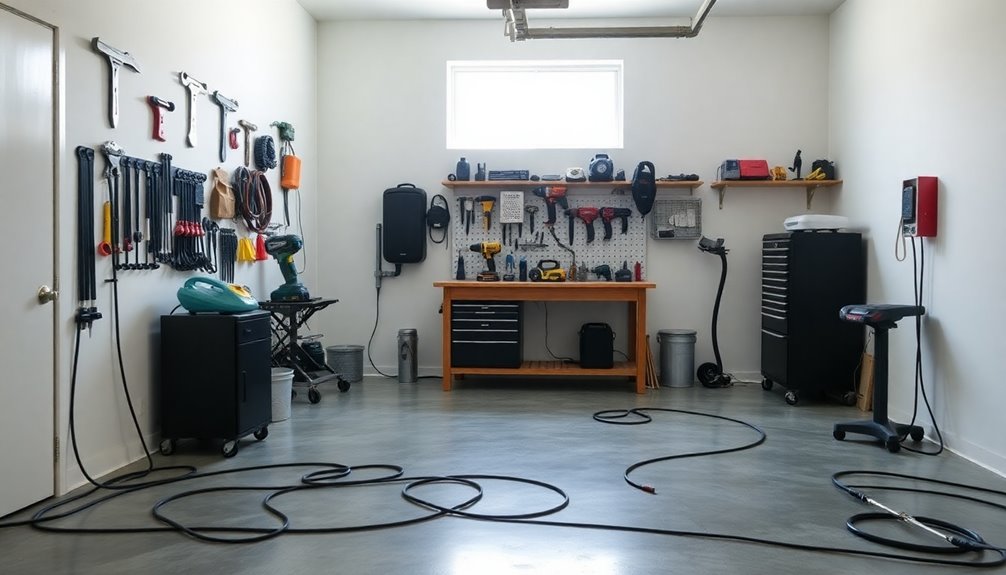
Tips for Efficiently Organizing Your Workshop
To maximize your workshop’s efficiency, start by grouping similar tools together based on their use.
Think about installing convenient storage solutions like pegboards or cabinets to keep everything organized and within reach.
This thoughtful layout not only improves workflow but also makes your workspace safer and more enjoyable to use.
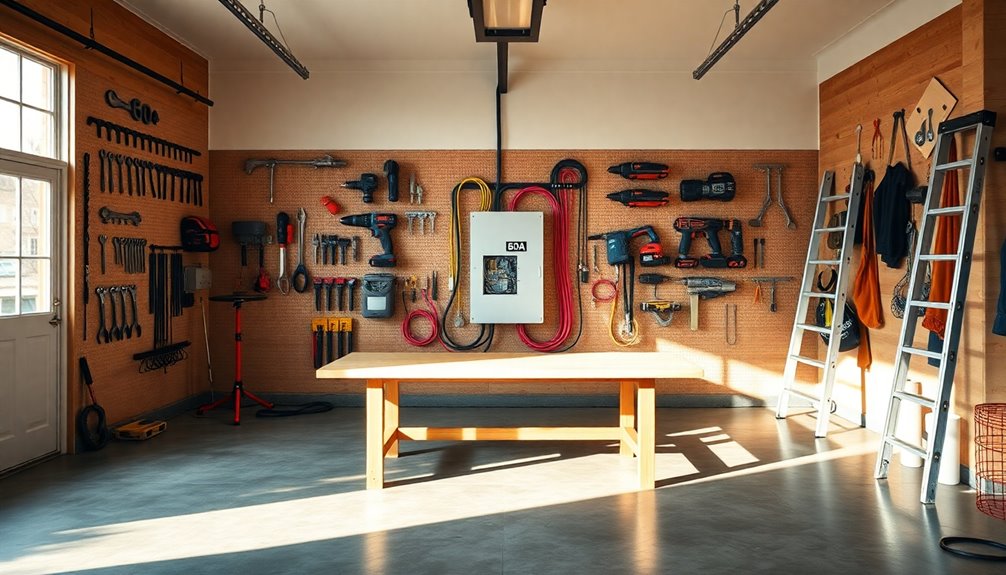
Tool Layout Strategy
While organizing your workshop, it’s crucial to implement a thoughtful tool layout strategy that enhances efficiency and minimizes workflow interruptions.
Here are some tips to help you design an effective layout:
- Dedicate zones for stationary tools like table saws and dust collectors.
- Place electrical outlets every five feet at a height of four feet.
- Use high outlets for cord reels to keep your workspace tidy.
- Group tools that require similar power sources together.
- Sketch a layout plan to visualize workflow and avoid obstacles.
Efficient Storage Solutions
Efficiently organizing your workshop not only saves you time but also enhances your overall productivity.
Start by utilizing vertical storage options like wall-mounted shelves and pegboards to keep your frequently used tools accessible while maximizing floor space. Implement clear storage bins with labels to categorize small parts, making it easy to find what you need quickly.
Designate specific zones for various activities, such as woodworking or tool maintenance, to streamline your workflow and reduce clutter. Consider mobile workstations or tool carts for flexibility in arranging your space.
Finally, incorporate overhead storage solutions, like ceiling-mounted racks, to store seasonal items, keeping your workspace clear and organized for daily tasks.
These efficient storage solutions will transform your workshop experience considerably.
Troubleshooting Common Electrical Issues in Garages
Have you ever been frustrated by electrical issues in your garage? You’re not alone. Common problems can disrupt your workflow, so it’s vital to troubleshoot effectively.
Here are key issues to check:
- Overloaded circuits causing tripped breakers
- Inadequate power supply when using multiple tools
- Voltage drops from undersized wiring
- Grounding and bonding issues leading to shocks
- Corrosion from dust and moisture affecting connections
Start by evaluating your tool usage and amperage draw to avoid overloaded circuits.
Confirm your wiring is appropriate for the distance and load. Proper grounding and bonding are fundamental for safety.
Finally, use GFCI protection in damp areas and regularly inspect connections for wear to keep your garage functioning efficiently.
Expanding Your Garage’s Capacity for Future Needs
Are you ready to future-proof your garage? Upgrading to a 100 amp subpanel from the start is essential.
This upgrade allows for more circuits and accommodates future needs without complications. By planning for additional circuits now, you guarantee that high-demand tools, like air compressors and welders, can run simultaneously without overloading your system.
Installing multiple dedicated circuits for heavy machinery boosts functionality and prevents circuit trips during peak usage. Aim for a minimum of 20 breaker spaces in your new panel to cover both current and anticipated future needs, especially for larger tools requiring 240V connections.
Regularly reassessing your power needs and documenting existing equipment will aid in efficiently planning for electrical capacity expansions.
Why Professional Consultation May Still Be Beneficial?
While you might feel confident tackling your garage upgrades on your own, consulting a professional electrician can provide invaluable benefits.
Considering garage upgrades? A professional electrician can enhance safety and efficiency while ensuring compliance with local codes.
Here are some reasons why professional consultation is worth considering:
- Guarantee compliance with local codes and regulations for safety.
- Get accurate load calculations to prevent overloads and enhance efficiency.
- Receive recommendations on the right wire sizes and circuit configurations.
- Optimize outlet and switch placement to improve workspace layout.
- Navigate complex installations like grounding and bonding requirements.
Final Thoughts on Creating a Functional Workshop Environment
Creating a functional workshop environment hinges on careful planning and execution, especially when it comes to the electrical layout. Start by mapping out the placement of outlets to guarantee easy access to your tools while preventing tripping hazards.
Installing multiple dedicated circuits is vital for efficiently running high-demand equipment, like a 60-gallon air compressor or welding tools. Consider incorporating a 100A subpanel, which offers ample capacity for current and future needs without risking overloads.
Proper wire sizing—typically 6 AWG or 4 AWG for 60A service—is fundamental for safety. Don’t forget to include GFCI protection for circuits in damp areas, assuring compliance with safety regulations while safeguarding your workshop from potential electrical hazards.
Conclusion
To sum up, transforming your garage into a functional workshop is a thrilling task that can be tackled with thoughtful planning and practical upgrades. By wiring wisely and weighing your power needs, you’ll create a space that sparks creativity and productivity. Don’t forget, even if you’re doing it yourself, a little professional perspective can provide priceless peace of mind. So, get geared up for your garage glow-up and enjoy the electrifying experience of crafting your ideal workspace!


Average Rating