Deck board seams are crucial for your deck's strength and lifespan. They help with water drainage and prevent rot when properly gapped and staggered. Regular inspection lets you spot damage early, like discoloration or loose fasteners. To repair frugally, use essential tools to replace damaged boards and seal gaps with wood filler. Reinforcing weak areas keeps your deck stable. You'll want to keep up with maintenance to avoid costly fixes down the line, so explore more to learn effective strategies.
Understanding Deck Board Seams
When you think about your deck, don't overlook the importance of deck board seams. These gaps between adjacent deck boards play an important role in water drainage and preventing moisture buildup, which can lead to wood rot. Choosing sustainable materials for your deck can help support eco-friendly practices, reducing the environmental impact of your outdoor space. Additionally, opting for sustainable materials can further enhance your deck's resilience and longevity.
To guarantee your deck remains structurally sound, it's necessary to maintain properly staggered seams. This not only enhances the visual appeal but also helps distribute weight evenly across the deck. Aim for a gapping of 1/8 to 1/4 inch to accommodate wood expansion and contraction due to moisture changes.
Regular maintenance, including cleaning and sealing these seams, is crucial to prolonging your deck's lifespan and avoiding costly repairs. Keep a close eye on seams for signs of lifting or gaps to catch any issues early. Additionally, consider using sustainable packaging solutions when purchasing materials for repairs to further enhance your eco-friendly efforts.
Common Issues With Deck Board Seams
Maintaining properly staggered seams is essential, but even with care, common issues can arise with deck board seams.
Seasonal moisture changes often lead to expansion and contraction, causing gaps or even lifting of the boards. Improper installation techniques, like inadequate fastening or misalignment, can worsen these issues, leaving visible gaps that weaken the structural integrity. Regular inspections are critical; look for early signs of wear, such as splintering or separation, so you can address them before they escalate. Additionally, water pooling in gaps can lead to wood deterioration and attract pests. Using financial management tools can help you budget for ongoing maintenance and repairs to keep your deck in top shape. Understanding savings goal setting can also aid in planning for larger repair projects.
To minimize these problems, guarantee proper gapping between deck boards during installation, which is key for accommodating natural expansion and contraction. Utilizing expense categorization tools can help you budget for ongoing maintenance and repairs to keep your deck in top shape.
Follow this repair guide to keep your deck in top shape.
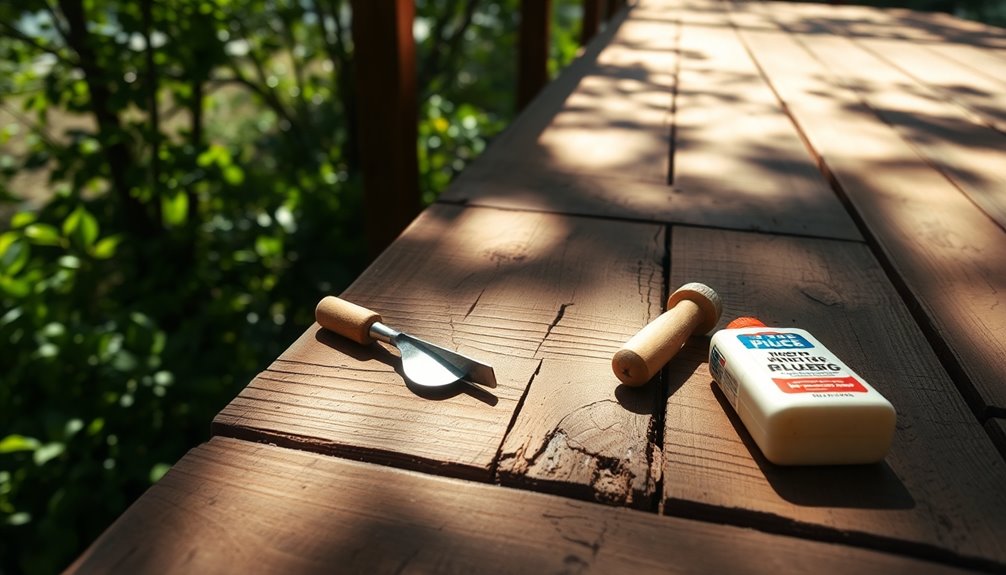
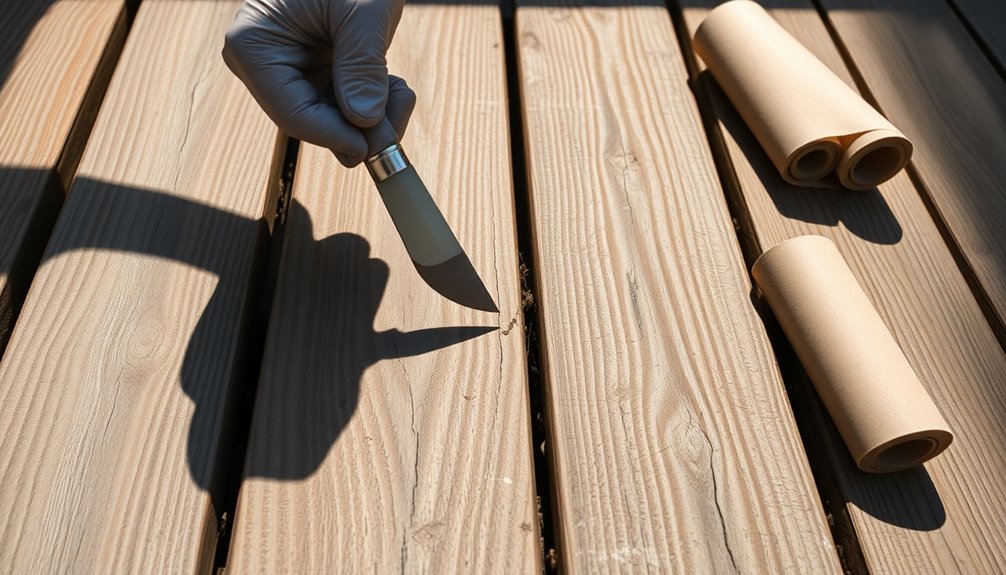
Tools Needed for Seam Repairs
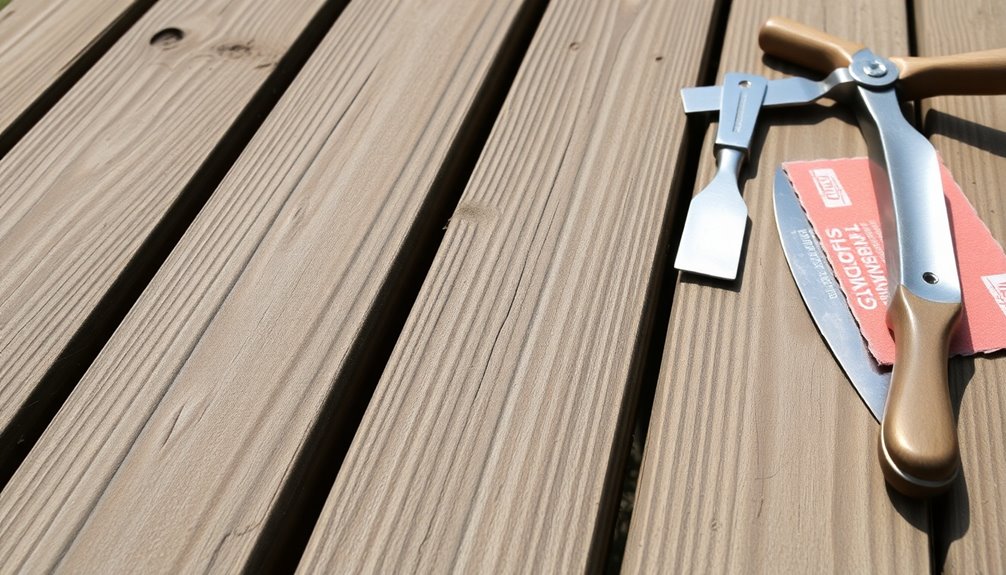
Proper tools are essential for effective deck board seam repairs. Start with a deck wrecker tool or pry bar to remove old boards and access the seams easily.
You'll need a circular saw or handsaw to cut new boards to fit snugly into the existing gaps. A drill or impact driver is vital for backing out screws from lifted or damaged boards, making removal and replacement hassle-free. Additionally, using expense management apps can help you keep track of the costs associated with your repair projects. Many of these apps offer receipt scanning features that reduce manual entry and enhance accuracy in tracking expenses.
Once you're ready to secure new boards, use deck screws or hidden fasteners for a seamless finish.
Don't forget to wear safety glasses and gloves to protect yourself while working, particularly when cutting or handling materials. Utilizing tools can enhance financial management and efficiency in your repair projects.
With the right tools, your deck repairs will be efficient and successful.
Inspecting Your Deck for Damage
When inspecting your deck for damage, start with a visual assessment to spot any signs of wear or rot. Pay close attention to the structural integrity, checking the joists and beams for any issues. Finally, look for moisture damage, as this can lead to severe rot and compromise your deck's safety. Additionally, consider using budgeting apps to manage repair costs effectively, ensuring you stay within your financial means. Utilizing a budgeting app like YNAB (You Need a Budget) can help you prioritize spending on necessary repairs while also planning for future maintenance. Implementing a structured budgeting framework will not only assist in managing current expenses but also align your repairs with your long-term financial goals.
Visual Damage Assessment
As you assess the condition of your deck, pay close attention to visible signs of damage that could indicate deeper issues.
Inspect the deck boards for rot, looking for dark discoloration or soft spots, which may mean replacing deck boards is necessary. Check for gaps or lifting between boards, signaling that moisture changes might require adjustments.
Don't overlook splintering or cracking along the edges; these not only affect aesthetics but also pose safety risks.
While you're at it, examine the joists and beams beneath the deck. Any signs of damage or rot in these supporting structures need immediate attention.
Finally, inspect fasteners for rust or protrusion, as these issues can compromise the integrity of your deck.
Structural Integrity Check
After evaluating visible damage, it's important to check the structural integrity of your deck.
Start by inspecting the joists and beams for signs of rot or damage; compromised structural elements can pose safety hazards.
Look closely at the deck boards for extensive wear, rot, or insect damage, as these conditions can impact overall integrity.
Pay attention to any gaps between deck boards and joists, which may indicate lifting or movement needing immediate attention.
Finally, evaluate the condition of the fasteners; loose or corroded screws and nails can weaken connections between boards and joists.
Regular inspections, at least once a year, can help you identify minor issues early, preventing more extensive repairs down the line.
Moisture and Rot Inspection
How can you guarantee your deck remains safe and sound? Start by regularly inspecting the boards for signs of moisture, like discoloration or a damp feel. Prolonged exposure can lead to rot and structural damage.
Check the seams between deck boards for gaps or lifting, which indicate moisture infiltration. Look for visible mold or mildew around the seams; these are clear signs of moisture retention that could result in wood decay.
As you walk on the deck, pay attention to any soft or spongy areas—these could signify rotting wood beneath the surface, especially near joints and seams.
Finally, inspect the underlying joists for rot, as compromised joists can cause lifting of the boards and require immediate attention.
Removing Loose Fasteners
Start by inspecting the condition of the fasteners holding your deck boards in place.
If you find any loose screws or nails, it's essential to re-secure those boards to prevent further gaps and damage. Effective management of these fasteners will help guarantee a safer and more stable deck. Additionally, establishing a centralized system for tracking maintenance tasks can help ensure you stay on top of repairs and inspections in the future. Regular reviews of financial health can also assist you in budgeting for necessary home repairs and maintenance, allowing for proactive measures rather than reactive fixes.
Inspect Fastener Condition
Inspecting your deck's fasteners is essential, as loose or damaged fasteners can lead to gaps and instability in the surface. Start by checking your deck boards for any loose fasteners. Use a pry bar to lift any lifted boards and inspect the fasteners beneath. Remove protruding nails or screws, which can be tripping hazards.
| Fastener Condition | Action Required | Replacement Type |
|---|---|---|
| Rusted screws | Replace | New screws |
| Protruding nails | Remove | N/A |
| Loose fasteners | Tighten or replace | New screws |
| Damaged fasteners | Replace | New screws |
| Secure fasteners | Verify snug fit | N/A |
Pre-drill holes for new screws to prevent splitting.
Re-secure Loose Boards
To re-secure loose boards effectively, first, walk across your deck and pinpoint any areas that feel springy or unstable.
Once you've identified the loose boards, remove any protruding nails or screws with a hammer or pry bar. This prevents further damage during your repair.
Next, pre-drill holes in the deck boards to avoid splitting when driving in new deck screws. Make sure these fasteners penetrate the joists below for a secure hold.
Use appropriate deck screws, whether composite or standard, and drive them in at the correct depth to maintain a flush surface.
Regular maintenance is key, so routinely check and tighten screws to prevent future loosening and extend your deck's lifespan.
Using a Pry Bar to Access Joists
While accessing joists under lifted or damaged deck boards can be tricky, using a pry bar makes the task considerably easier. Start by gently inserting the pry bar between the lifted board and the joist to create leverage. This approach helps you avoid splintering the wood.
| Step | Description |
|---|---|
| 1. Wear Safety Gear | Put on safety glasses and gloves. |
| 2. Insert Pry Bar | Carefully position it between the board and joist. |
| 3. Inspect Joists | Look for signs of rot or damage. |
Taking your time is essential for removing old boards without damaging anything else. Once you access the joists, assess for necessary repairs before reinstalling the deck boards.
Pre-Drilling New Fastener Holes
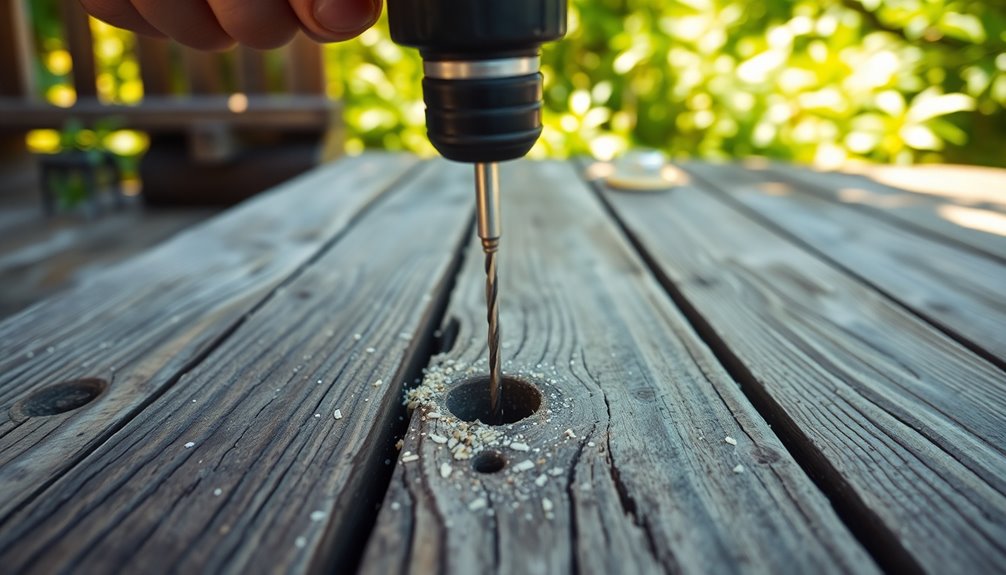
Pre-drilling new fastener holes is essential to avoid splitting your deck boards, especially if you're working with hardwoods or fastening close to the edges.
By using a 1/8 inch drill bit and a depth stop attachment, you can guarantee consistent hole depth and a secure fit for your screws.
This technique not only boosts the stability of your deck but also enhances its appearance by preventing unsightly gaps.
Importance of Pre-Drilling
When you're installing new fasteners in deck boards, pre-drilling is crucial to avoid splitting the wood, especially near the edges. This technique helps maintain the structural integrity of your deck by preventing cracks that can compromise strength.
By using a drill bit slightly smaller than the screw diameter, you'll make insertion easier and reduce the risk of damaging the decking material. It's particularly important in hardwoods, where density can make screws challenging to drive in without causing issues.
Drilling at least 1/4 inch away from the edge guarantees a secure fit and enhances the stability of the connection between the deck boards and joists. Ultimately, pre-drilling promotes the longevity of your deck.
Techniques for Accurate Holes
To achieve accurate holes for your deck's fasteners, it's essential to take a few careful steps before you start drilling. First, mark the locations for pre-drilling on your deck boards with a pencil or chalk to guarantee accuracy and alignment.
Use a drill bit that matches the diameter of the screw's shank to guarantee a snug fit and ideal hold. Position the holes about 1 inch from the edges of the board to prevent weakening the wood structure.
As you drill, maintain a consistent depth to guarantee that all fasteners sit flush with the surface, which helps avoid tripping hazards. Following these techniques will help you create precise and effective fastener holes in your deck.
Securing the Boards to Prevent Lifting
Securing your deck boards is essential for preventing lifting and ensuring longevity. Make sure each board is fastened securely to the joists using appropriate deck screws. Pre-drilling holes can help avoid splitting the wood.
Regularly inspect your deck for loose screws or nails and tighten them during routine maintenance to maintain stability. It's vital to maintain a proper gap between deck boards for drainage; this minimizes moisture retention that can lead to lifting.
For a cleaner look, consider using hidden fasteners to reduce the risk of protruding screws or nails. Additionally, applying a water-repellent sealer every few years protects the wood from moisture changes, further preventing lifting and warping.
Sealing Gaps With Wood Filler
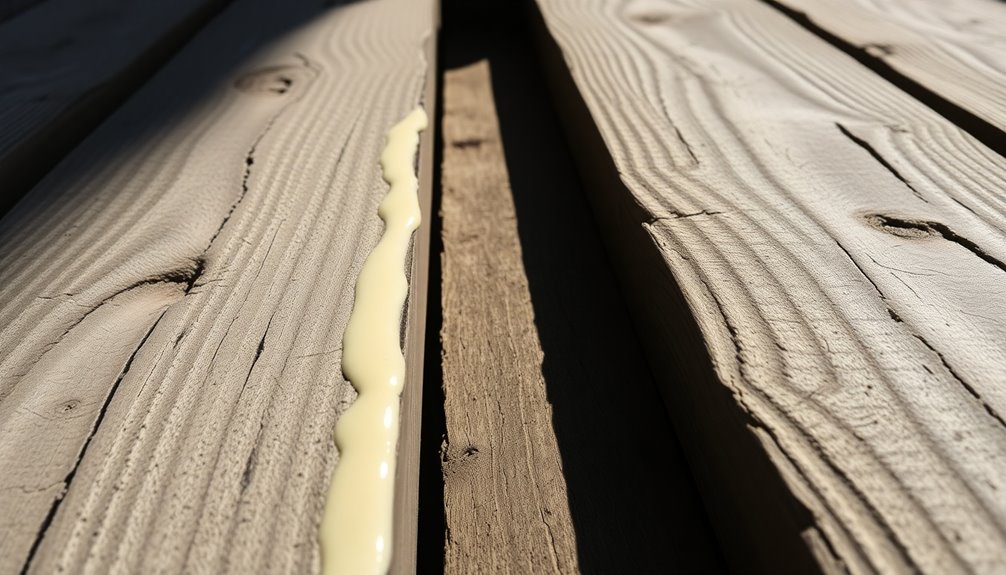
While gaps between deck boards might seem harmless, they can lead to moisture accumulation and potential damage over time. Using wood filler is an effective way to seal these gaps, preventing rot and insect infestation. Choose a wood filler designed for outdoor use, ensuring it's weather-resistant. First, clean the gaps with a stiff-bristle brush, making them dry and debris-free. Apply the wood filler generously, overfilling slightly for shrinkage. After it dries, sand the surface for a smooth finish and consider adding a protective sealant for extra durability.
| Problem | Risk | Solution |
|---|---|---|
| Moisture | Rot | Use wood filler |
| Insects | Infestation | Seal with sealant |
| Gaps | Structural Damage | Repair with filler |
Reinforcing Weak Areas
After sealing gaps with wood filler, it's important to address any weak areas in your deck that could compromise its stability.
Inspect the seams between deck boards regularly for gaps or signs of lifting. Use a pry bar to tighten any loose screws or nails, making sure they're fastened securely to the joists beneath.
For added support at weak areas, consider adding a reinforcing joist or blocking between existing joists, especially where board seams meet. This extra support can prevent further issues.
Remember to pre-drill new screws into the seam areas to avoid splitting, ensuring a solid connection between the boards and joists.
Taking these steps now can help prevent moisture accumulation and future damage to your deck.
Maintaining Your Deck for Longevity
To keep your deck in great shape for years to come, regular maintenance is essential. Clean your wood deck every 2-3 months to remove dirt, mildew, and grime that can cause wood rot.
Every two to three years, apply a water-repellent sealer or stain to protect against moisture and UV damage. Inspect your deck annually for signs of wear, such as lifting boards or loose fasteners, so you can address issues promptly and prevent future damage.
Guarantee proper gapping between deck boards for drainage and air circulation, which helps reduce moisture retention.
Finally, when replacing boards or applying treatments, use matching materials to maintain your deck's aesthetic and durability. Consistent care will guarantee your deck lasts for years.
Cost-Effective Solutions for Deck Care
Maintaining your deck doesn't have to break the bank, especially when you implement cost-effective solutions.
Regularly inspecting and maintaining your wood deck can prevent costly repairs. Early detection of gaps and lifting saves you from extensive damage later. Use appropriately sized deck screws to secure the boards, minimizing movement and keeping seams tight. This reduces moisture infiltration that leads to rot.
Applying a water-repellent sealer every few years at the seams protects your wood deck from moisture damage, extending its lifespan.
If you're tackling a DIY project, stagger the seams during installation to enhance structural integrity. Consider composite materials for decking, as they resist shifting and don't require the same upkeep as traditional wood options.
Conclusion
To sum up, taking care of your deck board seams can save you money and extend the life of your deck. It's a common belief that deck repairs are expensive and complex, but with the right tools and a little know-how, you can tackle these issues yourself. By sealing gaps, reinforcing weak areas, and maintaining your deck regularly, you can enjoy a sturdy, beautiful outdoor space without breaking the bank. So why not give it a shot?