
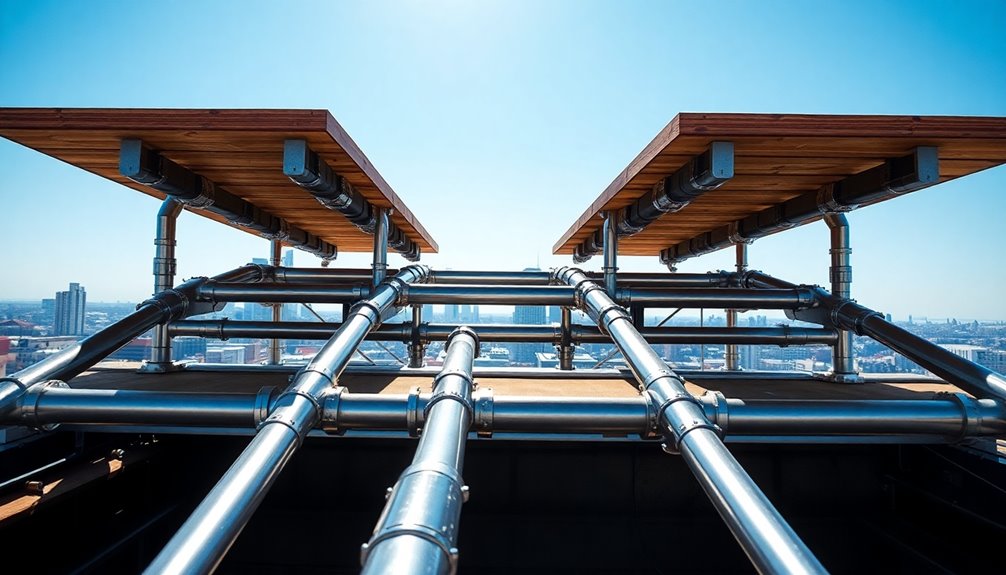
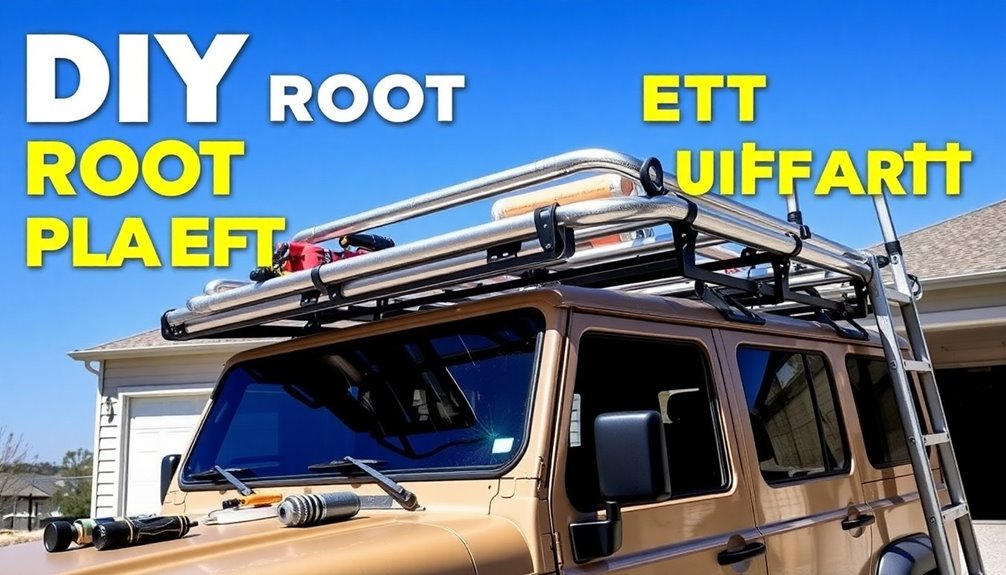
Building a DIY roof platform with EMT conduit is straightforward and offers a sturdy solution for your vehicle. Start by measuring your roof for a precise fit, then gather your materials like galvanized steel conduit and plywood. Cut the conduit, assemble it using connectors, and secure a plywood surface on top for added strength. Finally, paint and seal the platform to protect against the elements. Continue on to discover detailed steps for each stage of your project.
Understanding EMT Conduit and Its Benefits
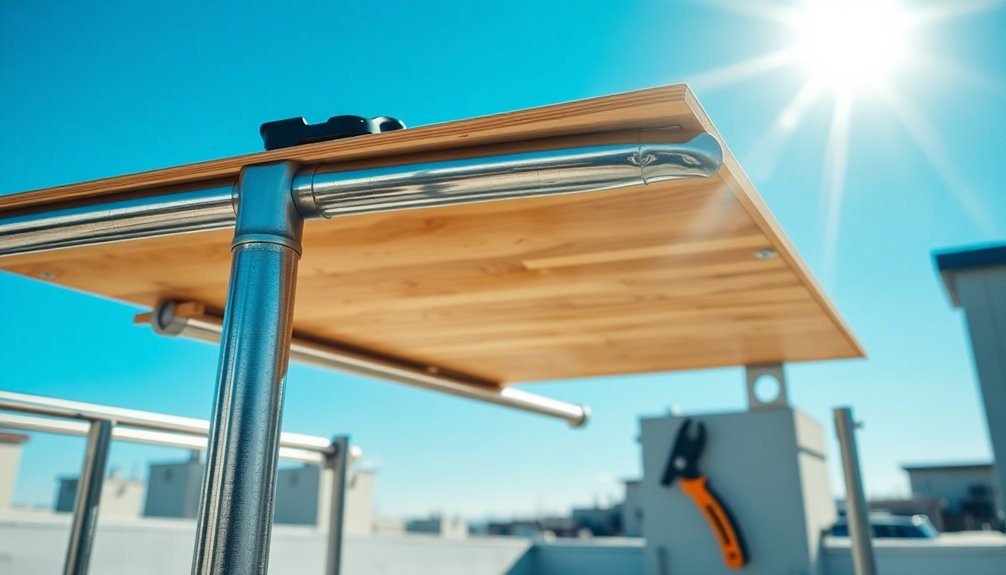
EMT conduit is a versatile and robust material that's perfect for your DIY roof platform projects. This lightweight, galvanized steel tubing offers incredible strength and durability, making it an excellent choice for home improvement tasks, especially when building a roof rack. Additionally, the use of expense tracking tools can help you budget effectively for materials and ensure you stay within your project's financial limits.
Its corrosion-resistant properties guarantee it can withstand various weather conditions, extending its lifespan outdoors. Plus, EMT conduit is readily available at most hardware stores, so you won't have trouble finding it for your projects. Many users find that utilizing user-friendly interfaces can enhance the efficiency of your construction process, similar to how expense management apps streamline financial organization.
You'll appreciate how easy it's to cut, bend, and assemble with simple connectors, eliminating the need for welding or complex tools. With EMT conduit, you can create a sturdy platform that safely supports all your equipment and gear.
Planning Your Roof Platform Design
When planning your roof platform design, start by measuring your vehicle's roof dimensions to guarantee a perfect fit. Make sure to take into account the mounting points for a secure installation.
For materials, galvanized steel electrical conduit is a strong and cost-effective option. You might also want to incorporate wood or additional framing for extra support. Draft a detailed design plan that outlines the number of horizontal and vertical rails, along with diagonal supports for stability. Additionally, consider incorporating eco-friendly materials to align your project with sustainable practices, as this supports sustainable businesses that prioritize environmental responsibility.
Using graph paper or design software can help you visualize your platform layout, ensuring all components are accurately proportioned. Prioritize safety by designing a platform that supports the intended weight, includes secure mounting solutions, and allows for easy adjustments later on. Additionally, consider using sustainable materials to enhance the eco-friendliness of your project.
Gathering Essential Materials and Tools
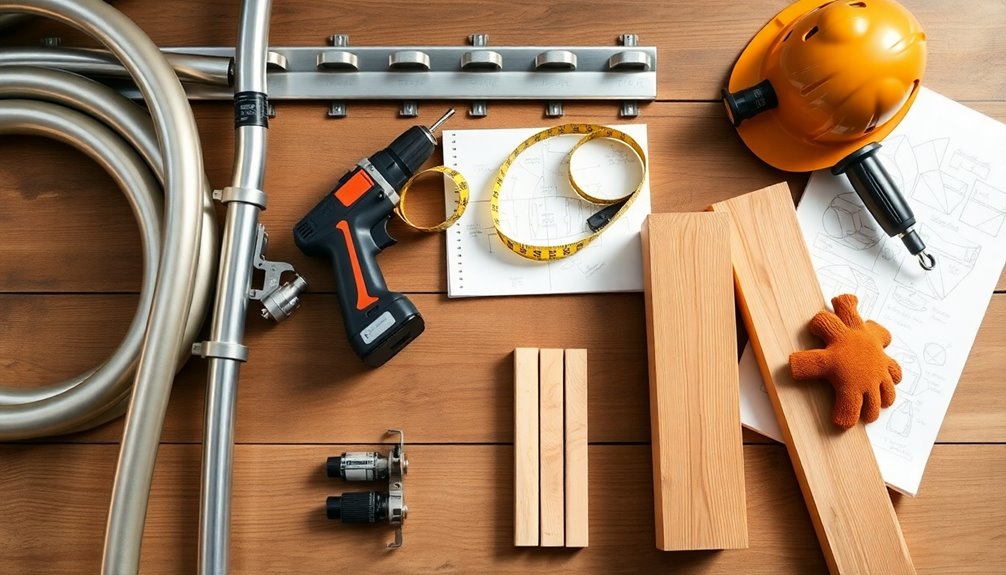
Before you start building your roof platform, gather all the essential materials and tools to guarantee a smooth assembly process.
First, collect galvanized steel electrical conduit (EMT) for its strength and cost-effectiveness. You'll also need a pipe cutter, a 4-inch cutoff wheel, a large vise for stability, and a hex wrench for adjustments. Budget apps can assist you in tracking your expenses effectively during this project. Additionally, using a budgeting app like YNAB can help you manage costs associated with purchasing materials.
Don't forget structural fittings like T-Connectors and flange connectors, which simplify assembly without welding. For decking, grab some wood and bolts, plus optional sealants to protect against weather damage.
Follow material selection tips to ascertain compatibility with your vehicle. Additionally, prioritizing financial literacy will help you make informed decisions regarding your project budget. Finally, prioritize safety gear recommendations like gloves and goggles to keep yourself protected throughout the project.
Measuring Your Vehicle's Roof Area
To guarantee your roof platform fits perfectly, start by measuring your vehicle's roof area accurately.
Begin by capturing the roof dimensions—measure the length and width at the widest points, accounting for any curves or slopes. Use a measuring tape for precision, and record your findings in both inches and centimeters. This will help with material selection and ascertain vehicle compatibility. Timely payments are also a consideration to ensure your budget for this DIY project remains intact. Additionally, consider utilizing AI-driven tools that can help optimize your shopping for materials based on your specific needs.
Don't forget to check for existing mounting points or features that might affect your platform's design and placement.
Finally, consider the height clearance needed for your vehicle to avoid obstructing overhead structures or increasing wind resistance. Regular reviews of savings and investment performance can also support informed decisions regarding any budget adjustments for your DIY project.
These measurement techniques will set a solid foundation for your DIY project.
Cutting EMT Conduit to Size
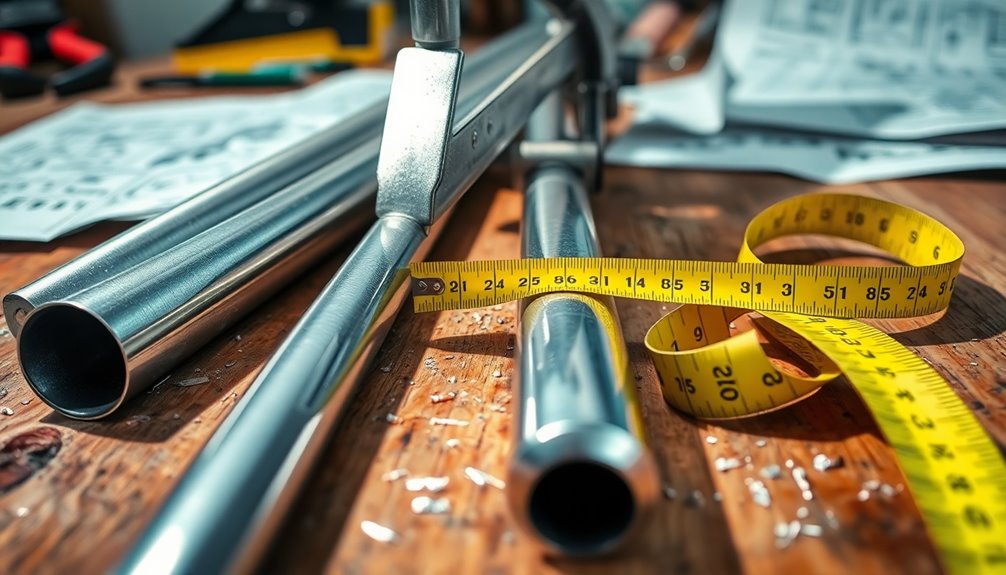
Cutting EMT conduit to size is a crucial step in building your roof platform, and it's important to do it right for a secure fit.
Start by measuring the required lengths accurately, considering your platform's design. Use a 4-inch cutoff wheel for efficient cutting techniques that guarantee clean, precise edges. Budgeting apps can provide insights that help you allocate funds for necessary materials. Incorporating price comparison tools can also aid in finding the best deals on the materials needed for your project.
Always remember your safety precautions: wear safety goggles and gloves to protect against metal shavings and debris. Secure the conduit in a large vise to stabilize it during cutting, which helps maintain accuracy.
After cutting, take a moment to smooth out any sharp edges using a deburring tool or file to prevent injuries while handling the conduit. Following these recommendations will set you up for a successful assembly. Additionally, ensuring you have a user-friendly interface will enhance your overall project experience and efficiency.
Assembling the Frame With Connectors
Now that you've cut your EMT conduit to size, it's time to start assembling the frame using T-Connectors, 180 Connectors, and 90 Degree Connectors.
Begin by securing the vertical components and then work on the horizontal framework to create a solid structure.
Remember to double-check your connections and tighten all bolts for stability before finishing up.
Selecting Connector Types
As you assemble the frame of your DIY roof platform, selecting the right connectors is essential for creating a sturdy and reliable structure.
Use T-Connectors for strong joints between horizontal and vertical EMT conduit pieces. For corner connections, 90 Degree Connectors guarantee a secure framework, while 180 Connectors allow easy addition of cross supports, enhancing stability.
Always prioritize connector compatibility to guarantee a seamless fit. During connector installation, make sure all connectors are tightly secured with bolts; loose connections can jeopardize safety.
Finally, focus on connector maintenance by choosing durable, weather-resistant materials to prevent rust and degradation over time, extending the life of your roof platform.
Assembling Vertical Components
With the connectors securely in place, you're ready to assemble the vertical components of your roof platform.
Start by cutting your EMT conduit to the desired lengths for these vertical component materials, ensuring precision for maximum stability.
Utilize T-Connectors at the base of each vertical piece for easy attachment to the horizontal rails, creating secure connections.
Insert the vertical components into the connectors and tighten the bolts snugly to support weight effectively.
For added strength, consider using 90 Degree Connectors at the top of the vertical components to stabilize the upper framework and prevent wobbling.
Finally, inspect all connections for proper alignment and tightness, keeping stability considerations in mind before moving on to the next phase of your project.
Securing Horizontal Framework
To secure the horizontal framework of your roof platform, start by cutting the EMT conduit to the exact lengths needed for a snug fit with the connectors.
Utilize horizontal support techniques like T-Connectors to attach the ends of the horizontal rails to the vertical supports. This guarantees a stable structure capable of handling significant weight.
For enhanced stability, implement connector alignment strategies by using 180 Connectors at the corners where the horizontal pieces meet.
Make sure all connections are tightened securely with bolts to prevent any movement during use, which is essential for safety.
Finally, consider applying a coat of weather-resistant paint to protect the framework against UV rays and corrosion, ensuring longevity for your DIY roof rack.
Securing Vertical Supports
When securing your vertical supports, you'll want to choose sturdy materials that can handle the load.
Proper attachment techniques, like using T-Connectors and bolting directly to the vehicle's frame, will greatly enhance stability and strength.
Don't forget to double-check all connections to guarantee your platform is safe for transport.
Choosing Vertical Support Materials
Selecting the right vertical support materials is essential for building a sturdy DIY roof platform. Galvanized steel electrical conduit (EMT) is a fantastic option, balancing strength with cost-effectiveness. It can support significant weight, making it ideal for your project.
When conducting a cost analysis, consider not just the price of the EMT but also the potential for long-term durability. Make certain to cut your supports to the correct height based on your vehicle's dimensions for maximum stability.
You might explore material alternatives, but EMT typically outperforms others in both availability and strength. To enhance structural integrity, think about using diagonal bracing and confirm all connections are tightened and protected with anti-corrosive coatings for weather resistance.
Proper Attachment Techniques
After you've chosen the right vertical support materials, it's time to focus on how to securely attach them. Use flange connectors to fasten the supports to your vehicle's frame, guaranteeing a stable attachment point.
Opt for self-tapping screws or bolts, making certain they penetrate the metal frame for maximum strength. To enhance load distribution and accommodate weight considerations, incorporate diagonal braces if needed, preventing lateral movement.
Tighten all connections firmly, and if you have a torque wrench, use it to ascertain the vertical supports stay secure under load.
Don't forget to regularly inspect the attachment points for any wear or loosening, especially after heavy use or long trips, to maintain the integrity of your roof rack system.
Ensuring Stability and Strength
To guarantee your roof platform remains stable and strong, it is crucial to securely fasten the vertical supports to your vehicle's frame. Use flange connectors for a solid foundation, and employ 180-degree connectors at joints to enhance strength. Reinforce each vertical support with diagonal braces, utilizing effective weight distribution methods to improve overall stability.
Here's a quick reference table for your setup:
| Technique | Purpose | Tips |
|---|---|---|
| Flange Connectors | Secure attachment to frame | Ensure tight fit |
| 180-Degree Connectors | Reduce movement at joints | Check for alignment |
| Diagonal Braces | Distribute weight evenly | Use three pop rivets per support |
Regularly inspect all connections to maintain structural integrity and tighten bolts as needed.
Constructing the Horizontal Frame
As you commence on constructing the horizontal frame, cutting the EMT conduit to the precise lengths is essential for achieving a sturdy design that fits your roof platform.
Start by measuring accurately to guarantee all pieces align perfectly with your horizontal frame design. Use pull-through connectors to secure the frame, enhancing durability while allowing for easy assembly.
For a polished look, clean the corners of the conduit where connections will be made. Incorporate effective connection reinforcement techniques by using three pop rivets at each connection point for added strength.
Once assembled, double-check all connections for alignment and tightness. Following these conduit assembly tips will guarantee the integrity and safety of your roof platform, setting a solid foundation for the next steps.
Adding the Plywood Surface
Now that your frame is ready, it's time to add the plywood surface.
You'll want to select the right thickness for strength without adding unnecessary weight, then cut it to fit your EMT conduit frame perfectly.
Once you've got it sized, secure the plywood using stainless steel screws or bolts to guarantee it stays in place and can handle the elements.
Selecting Plywood Type
When choosing plywood for your DIY roof platform, opting for exterior-grade plywood is essential since it guarantees durability against moisture and weather conditions.
Look for plywood grades that offer a thickness of at least 3/4 inch to provide adequate load capacity. For even better protection, consider using marine plywood, especially if your platform will face harsh elements. This type enhances weather resistance, preventing rot and delamination.
Additionally, select plywood with a smooth surface finish to create a safer, more stable platform for transporting gear, as it minimizes the risk of slippage.
Finally, treat or seal the plywood with a weather-resistant finish to extend its lifespan and protect it from UV damage.
Cutting and Sizing
To create a sturdy and reliable surface for your roof platform, start by measuring the dimensions of your EMT conduit frame. This guarantees a snug fit without overhanging edges. A sturdy plywood type, preferably ¾ inch thick, provides adequate support for your gear. Use cutting techniques such as a circular saw or jigsaw to cut the plywood accurately, guaranteeing clean edges for a professional finish.
| Step | Action | Purpose |
|---|---|---|
| Measure Dimensions | Measure the frame | Determine plywood size |
| Choose Plywood | Select ¾ inch thick plywood | Guarantee support |
| Cut Plywood | Use a circular saw or jigsaw | Achieve precise dimensions |
| Sand Edges | Smooth edges and surface | Prevent splinters, improve adhesion |
Once cut, sand the edges for smoothness and prepare for securing the surface.
Securing the Surface
Securing the plywood surface to your EMT conduit frame is essential for stability and safety. Start by cutting the plywood sheets to fit snugly within the frame.
Use 1 ¼ inch wood screws for attachment, placing them approximately every 12 inches along the edges and in the center. This guarantees even weight distribution and plywood durability.
Make sure the plywood is mounted flush with the conduit's top to avoid any protruding edges that could snag gear.
After installation, enhance the surface with weatherproofing techniques, like applying a weatherproof sealant or varnish.
Regularly inspect the plywood for wear and tear, reapplying sealant as needed to maintain its protective qualities.
This way, your roof platform stays safe and functional for years.
Finishing Touches: Painting and Sealing
As you wrap up your DIY roof platform project, giving the EMT conduit a fresh coat of paint not only enhances its appearance but also protects it from the elements.
Start with thorough surface preparation; clean the conduit to remove dirt or grease for better paint adhesion. Use a rust-inhibiting primer to safeguard against corrosion.
Then, select a high-quality exterior spray paint or one specifically for metal surfaces, ensuring it provides UV protection and can withstand harsh weather. Employ effective painting techniques for a smooth finish.
After painting, let the platform cure fully according to the manufacturer's instructions, usually 24-48 hours. For extra durability, consider applying a clear sealant over the paint as a protective coating against scratches and UV degradation.
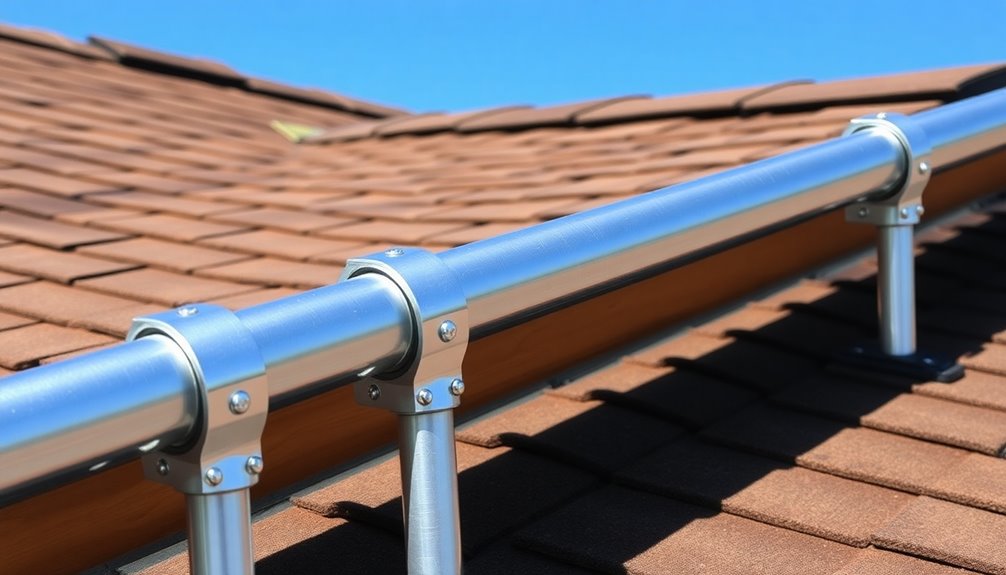
Mounting the Platform on Your Vehicle
Mounting your roof platform on the vehicle is an essential step that guarantees stability and safety during use. Start by choosing the right mounting techniques based on your vehicle's compatibility and the platform weight. Secure the flange connectors to the vehicle's frame for a stable base. Use crossover conduit clamps to attach the platform to OEM or aftermarket roof bars easily.
Here's a quick overview of your options:
| Mounting Technique | Material | Installation Method |
|---|---|---|
| Flange Connectors | Steel | Bolted to frame |
| Crossover Clamps | Aluminum | Direct attachment |
| Pipe Straps | Stainless Steel | Wrap and secure |
| U-Bolts | Galvanized Steel | Clamp around structure |
| Self-Tapping Screws | Steel | Drill for easy install |
Choose wisely for a secure fit!
Safety Checks and Final Adjustments
After you've securely mounted your roof platform, it's important to perform safety checks and make any final adjustments.
Start with some safety inspection tips: thoroughly inspect all connections, confirming bolts and nuts are tight to prevent movement during use.
Next, check that your roof rack is level and aligned with your vehicle's roof to avoid uneven weight distribution, a common installation mistake.
Test the stability by applying pressure to various points, looking for weak spots or flexing.
Verify all components are free of sharp edges to prevent injuries.
Finally, validate that the mounting points are firmly attached and can handle your anticipated load, keeping load capacity considerations in mind to promote safety while using your platform.
Conclusion
You've transformed your vehicle into a mobile fortress worthy of a superhero! With your DIY roof platform, the sky's the limit—literally! Picture yourself soaring above the mundane, conquering every adventure with ease and style. You've mastered the art of EMT conduit, turning a simple idea into a magnificent reality. Now, go forth and release your newfound powers; your epic journeys await, and the world is your oyster! Don't just drive—elevate your experience to legendary heights!


