

Building a DIY roof rack with EMT conduit is a cost-effective way to enhance your vehicle for adventures. It's lightweight, sturdy, and easy to customize without welding. You'll also find it affordable, durable, and resistant to corrosion, making it perfect for outdoor conditions. With essential tools and materials, you can craft a roof rack tailored to your vehicle's needs. Plus, there are plenty of innovative features to enhance functionality. Stick around to discover more tips and tricks!
Understanding EMT Conduit and Its Benefits for DIY Roof Racks
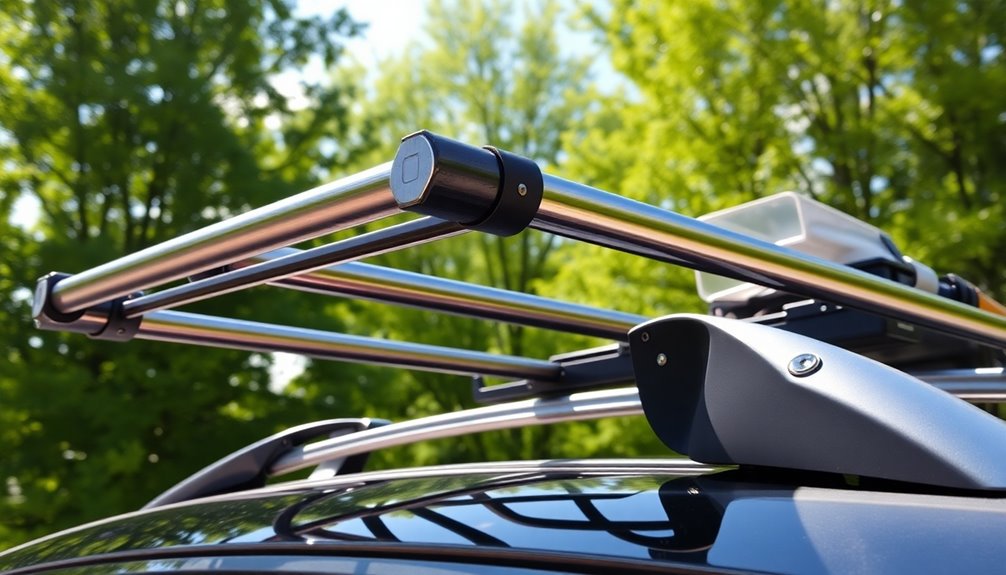
When you're looking to build a DIY roof rack, understanding EMT conduit is crucial, as it offers a lightweight yet sturdy option. You'll be able to find this affordable material commonly used for its strength and durability. Its versatility makes it easy to customize your roof rack design, fitting various vehicles and personal needs without welding. Additionally, using sustainable packaging solutions in your projects can further reduce your environmental impact.
By utilizing T-connectors and clamps, you can create stable structures that support diverse outdoor gear. Plus, EMT conduit's corrosion resistance guarantees your rack remains reliable in tough outdoor conditions, which is essential for adventure enthusiasts like you. With its cost-effectiveness and adaptability, EMT conduit stands out as an attractive option for DIY builders wanting functional, personalized roof racks on a budget. Furthermore, understanding expense tracking can help you manage costs effectively while undertaking your DIY projects. Additionally, choosing eco-friendly materials, such as sustainable practices, can enhance the environmental benefits of your DIY projects.
Essential Tools and Materials for Building Your Roof Rack
Building a DIY roof rack requires a few essential tools and materials that make the process smooth and efficient.
Start with a hacksaw for cutting EMT conduit, a drill for making holes, and a wrench for tightening bolts and clamps.
For roof rack materials, you'll need EMT conduit for the frame, T-connectors for stable joints, and maker pipe clamps to secure components easily. Additionally, using budgeting apps can help you manage your expenses while sourcing these materials. Consider using YNAB for a structured approach to allocate funds for your project.
Tool selection tips include using a tape measure for accurate dimensions and guaranteeing a proper fit on your vehicle.
Don't forget roof rack brackets specific to your model to simplify construction.
Finally, adhere to DIY safety guidelines by wearing protective gear and working in a well-ventilated area to guarantee a safe building experience. Additionally, consider using expense management apps to keep track of costs associated with your DIY projects.
Customizing Your Roof Rack for Specific Vehicle Models

When customizing your roof rack, using vehicle-specific brackets makes the installation process much simpler. You can also adjust dimensions and features to perfectly match your vehicle's unique shape and size. This guarantees your rack not only fits well but functions exactly as you need it to. Additionally, utilizing expense tracking tools can help you manage costs associated with your customizations effectively. Implementing automated processes for tracking these expenses can further streamline your budgeting efforts. Additionally, using accurate categorization of your expenses can provide insight into your spending patterns and help identify areas for cost savings.
Vehicle-Specific Brackets Availability
If you want to create a sturdy roof rack tailored to your vehicle, vehicle-specific brackets are essential.
These brackets simplify your DIY roof rack project by ensuring bracket compatibility with various makes and models. They allow you to easily attach EMT conduit to your vehicle's existing structures without complicated modifications.
Many manufacturers provide compatible roof rack brackets that enhance stability and functionality, aligning with their manufacturer recommendations. By using these customizable brackets, you'll reduce assembly time while improving the overall look and utility of your roof rack system.
Additionally, they can accommodate unique design features, like solar panel mounts or extra load support, making your setup even more functional for your adventures.
Custom Dimensions and Features
Customizing your roof rack to fit your specific vehicle model not only enhances its functionality but also guarantees a sleek, integrated look.
Start by making custom size adjustments based on the measurements of your vehicle's roof, ensuring vehicle fit optimization for a secure installation.
Integrate features like adjustable solar panel angles to maximize utility during outdoor adventures. Using T-connectors in your construction allows for stable configurations, accommodating unique vehicle shapes and load requirements.
Don't hesitate to get creative—consider feature integration ideas like built-in canopies or shower setups tailored to your activities.
These adjustments not only improve performance but also elevate your overall experience, making your DIY roof rack truly one-of-a-kind.
Innovative Features to Consider for Your Roof Rack
While planning your next outdoor adventure, consider incorporating innovative features into your roof rack that can elevate both functionality and comfort.
Solar panel integration is a game-changer, allowing you to maximize energy capture while on the go. Additionally, you can explore price comparison tools to find the best solar panel options tailored for your needs. Built-in canopies and showers can greatly enhance your camping comfort, providing you with essential amenities straight from your roof rack. Utilizing price comparison websites can also help you identify the most affordable options for these features.
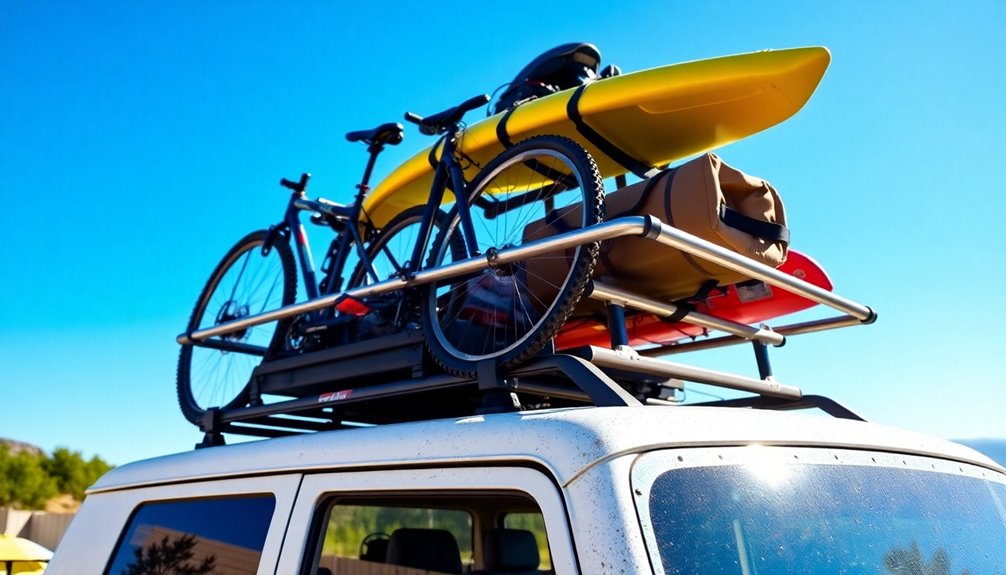
For effective cargo organization, utilize eye hooks and crossbars to secure your camping gear, ensuring stability during travel. Price tracking apps can also help you monitor deals on these organizational tools.
Don't forget about telescoping designs, which adapt to various cargo loads and vehicle types, making loading and unloading a breeze.
Finally, personalize your roof rack with unique finishes or paint jobs to add style while maintaining its practical features. Additionally, using multiple price comparison tools can help you find the best deals on the equipment you need for your adventures.
Step-by-Step Guide to Constructing a Basic Roof Rack

Before you start building your roof rack, gather all the required materials and tools to guarantee a smooth assembly process. Additionally, utilizing a budgeting app can help you track expenses effectively while working on your DIY projects. You'll want to follow clear assembly instructions to achieve a sturdy frame while keeping safety and stability in mind throughout the project. With the right preparation, you'll have a functional roof rack ready to hit the road in no time. Additionally, having a clear financial goal can help you budget effectively for your DIY projects, as apps like YNAB can assist in achieving financial planning objectives.
Required Materials and Tools
To create a sturdy roof rack, you'll need several essential materials and tools. Focus on material selection strategies to guarantee your roof rack is both durable and affordable. Here's a quick list of what you'll need:
| Materials | Tools |
|---|---|
| EMT conduit pipes | Measuring tape |
| T-connectors | Pipe cutter |
| Maker pipe clamps | Drill |
| U-bolts | Wrench |
| Metal straps |
For budget-friendly options, consider sourcing materials from local hardware stores or online marketplaces. Don't forget tool maintenance tips, like keeping your drill charged and blades sharp, to make your construction process smoother. With these materials and tools, you're ready to initiate your DIY roof rack journey!
Assembly Instructions Overview
As you begin assembling your DIY roof rack, start by gathering all your materials and tools in one place to streamline the process.
Measure and cut the EMT conduit to your desired dimensions, keeping in mind the width of your vehicle and any gear you'll carry.
Use T-connectors to build the frame, focusing on frame stability methods by reinforcing joints with metal straps and bolts.
Incorporate crossbars to enhance load distribution strategies, ensuring your gear is secure and balanced.
For added functionality, add eye hooks to tie down cargo effectively.
Finally, apply weatherproofing techniques like paint or sealant to protect your roof rack from the elements, making it both practical and visually appealing.
Safety and Stability Tips
With your roof rack assembly underway, prioritizing safety and stability is key for a secure build.
Start by measuring your vehicle's roof dimensions and selecting EMT conduit lengths that fit. This guarantees proper stability, which is essential for roof rack safety.
Use T-connectors at critical junctions and secure the EMT conduit with metal straps and bolts to your vehicle's existing structures. Incorporate crossbars and eye hooks to stabilize cargo, preventing shifting while driving.
Make certain all joints are tightly secured and regularly check for wear and tear. For added stability, consider reinforcing with additional cross support or U-bolts for a firmer attachment to your roof rails.
Keep these cargo stability tips in mind for a safe adventure!
Using T-Connectors for Stability and Strength
When you're building a DIY roof rack, incorporating T-connectors can make a significant difference in stability and strength. These connectors provide essential T connector benefits by creating secure junctions for EMT conduit without welding.
By using T-connectors, you can easily add crossbars and support structures, enhancing your roof rack customization to fit various vehicle shapes and sizes. When combined with metal straps and bolts, they create a robust framework that supports heavy loads while maintaining structural integrity.
Plus, T-connectors facilitate easier assembly and disassembly, making it convenient for you to modify or store your rack when not in use. Overall, they're a game-changer for achieving a strong and adaptable roof rack.
Enhancing Functionality With Adjustable Solar Panel Angles
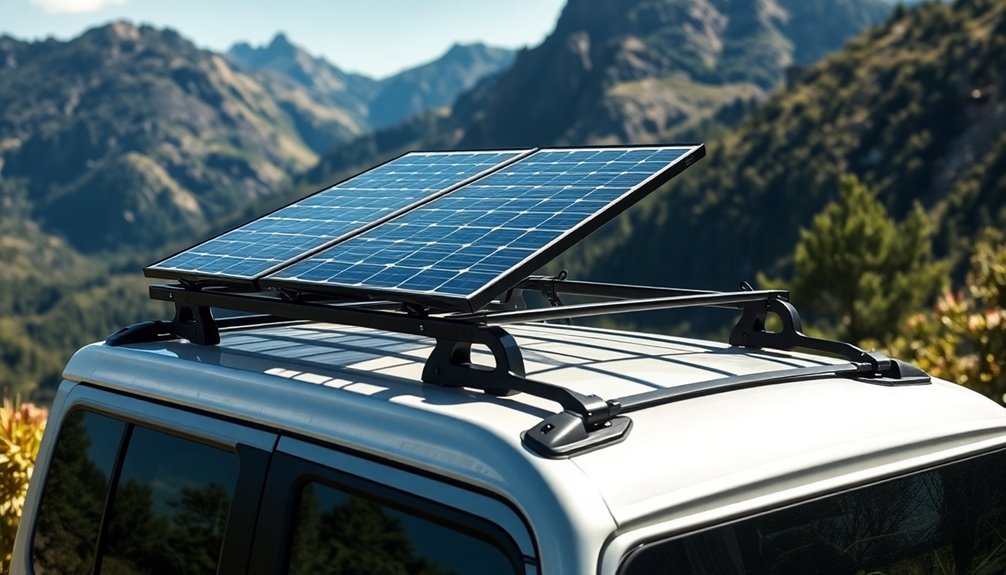
Using T-connectors not only adds strength to your roof rack but also opens the door to innovative features like adjustable solar panel angles.
By implementing adjustable mounting techniques, you can enhance solar energy efficiency, maximizing your panels' performance throughout the day. Incorporating a telescoping design allows for quick adjustments, so you can easily adapt to the sun's changing position.
Additionally, consider roof rack accessories like pivoting mounts that enable smooth adjustments without any tools. This setup makes it simple to tweak your solar panels for peak performance.
With lightweight EMT conduits forming a robust framework, you'll create a versatile system that supports your adventure needs while harnessing the sun's energy effectively.
Creative Ideas for Incorporating Canopies and Showers
Incorporating canopies and showers into your DIY roof rack can transform your outdoor experience, providing essential comfort and convenience.
By using durable canopy materials like waterproof fabric, you can create a shaded area for relaxation during camping trips or picnics. Adjustable canopy designs made with EMT conduit and maker pipe clamps allow you to customize height and angle to suit your needs.
For shower designs, consider adding a solar shower bag that heats water using solar energy, providing a revitalizing rinse after adventures. Telescoping features also enable you to modify the setup based on weather conditions.
With these creative ideas, your adventure setup will become more enjoyable, ensuring you're prepared for any outdoor activity.
Securing Cargo: Eye Hooks and Velcro Straps

To guarantee your cargo stays secure during transit, eye hooks and Velcro straps are essential additions to any DIY roof rack. Eye hooks can be strategically placed on your rack, creating secure points for attaching ropes or bungee cords, which enhances load stability.
Pairing these hooks with adjustable straps allows you to accommodate various sizes and shapes of cargo, making your rack more versatile. Velcro straps are particularly great for securing lightweight items like tents or tarps, preventing them from shifting and getting damaged while you travel.
Personalizing Your Roof Rack With Aesthetic Elements
How can you make your roof rack not just functional, but also a reflection of your personal style? Start by exploring vibrant color choices that resonate with your personality—think bold hues or subtle pastels.
You can also experiment with material combinations; for instance, integrating rustic wood accents with the EMT conduit can create a unique contrast that's both eye-catching and practical.
Aesthetic enhancements like custom paint jobs or unique finishes can elevate your roof rack's look, making it stand out on the road.
Consider adding features such as sun shades, which not only provide comfort but also enhance the overall design.
With a little creativity, your roof rack can truly showcase your adventurous spirit while serving its purpose.
Tips for Adapting Existing Designs to Fit Your Needs
While adapting existing roof rack designs to fit your needs, it's crucial to focus on stability and functionality.
Start by using T-connectors and metal straps to create stable rungs and frames, allowing for creative design adaptations tailored to your vehicle's dimensions.
Consider integrating crossover clamps for a customized build that maximizes load capacity by connecting round EMT conduit with your vehicle's rails.
Utilizing compatible roof rack brackets simplifies the adaptation process and enhances overall stability.
Don't forget to draw inspiration from community designs, like Joe Bacon's van rack, and modify features to enhance aesthetic appeal.
Incorporating functional accessories, like eye hooks and Velcro straps, also improves cargo security while maintaining versatility.
Happy building!
Community Success Stories: Inspiring DIY Roof Rack Builds
When you think about DIY roof racks, it's inspiring to see how others have turned their unique ideas into practical builds.
From Jacob's innovative Baja Bug rack with integrated lights to Terence's rustic truck design, these community success stories highlight the creativity and functionality you can achieve.
Let's explore some standout examples that could spark your next project!
Unique Design Inspirations
As you explore the world of DIY roof racks, you'll find that creativity knows no bounds in the community of builders who share their unique designs.
Michael's roof rack showcases effective tool storage solutions using EMT conduit and maker pipe clamps, making it user-friendly for enthusiasts like you.
Jacob's Baja Bug roof rack cleverly integrates lights and a spare tire holder, highlighting the versatility of custom material choices.
Terence's rustic truck rack demonstrates how aesthetic enhancement techniques, like unique materials and custom paint, can personalize your build.
Joe Bacon's van rack ingeniously incorporates solar panel storage, showcasing innovative design features.
Finally, Gilbert's practical use of u-bolts for secure fittings inspires others to think outside the box in their DIY endeavors.
Practical Build Examples
DIY roof rack builds are all about ingenuity and practicality, and the community is brimming with inspiring success stories.
Jacob's Baja Bug showcases design variations with integrated lights and a spare tire holder, proving EMT conduit's versatility.
Terence's rustic truck rack incorporates reclaimed materials, blending personal style with functionality.
Michael's roof rack highlights tool storage capability, demonstrating how custom designs can meet specific user needs in outdoor settings.
Gilbert innovatively uses u-bolts for secure attachment, enhancing stability and ease of installation.
Meanwhile, Joe Bacon's van rack creatively combines solar panel storage with utility, showcasing how material choices can lead to functionality enhancements.
These examples inspire you to initiate your own DIY roof rack adventure!
Overcoming Common Challenges in Roof Rack Construction
While constructing a roof rack may seem intimidating, several strategies can help you overcome common challenges. Start by utilizing welding alternatives like T-connectors for easy assembly. Securely attach your rack using metal straps and bolts to prevent wobbling. Search for compatible roof rack brackets to guarantee a snug fit for your vehicle. Crossover clamps are great for combining EMT conduit pipes with existing vehicle rails, enhancing stability.
Here's a quick reference table:
| Challenge | Solution |
|---|---|
| Difficulty in assembly | Use T-connectors and crossover clamps |
| Cargo balance issues | Incorporate eye hooks and crossbars |
| Tool disorganization | Organize tools in a dedicated box |
| Wobbling during use | Secure with metal straps and bolts |
| Incompatibility with vehicle | Find specific roof rack brackets |
Accessorizing Your Roof Rack for Maximum Utility
To maximize the utility of your roof rack, consider accessorizing it with features that enhance both functionality and convenience.
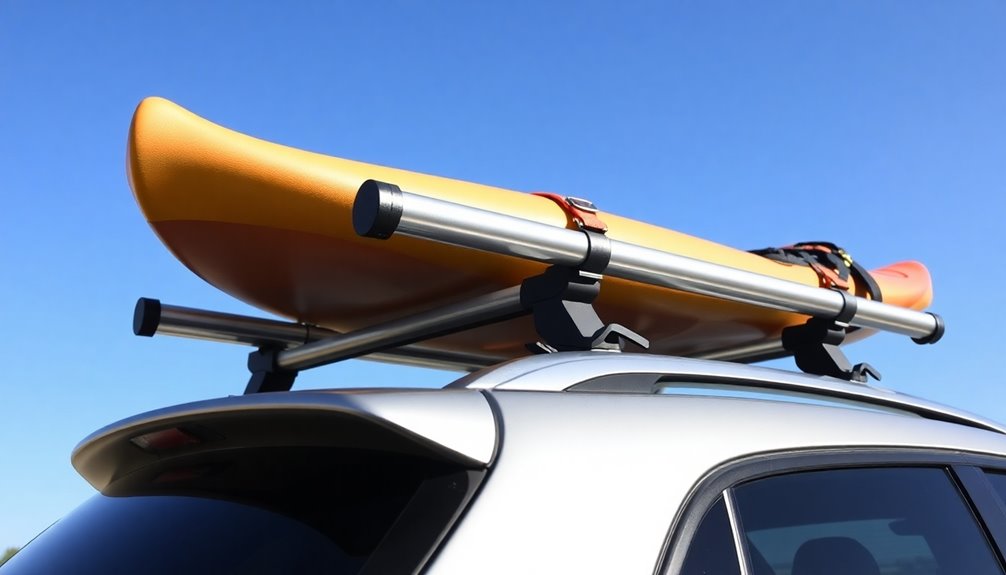
Start by incorporating eye hooks to secure outdoor gear, using cargo organization techniques that prevent shifting during travel. Crossbars offer additional support for larger items like kayaks or canoes, while Velcro straps and bungee cords grant quick access to smaller essentials.
For added comfort, integrate built-in canopies or sun shades, creating shaded areas for cooking or lounging.
Don't forget to explore adjustable solar panel mounts, harnessing renewable energy on your adventures.
These additions not only improve gear protection methods but also elevate roof rack aesthetics, making your setup both practical and visually appealing.
Maintaining and Upgrading Your Roof Rack Over Time
Maintaining your roof rack over time is essential for ensuring safety and maximizing functionality on your adventures.
Regularly inspect your EMT conduit roof rack for wear, rust, or loose connections. Secure all bolts and straps to boost roof rack longevity and prevent issues on the road.
For load capacity enhancement, consider adding accessories like eye hooks or crossbars, tailored for your gear.
To improve weather resistance, repaint or apply a protective coating, especially if you face harsh conditions.
Customization options, such as integrating solar panels, can also elevate your rack's performance.
Engage with the DIY community for innovative upgrades that adapt to your needs, inspiring fresh ideas for efficient use of space and energy on your journeys.
Conclusion
With your DIY roof rack crafted from EMT conduit, you're not just saving money; you're releasing your adventurous spirit. Like a seasoned explorer, you've transformed your vehicle into a trusty companion, ready to conquer the open road. As you load up for your next journey, remember that each trip is a new chapter in your story. Keep your roof rack maintained and upgraded, and let it carry your dreams as you chase the horizon. Adventure awaits!


