
Upgrading your dishwasher outlet from single to dual makes your kitchen smarter and safer. First, verify you’ve turned off power at the breaker box. Then, separate the hot terminals to prevent overload, and use pigtails for ground wires. Remember to check your connections and keep the area dry. With proper techniques, this change will improve appliance efficiency and safety. There’s more to explore about tools and maintenance that’ll help you succeed in this upgrade.
Why Upgrade Your Dishwasher Outlet?

Upgrading your dishwasher outlet is essential, especially if you want to enhance your kitchen’s efficiency. By installing a dual outlet, you can run both your dishwasher and disposal unit simultaneously, making meal cleanup a breeze.
This home improvement not only boosts convenience but also prevents electrical overload by providing dedicated power sources for high-demand appliances. You can control one outlet with a light switch, while the other stays powered for constant use.
Additionally, adding features like GFCI outlets enhances safety against electrical shocks in wet kitchen areas. An upgraded outlet also increases your home’s overall value, appealing to potential buyers who appreciate modern, efficient kitchens. Regular maintenance ensures proactive home upkeep, helping you avoid future electrical issues.
Don’t underestimate the impact of this simple yet effective upgrade!
Understanding the Benefits of Dual Functionality

Upgrading to a dual functionality outlet brings enhanced convenience and efficiency to your kitchen by allowing you to run both your dishwasher and garbage disposal simultaneously.
You’ll also gain better energy management, as you can control when each appliance draws power, which can help lower your utility bills. Additionally, optimizing the use of high-power appliances can lead to significant energy savings, contributing to reduced monthly expenses.
Plus, this setup improves safety by providing dedicated control for high-power appliances, reducing the risk of accidental activation.
Enhanced Convenience And Efficiency
A dual-function dishwasher outlet can greatly enhance your kitchen’s convenience and efficiency. This upgrade allows you to run your dishwasher and garbage disposal simultaneously, streamlining your meal cleanup process.
With the split-function outlet, one socket stays powered while the other is controlled by a wall switch, making appliance placement more flexible based on your needs. This not only optimizes your workflow but also reduces clutter by minimizing the number of plugs and outlets required.
You’ll save time by easily controlling appliances without fumbling under the sink or behind the dishwasher. Plus, a properly configured dual outlet guarantees safety, adhering to electrical codes while maximizing your kitchen design’s functionality.
Enjoy a tidier and more efficient cooking space!
Improved Energy Management
While managing energy use may not seem like a priority in your kitchen, switching to a dual-function outlet can greatly impact your efficiency. This setup allows you to control energy consumption by providing an always-powered outlet for essential appliances while managing others, like disposals, through a switch.
By separating power supplies, you reduce energy waste, ensuring only necessary appliances draw power when needed, which enhances energy efficiency and helps lower your electricity bills. Additionally, this configuration can boost appliance longevity by minimizing start-up loads and reducing wear on motors.
Plus, managing power from a single outlet fosters better electrical organization, streamlining your kitchen and cutting down on clutter.
Increased Safety Features
When you opt for a dual-function outlet for your dishwasher, you enhance safety by allowing one outlet to remain powered while controlling another through a switch. This setup helps you minimize the risk of accidental activation, which is vital for meeting safety regulations.
By breaking the tab connecting the brass terminals, you guarantee separate operation for the disposal and dishwasher, reducing electrical hazards. A dedicated switch simplifies disconnection during maintenance, protecting against water-induced electrical issues.
Additionally, dual functionality outlets promote appliance compatibility and help prevent circuit overloads, guaranteeing compliance with wiring standards. By using proper wiring techniques, like securely connecting ground wires, you further boost the safety features of your installation.
Safety First: Essential Precautions for Electrical Work
Before diving into any electrical work, it’s essential to prioritize safety to avoid accidents or injuries. Start by confirming the power is turned off at the breaker to prevent electrical hazards.
Use insulated tools and wear rubber-soled shoes to minimize the risk of shock during your installation. Double-check all connections for security, and cap exposed wires with wire nuts to prevent accidental contact.
A voltage tester is a smart choice; it confirms no power flows through the wires before you touch or connect them. Familiarize yourself with local wiring standards and regulations to confirm compliance and safety throughout your upgrade project. Additionally, conducting regular billing process reviews can help ensure that any associated costs are managed effectively during your upgrade.
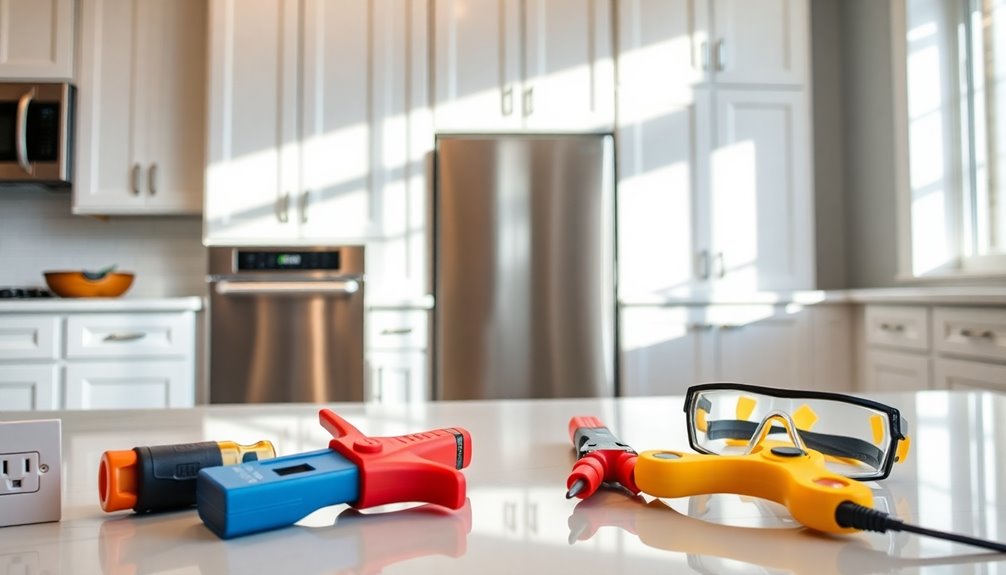
Tools and Materials You’ll Need for the Upgrade
To successfully upgrade your dishwasher outlet, you’ll need a few essential tools and materials at hand.
Start with upgrading tools like a screwdriver, wire stripper, and a voltage tester to guarantee electrical safety during your project. A drill will help secure the electrical box and switch.
For materials, gather a double outlet, a single-pole switch, and electrical wire (12 or 14 gauge based on your circuit). Don’t forget a metal box for housing connections.
Safety gear, including insulated gloves and safety goggles, is vital to protect against hazards.
Additional supplies like wire nuts, electrical tape, and spacers may be necessary for secure connections and a proper fit within your chosen outlet types. To ensure a smooth installation process, you may also want to consider using an expense tracking app to manage costs associated with your upgrade project.
How to Turn Off Power at the Breaker Box
Turning off the power at the breaker box is essential for your safety while upgrading your dishwasher outlet.
First, locate the breaker box, which is often found in common breaker box locations like the basement, utility room, or garage. Identify the correct circuit breaker for the dishwasher or sink area; it’s usually labeled for easy access. Flip it to the “off” position to cut power.
If you can’t find a labeled breaker, turn off the main power switch to guarantee all electricity is off. Always follow electrical safety guidelines—use a voltage tester to confirm the power is indeed off before starting work.
After your upgrade, remember to turn the breaker back on and test the outlet for functionality.
Identifying Your Existing Wiring Setup
As you prepare to upgrade your dishwasher outlet, it’s important to identify your existing wiring setup. Typically, you’ll find black, white, and red wires, so familiarize yourself with these wiring standards.
Verify your outlet is configured correctly for dual function, with one side permanently powered and the other controlled by a switch. It’s vital to check that ground wires are securely connected with a pigtail and that neutral wires are capped together for stability. Be mindful of the shallow electrical box layout, as space limitations may affect wire placement. Most importantly, remember to confirm that power is turned off at the breaker for circuit safety before you start working on the wiring. Additionally, consider reviewing soundproofing basics to ensure that any nearby appliances or systems do not contribute to unwanted noise during the installation process.
Breaking the Metal Tab for Split Outlet Functionality
Creating a split outlet functionality requires breaking the metal tab that connects the two brass terminals on your outlet. This step is essential for allowing independent control of each outlet half.
First, make certain you understand the different outlet types and follow electrical standards to maintain safety. Use a pair of pliers to carefully snap off the tab, making sure not to damage the terminals.
Once that’s done, connect the black wire to one brass terminal for constant power and the red wire to the other for switch control. Remember to cap the neutral wires together and securely attach the ground wire to the green terminal. Incorporating house maintenance oil can enhance the longevity of the electrical components in your home.
Always turn off the power at the breaker before starting any installation tips to avoid electrical shock.
Wiring Configuration: Connecting the Switch and Outlet
To successfully connect the switch and outlet for your dishwasher and disposal, you’ll need to guarantee the wiring is configured correctly.
Start by breaking the metal tab between the hot terminals to create separate circuits. Connect the black wire from the power source and the red wire from the switch to the respective hot terminals, following wire color coding for safety.
Use a pigtail to join all ground wires and cap the neutral wires with wire nuts.
Adhere to outlet placement guidelines, ensuring the outlet fits in a shallow electrical box and using longer screws for spacers. Additionally, ensure that the P-trap is properly maintained to prevent any unpleasant odors from affecting your kitchen environment.
Finally, restore power and test the outlet to confirm that one half is always powered, while the other is controlled by the switch, ensuring proper electrical load distribution.
Securing Connections: Tips for a Safe Installation
While securing connections during your dishwasher outlet installation, it’s crucial to prioritize safety and reliability. Always turn off the power at the breaker to guarantee electrical safety before you start working.
Prioritize safety by turning off the power at the breaker before starting your dishwasher outlet installation.
When making wire connections, break the metal tab between the brass terminals to allow one section to remain powered while the other is controlled by the switch. Use wire nuts or caps to secure all connections tightly, preventing any loose wires that could lead to shorts or malfunction.
Consider using spacers to fill any gaps between the electrical box and drywall, guaranteeing the switch is properly aligned and accessible.
Finally, test the outlet after installation to confirm that everything functions as intended. These installation tips will help guarantee a safe setup, and remember that DIY repair skills can significantly boost your confidence in handling such projects.
Overcoming Installation Challenges in Shallow Boxes
When tackling installation in shallow boxes, effective space management is vital. You’ll need to trim wires appropriately and may have to get longer screws to guarantee everything fits securely. Additionally, consider incorporating smart lighting solutions to enhance visibility during the installation process.
Space Management Techniques
Installing a dishwasher outlet in a shallow electrical box can be tricky, but effective space management techniques can streamline the process.
Start by using spacers to prevent the switch from being recessed too far into the wall, guaranteeing proper functionality. You might need longer screws from a home improvement store to accommodate the additional thickness.
Plan your wiring layout carefully, employing space optimization strategies to maximize efficiency within the box. This guarantees all components fit securely without overcrowding.
Consider using nylon cover plates instead of standard materials to reduce breakage risk from overtightening.
Finally, implement wire management techniques to trim and organize wires, preventing safety hazards and complications during installation while adhering to electrical box dimensions.
Proper Wire Trimming
Proper wire trimming is essential for overcoming installation challenges in shallow electrical boxes. When you’re working with limited space, it’s important to trim the wire length appropriately to avoid creating connection stress.
Use wire strippers to carefully remove insulation, ensuring you leave enough wire to make secure connections without excess wire bulging out of the box. This precision is critical, especially if you’ve broken the metal tab on the outlet for separate control of functions; improper trimming can lead to wire interference.
Always double-check that all wire connections are tight and secure before closing the box to prevent potential hazards or malfunctions. A little attention to detail now will save you headaches later!
Using Longer Screws
After confirming your wires are trimmed correctly, the next step in tackling shallow electrical box challenges involves securing your outlet or switch with longer screws.
These longer screw options provide the necessary reach to properly secure your installation without compromising safety.
- Measure screw length after making spacer adjustments.
- Find longer screws at local home improvement stores.
- Use nylon cover plates to prevent breakage from overtightening.
- Double-check screw lengths before installation.
It’s essential to verify that you have the right screw length measurement to accommodate any adjustments made during installation.
Testing Your New Outlet: Ensuring Proper Functionality
Once you’ve completed the wiring for your new outlet, it’s crucial to guarantee everything functions correctly before using it.
Start by verifying the power is off at the breaker for safety confirmation. Next, use a multimeter to check voltage at the outlet; one side should always be powered while the other is controlled by the switch.
Perform testing procedures by toggling the switch on and off to confirm that the disposal operates as expected.
Visually inspect the outlet to confirm that the metal tab between the brass terminals has been broken off, allowing for split functionality.
Finally, plug in a lamp to verify outlet compatibility, confirming one side is continuously powered while the other is switch-controlled. Additionally, ensuring proper functionality of electrical systems can help minimize energy consumption and enhance overall efficiency.
Common Mistakes to Avoid During the Upgrade
When you’re upgrading your dishwasher outlet, it’s essential to prioritize safety by turning off the power at the breaker.
Don’t overlook wiring specifications; failing to follow these can lead to serious issues down the line.
Ignoring Safety Precautions
Neglecting safety precautions during your dishwasher outlet upgrade can lead to serious consequences. To guarantee a safe installation, prioritize safety awareness and conduct a thorough risk assessment.
Here are some common mistakes to avoid:
- Always turn off the power at the breaker before starting any electrical work.
- Familiarize yourself with local electrical codes to avoid legal issues.
- Use tools like a voltage tester to confirm the power is off.
- Secure all wire connections and check for exposed wires.
Incorporating emergency procedures is also essential. If something goes wrong, knowing how to respond can keep you safe.
Overlooking Wiring Specifications
Overlooking wiring specifications during your dishwasher outlet upgrade can lead to significant problems, especially if you’re unfamiliar with the color coding and functions of the existing wires.
Knowing that black is hot, white is neutral, and green or bare is ground is essential to avoid incorrect connections. Don’t forget to break the metal tab between the hot terminals to guarantee outlet compatibility, allowing for one always-on and one switch-controlled outlet.
Always turn off the power at the breaker before you start working, as neglecting this safety regulation can result in serious accidents.
After installation, test the outlet to confirm it operates correctly; overlooking this step could lead to functionality issues that you’ll want to avoid.
How to Handle Troubleshooting and Issues?
How can you effectively troubleshoot issues with your dishwasher outlet? Start by prioritizing electrical safety; always confirm that the power is off at the breaker before diving in.
Prioritize electrical safety by ensuring the power is off at the breaker before troubleshooting your dishwasher outlet.
If the outlet behaves inconsistently, employ these troubleshooting techniques:
- Check for loose connections in the wiring and split tab on the outlet.
- Use a multimeter for outlet testing to see if one side is powered while the other is controlled by the switch.
- If your electrical box is shallow, consider rearranging or trimming wires, using spacers if needed.
- Inspect the switch if the battery’s red light indicator isn’t functioning correctly to verify it’s seated properly.
Following these steps will help you resolve any issues safely and effectively.
Maintenance Tips to Keep Your Outlet Functioning
Once you’ve tackled any issues with your dishwasher outlet, it’s important to focus on regular maintenance to keep it functioning well.
Inspect the outlet frequently for signs of wear or damage, like frayed wires or discoloration, to avoid electrical hazards. Verify that it’s properly grounded to protect against surges and enhance safety.
Keep the area around the outlet clean and dry to prevent shorts, which can shorten your outlet lifespan. Periodically test the outlet’s functionality with a voltage tester to verify both functions work correctly.
If you notice any problems, turn off the power at the breaker and consult a licensed electrician to handle any electrical work. Regular maintenance helps verify reliability and safety.
Final Thoughts on Enhancing Kitchen Efficiency
When you upgrade your dishwasher outlet, you’re not just enhancing functionality; you’re also streamlining your entire kitchen workflow.
Improved safety measures and the ability to use multiple appliances at once can make a huge difference in your daily routine.
Let’s explore how these upgrades contribute to a more efficient kitchen environment.
Streamlined Kitchen Workflow
While managing kitchen tasks can often feel overwhelming, upgrading your dishwasher outlet can greatly streamline your workflow. By implementing a dual-function outlet, you enhance kitchen organization, allowing for seamless multitasking.
With proper wiring, you’ll enjoy improved appliance compatibility, reducing clutter and optimizing workflow.
Here are some benefits of this upgrade:
- Simultaneous operation of the dishwasher and disposal
- Dedicated switches for better control
- Reduced downtime between appliance usage
- Enhanced safety through correct wiring practices
These upgrades not only make your tasks easier but also create a more efficient workspace.
Enjoy peace of mind knowing your appliances are running smoothly and safely, allowing you to focus on cooking and cleaning without interruptions.
Enhanced Appliance Functionality
Upgrading your dishwasher outlet not only boosts appliance functionality but also transforms your kitchen into a more efficient workspace.
With proper outlet placement, you can streamline your appliance selection process, ensuring compatibility with your dishwasher and other devices. A dual-function outlet allows one side to remain powered for your dishwasher, while the other can be switched for additional appliances, enhancing versatility.
When installing, remember to break the metal tab between the hot terminals for separate controls, ensuring peak performance. By using a shallow electrical box with spacers, you’ll keep wiring neat and accessible.
Don’t forget to test the outlet post-installation to confirm everything works as intended, making your kitchen more efficient and functional overall.
Improved Safety Measures
Enhancing the safety of your kitchen is just as important as improving its efficiency. By adhering to safety standards and electrical codes, you can guarantee a secure environment while making upgrades.
Here are some key measures to follow:
- Always turn off the power at the breaker before starting any electrical work to avoid shock hazards.
- Use a GFCI outlet for kitchen installations, especially in damp areas, to protect against electrical faults.
- When upgrading to a dual-function outlet, break the tab between brass terminals for controlled power.
- Secure all wiring connections with wire nuts and cap them properly to prevent accidental contact.
Following these installation guidelines won’t only enhance safety but also contribute to a well-functioning kitchen.
Conclusion
Upgrading your dishwasher outlet might seem like a small task, but it’s the little things that make a big difference, right? By embracing dual functionality, you’re not just enhancing efficiency; you’re transforming your kitchen into a culinary command center—who knew a simple outlet could wield such power? Just remember, while you’re busy revolutionizing your space, don’t let safety take a backseat. After all, nothing says “dream kitchen” like a well-functioning outlet that doesn’t spark a fire!


Average Rating