You can easily fix a hole in your favorite shirt using no-sew methods or hand sewing techniques. For tiny holes, a fusible bonding web works great; just cut a piece larger than the hole, place it underneath, and press it with an iron for a seamless repair. For larger holes, hand sewing with a matching thread can give you a more personalized touch. Start from the fabric's wrong side, using a backstitch or running stitch for durability. Each repair adds character, making your shirt unique. Stick around for more tips on mastering your sewing skills!
Understanding T-Shirt Damage
When you notice a tiny hole in your favorite t-shirt, it can be frustrating, but understanding the damage is the first step to fixing it. These holes, often measuring 5 mm or less, are perfect candidates for repair instead of replacement. The causes of these pesky holes typically include wear and tear, snagging on rough surfaces, or even natural degradation from frequent washing.
Using tools like expense management apps can also help you budget for repairs, ensuring you have the resources to keep your wardrobe in top shape.
I'm looking to keep my favorite garments in rotation, so knowing how to address these issues is essential. To proceed effectively, make sure you assess the type and extent of the damage. For tiny holes, no-sew methods using fusible bonding web work wonders, while slightly larger holes may require hand sewing.
By understanding the damage, you can choose the right repair technique, ensuring a seamless appearance when you're done.
Extending the lifespan of your t-shirt not only saves money but also helps maintain the memories associated with your favorite pieces. By tackling these minor repairs yourself, you can keep wearing those beloved garments without the need for constant replacements.
Benefits of Repairing Clothing
Repairing your clothing isn't just about fixing a hole; it's a smart way to reduce waste and promote sustainability.
By engaging in ethical shopping practices, you contribute to a socially responsible economy and support businesses that prioritize sustainability.
Plus, it saves you money by keeping your favorite shirts in rotation instead of buying new ones.
You'll also get to release your creativity, making each repair a unique expression of your style.
Environmental Impact Consideration
How can fixing a hole in your shirt make a difference for the environment? By choosing to repair rather than toss, you greatly reduce textile waste—around 92 million tons are produced globally each year.
Each t-shirt you mend can save up to 2,700 liters of water, the amount needed to create a single cotton shirt. By extending the life of your garments, you also help decrease the demand for new clothing, which contributes to about 10% of global carbon emissions.
Engaging in these eco-friendly practices fosters a culture of sustainable fashion, where quality and longevity take precedence over fast fashion's throwaway mentality.
When you repair your clothes, you're not just saving resources; you're contributing to a circular economy that promotes resource efficiency. This shift encourages textile recycling and helps mitigate the environmental impact of clothing production.
Cost-Effective Fashion Solutions
Choosing to repair your clothing not only supports environmental sustainability but also offers significant financial benefits. By extending the lifespan of your garments, like t-shirts, you can save an average of $200 a year. Instead of replacing items that have minor damage, investing time in repair can drastically cut your clothing expenses.
Consider that the average t-shirt costs between $10 to $30. When you repair just a few shirts, you'll notice substantial savings over time. Engaging in repair techniques also helps reduce the staggering 92 million tons of textile waste generated globally each year.
If you're into thrift shopping or seeking upcycling ideas, repairing clothes fits perfectly into a minimalist wardrobe. You'll not only create unique fashion statements but also cultivate a sustainable fashion mindset.
This approach encourages you to value quality and longevity over fleeting fast fashion trends, making your wardrobe both economical and eco-friendly.
Personalization and Creativity
Transforming a worn-out shirt into a personalized masterpiece can be a rewarding experience that showcases your unique style. When you repair your favorite shirt, you're not just fixing a hole; you're creating an opportunity for self-expression.
Consider incorporating custom stitching ideas that reflect your personality. Whether it's a bold zigzag or a delicate floral pattern, each stitch can tell a story.
Experiment with fabric color combinations to breathe new life into your shirt. You might choose vibrant hues that contrast with the original fabric or subtle tones that complement it beautifully. The choice is yours, and it can dramatically alter the garment's look.
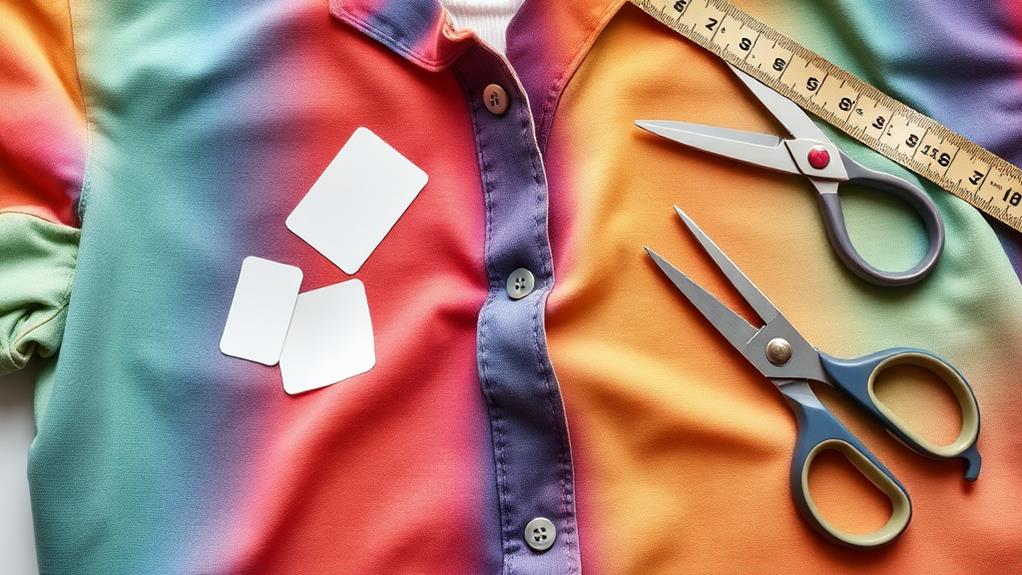
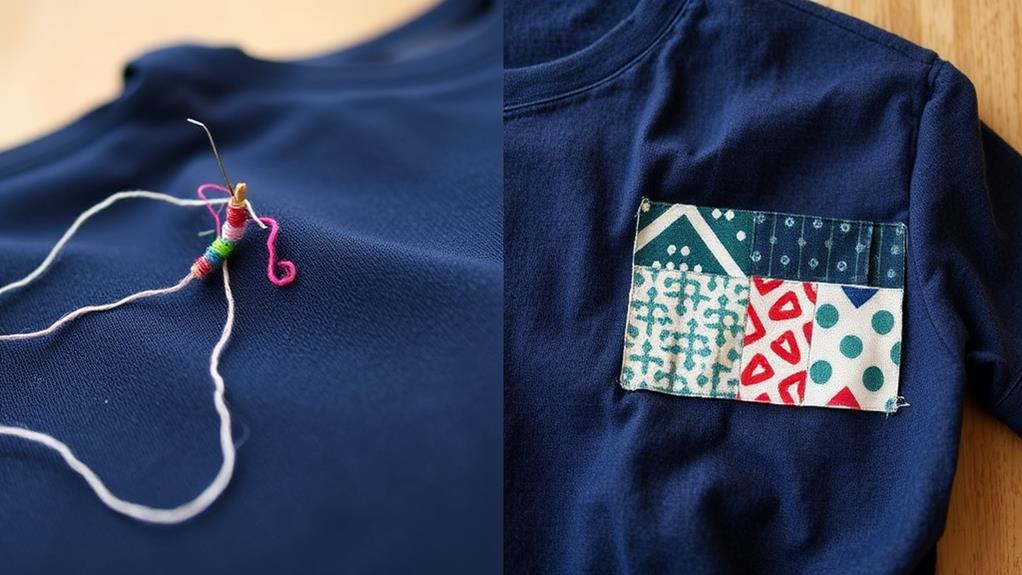
Don't forget about unique patch designs! Adding a creative patch can turn a simple repair into a statement piece. Whether you opt for playful motifs or stylish embroidery, patches can express your interests and passions, making the shirt even more meaningful.
Engaging in this repair process not only makes your clothing distinct; it also promotes sustainable fashion by reducing waste.
Overview of Repair Techniques
When it comes to fixing a hole in your shirt, you have a couple of effective techniques at your disposal. Each method has its pros and cons, making a repair technique comparison essential for your specific needs.
For tiny holes (5 mm or less), the no-sew repair technique is ideal. This method uses fusible bonding web and a lightweight stabilizer, allowing you to mend without any visible stitching. You'll want to press the area around the hole, apply a damp press cloth, and hold the iron in place for about 10 seconds for effective adhesion.
Additionally, using tools that simplify processes can enhance your overall repair experience, much like how expense tracking tools assist entrepreneurs in managing their finances efficiently.
If you're dealing with slightly larger holes, hand sewing is your best bet. This technique lets you grab small strands of fabric from both sides of the hole, ensuring a tighter closure. Working on the wrong side of the fabric types guarantees a cleaner finish, and you can choose between matching or contrasting thread to enhance the repair's aesthetic.
Ultimately, both methods yield different outcomes—the no-sew method minimizes outside visibility, while hand sewing may be more noticeable on the shirt's surface. Choose the one that best suits your repair needs.
Preparing for No-Sew Repair
To start your no-sew repair, gather all the materials you'll need, including fusible bonding web and a lightweight stabilizer.
This process is similar to the way budgeting apps help organize your financial goals by providing structure and support.
Flip your shirt inside out and press the area around the hole to smooth the fabric for a better repair.
This preparation guarantees you're set for a clean and effective fix.
Gather Necessary Materials
Before you plunge into fixing that pesky hole in your shirt, it's crucial to gather the right materials for a no-sew repair. Start with your repair materials selection, which should include fusible web options that are slightly larger than the hole you're tackling. This will guarantee adequate coverage and adherence.
Next, grab a lightweight cutaway stabilizer. This stabilizer type will provide added support during the repair process, helping to prevent future damage.
You'll also need a damp press cloth and parchment paper to protect your ironing board while applying heat.
Don't forget to flip the t-shirt inside out. Working on the area around the hole from this angle will yield best results.
Have your iron ready, set to the wool setting, as this is the perfect temperature for applying the bonding web effectively.
Lastly, prepare a clean, flat workspace. This will make it easier for you to move around while applying heat and pressure during the repair.
With these materials gathered and your workspace ready, you're all set to tackle that hole and restore your favorite shirt!
Prepare the Fabric
With the shirt flipped inside out, you can easily access the damaged area for your no-sew repair. Start by pressing the area around the hole to smooth out the fabric. This step enhances adhesion, allowing your chosen adhesive options to bond better.
Next, gather the edges of the hole to tighten the fabric. This technique helps achieve a cleaner finish when applying your repair materials.
Cut a piece of fusible bonding web that's slightly larger than the hole. This guarantees complete coverage during the repair process, which is vital for fabric types that might fray easily.
Additionally, place a lightweight cutaway stabilizer underneath the damaged area. This provides extra support and prevents further tearing, which can be especially helpful for delicate or stretchy fabrics.
As you prepare the fabric, make sure you have all your repair tools ready. This includes your adhesive options, the fusible web, and the stabilizer.
Taking these steps will help you create a smooth and durable repair, making your favorite shirt look as good as new without any sewing.
Step-by-Step No-Sew Method
Repairing a hole in your shirt doesn't have to involve a needle and thread; a no-sew method offers a quick and effective solution. Start by flipping your t-shirt inside out and pressing the area around the hole to prepare it for repair.
To make your repair more eco-friendly, consider using materials from sustainable packaging solutions or leftover fabric scraps. Choose a piece of fusible bonding web that's slightly larger than the hole, and place it over the damaged area, ensuring it covers the hole completely. For improved repair aesthetics, consider fabric selection carefully—lighter fabrics may require a lightweight cutaway stabilizer underneath.
Next, heat your iron to the wool setting. Cover the bonding web with a damp press cloth, and press down for about 10 seconds without shifting the iron. This step is vital for adhering the web properly.
Once that's done, flip the t-shirt to the right side and press the area again to finalize the repair, keeping in mind that you might see some visibility of the stabilizer inside.
This method not only fixes your shirt but also contributes to fashion upcycling, allowing you to extend the life of your favorite garments without compromising style.
Ironing for No-Sew Success
Achieving a successful no-sew repair hinges on the proper ironing technique. First, set your iron to the wool setting; this ideal heat is vital for activating the fusible bonding web. To enhance your repair experience, consider leveraging AI-driven tools for personalized shopping recommendations on fabric and repair supplies.
Next, prepare a damp press cloth to place over the bonding web. This step guarantees even heat distribution and protects your fabric from direct contact with the iron, preventing any burns or damage.
Position your iron over the press cloth and hold it in place for approximately 10 seconds without shifting. This allows the bonding web to meld seamlessly with the fabric around the hole. After the initial pressing, flip the t-shirt to the right side and press again to finalize the repair. This second pressing guarantees the bonding web adheres securely, giving your shirt a clean finish.
Keep in mind that while this no-sew method is effective for tiny holes, some visibility of the stabilizer on the inside of the shirt may occur post-repair. By following these ironing steps, you'll achieve a neat and durable fix, extending the life of your favorite shirt without the need for sewing.
Hand Sewing Essentials
When it comes to hand sewing, choosing the right thread and mastering basic stitching techniques are key to a successful repair.
Utilizing tools like expense tracking apps can also help freelancers manage their sewing supplies and costs effectively.
You'll want to match your thread to the fabric type and color to keep your work looking seamless.
Plus, securing your stitches with a knot at the end guarantees that your repair lasts and stays intact.
Thread Selection Tips
Choosing the right thread is essential for a successful hand sewing repair. Start by selecting the appropriate thread type based on your fabric. Cotton threads lend a softer finish, while polyester threads offer better durability and resistance to fraying.
For lightweight fabrics, opt for a thread weight of 40 or 50. However, if you're working with heavier materials, a thicker 30 weight thread is your best bet for support.
Next, consider thread colors. Match the thread closely to your fabric for a seamless look, or choose a contrasting color to create a decorative effect. It's all about what fits your style and the shirt's design.
Don't forget about the fabric's stretch, especially with knits. Choose a thread with some elasticity to prevent breakage during wear.
For delicate repairs, using a single strand of thread is typically best, while doubling the thread can enhance strength for larger holes.
Stitching Techniques Explained
Often, mastering a few basic stitching techniques can make all the difference in repairing a hole in your shirt. For holes slightly larger than 5 mm, you'll want to choose the right stitching patterns to guarantee a secure repair. A simple running stitch or a backstitch can work wonders, depending on your preference and the fabric type.
When it comes to thread types, using a matching thread will help achieve a seamless look, while contrasting thread can add a decorative flair. Remember to always work from the wrong side of the fabric; this not only keeps your stitches less visible but also results in a cleaner finish.
After you've stitched the hole, gentle fabric manipulation is key. Carefully flatten the repaired area to blend it with the surrounding fabric, enhancing the overall appearance.
Don't forget to tie a knot at the end of your stitching to secure your work. This not only keeps the edges snugly together but also guarantees your repair lasts. With these techniques in hand, you're on your way to giving your favorite shirt a new lease on life!
Knotting for Security
Securing your stitches starts with mastering the art of knotting. When you hand sew a hole in your favorite shirt, always tie a secure knot at both the beginning and end of your stitching. This prevents the thread from unraveling.
One effective method is to wrap the thread around your needle two to three times and pull the needle through the loop created. This technique guarantees a tight grip.
For added security, consider using a double strand of thread. This boosts knot strength, making it less likely to come undone—a useful tip when you're facing knotting challenges.
You might also want to practice various knot tying techniques, such as the square knot or surgeon's knot. Each has its own advantages, and a knot strength comparison will show you which works best for your needs.
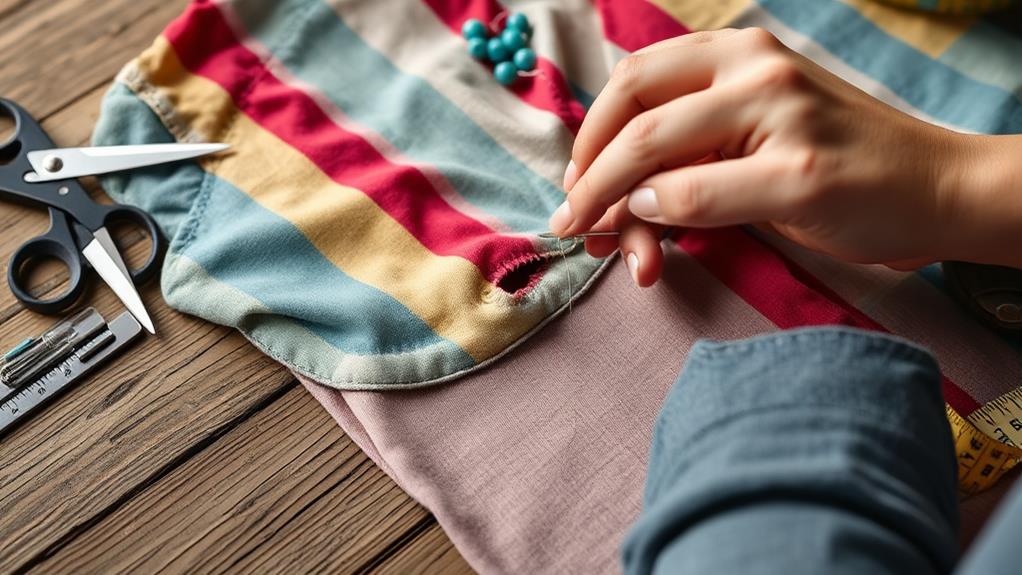
Executing Hand Sewing Repair
When it comes to executing a hand sewing repair on a shirt, starting on the wrong side of the fabric is key for achieving a clean finish. This lets you work more discreetly while ensuring the hole is easily accessible.
Choose a matching or contrasting thread based on whether you want the repair to blend in or stand out. For freelancers managing tight budgets, it's crucial to reflect on tools that help with financial tracking while engaging in DIY repairs. Cut a length of thread about three times the width of the hole for easy manipulation.
Next, grab small strands of fabric from both sides of the hole, gently pulling them together to minimize the gap. Use a simple running stitch or backstitch technique to secure the edges.
Pay attention to your thread tension; you want it snug but not too tight, or it could pucker the fabric. Remember to tie a knot at the end of your sewing to prevent unraveling.
Once you've completed the repair, gently manipulate the fabric to flatten the area, ensuring the repair appears as seamless as possible. With these steps, no matter the fabric types, your shirt will be looking good as new in no time!
Comparing Repair Techniques
Repairing a hole in your shirt can be approached a couple of effective ways, each with its own advantages and drawbacks.
The no-sew repair technique is perfect for tiny holes (5 mm or less) and utilizes fusible bonding web and stabilizer. This method offers a seamless finish, making it a great choice for achieving high repair durability. However, keep in mind that it may leave some visible stabilizer on the inside of the shirt, which could affect aesthetic considerations.
On the other hand, hand sewing can accommodate slightly larger holes but tends to be more visible due to the stitching. This technique requires thread and needle to secure the fabric, which can create a more textured finish. While hand sewing may not match the seamless appearance of the no-sew method, it allows for a personalized touch and can be quite effective regarding technique suitability for various fabric types.
Ultimately, your choice will depend on the size of the hole, desired aesthetics, and how much effort you want to invest in the repair. Each technique has its merits, so consider what works best for your favorite shirt.
Expanding Your Sewing Skills
Expanding your sewing skills can be a rewarding journey that opens up a world of creative possibilities. To get started, explore online platforms and video tutorials that offer step-by-step guidance on various sewing techniques. This will enhance your skills beyond basic repairs and introduce you to new methods.
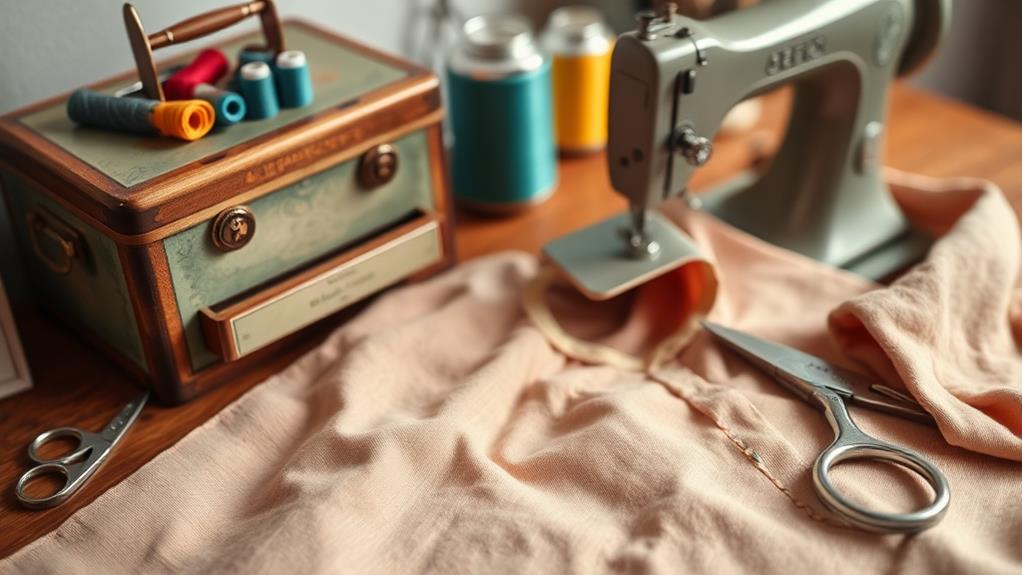
Investing in a basic sewing kit is essential, too; make sure it includes needles, thread, scissors, and fabric glue to facilitate your learning process.
Practice is key, so create small projects like simple patches or decorative stitches. This builds your confidence and helps you get familiar with different sewing methods.
Don't underestimate the power of sewing community engagement. Join local or online sewing groups where you can share experiences, ask questions, and receive valuable feedback from more experienced sewists.
As you grow, engage in fabric choice exploration. Experiment with different types of fabrics and threads to understand how they behave. This knowledge will guide you in selecting the right materials for specific repairs or projects.
With the right skill-building resources and a bit of practice, you'll find yourself tackling more complex sewing challenges in no time!
Conclusion
Repairing a hole in your favorite shirt isn't just about mending fabric; it's like stitching back together a cherished memory. Think of that shirt as a favorite book—each tear tells a story, and every repair adds to its character. By using the techniques you've learned, you're not only saving your clothing but also preserving those moments. So, grab your needle or glue, and breathe new life into your wardrobe, one stitch at a time!