Making your own blackberry syrup for canning is easy and budget-friendly. Start by gathering fresh blackberries, sugar, water, and lemon juice. You’ll enjoy rich flavors without preservatives and save money, especially if you use homegrown berries. The canning process involves sterilizing jars, simmering the syrup, and processing in a boiling water bath. This syrup can enhance pancakes, cocktails, and more. If you’re curious about the best berry selection and creative uses, there’s plenty more to explore!
Why Make Your Own Blackberry Syrup?
Have you ever wondered why you should make your own blackberry syrup? First off, it’s a fantastic way to enjoy a rich, natural flavor without the preservatives found in store-bought varieties.
You’ll not only savor the taste, but you’ll also reap the health benefits of blackberries, packed with antioxidants and vitamins.
Plus, crafting your own syrup can lead to significant cost savings, especially if you grow your own berries or buy them in bulk.
Crafting your own syrup not only enhances your dishes but also saves money, especially if you grow or buy berries in bulk.
With just a few simple ingredients, you can whip up a delicious syrup that enhances pancakes, desserts, and cocktails. Additionally, making homemade beverages encourages financial discipline and helps you save money in the long run.
You’ll feel great knowing you’ve created something wholesome and budget-friendly.
Ingredients You’ll Need for Blackberry Syrup
To make delicious blackberry syrup, you’ll need the right ingredients and tools.
Start by selecting the freshest blackberries for the best flavor and texture. Also, ensure you have essential canning supplies to safely store your syrup for long-lasting enjoyment.
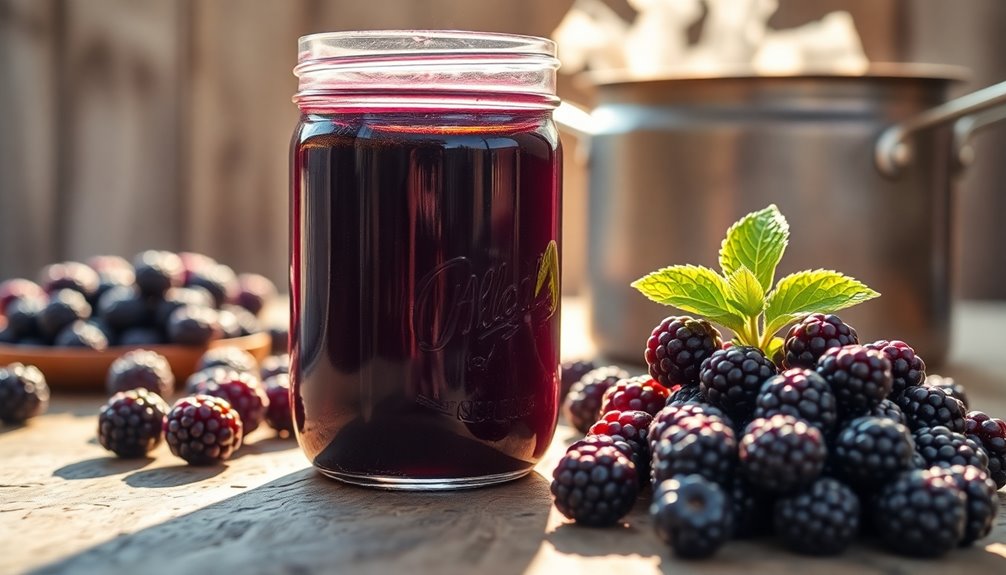
Fresh Blackberries Selection Tips
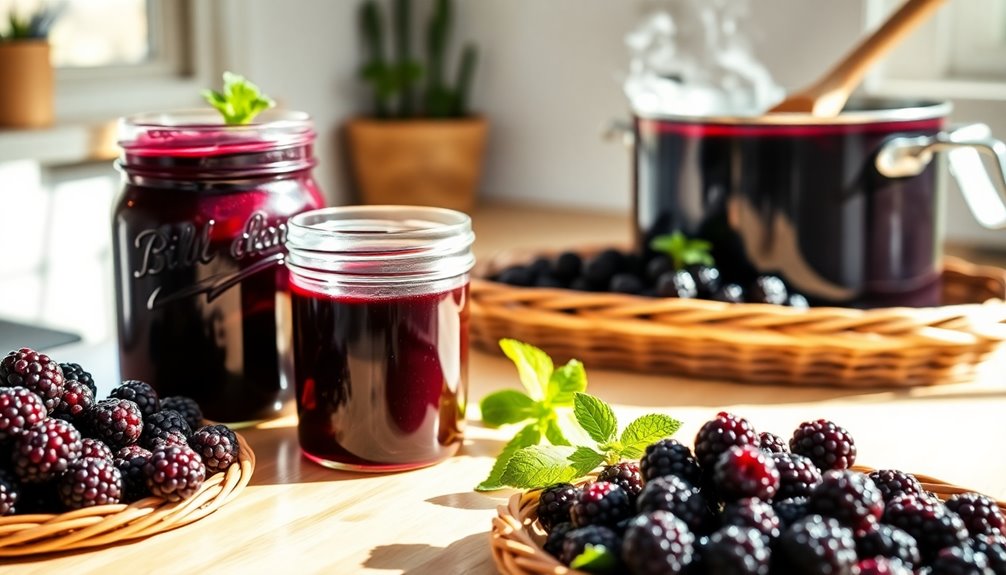
Choosing the best fresh blackberries is essential for making a delicious syrup. When you’re out berry picking, look for plump, shiny berries that are deep black in color. Avoid any that are soft, mushy, or have signs of mold. These can spoil your syrup’s flavor.
Check the fruit ripeness carefully; ripe blackberries should easily pull away from the stem without much effort. If you find some that are still red or purple, leave them behind to ripen a bit longer. It’s worth the wait!
Essential Kitchen Tools Needed
Creating a delicious blackberry syrup requires a few essential kitchen tools and ingredients. First, gather your kitchen gadgets like a large pot for cooking the berries, a measuring cup for accurate ingredient ratios, and a wooden spoon for stirring.
You’ll also need a fine mesh strainer to separate the juice from the pulp effectively.
Don’t forget your preserving tools, including sterilized jars and lids to store your syrup safely. A funnel can make pouring the syrup into jars much easier, minimizing spills.
Finally, have a ladle on hand for transferring the syrup. With these essentials, you’ll be well-equipped to create a tasty, budget-friendly blackberry syrup that you can enjoy all year round!
Step-by-Step Instructions for Canning Blackberry Syrup
**
Now that you’ve gathered your ingredients, it’s time to focus on the canning process. You’ll want to follow each step carefully to guarantee your blackberry syrup stays fresh. Remember to use sterilized Mason jars for safe preservation as you walk through the essential steps together.
Essential Ingredients Needed
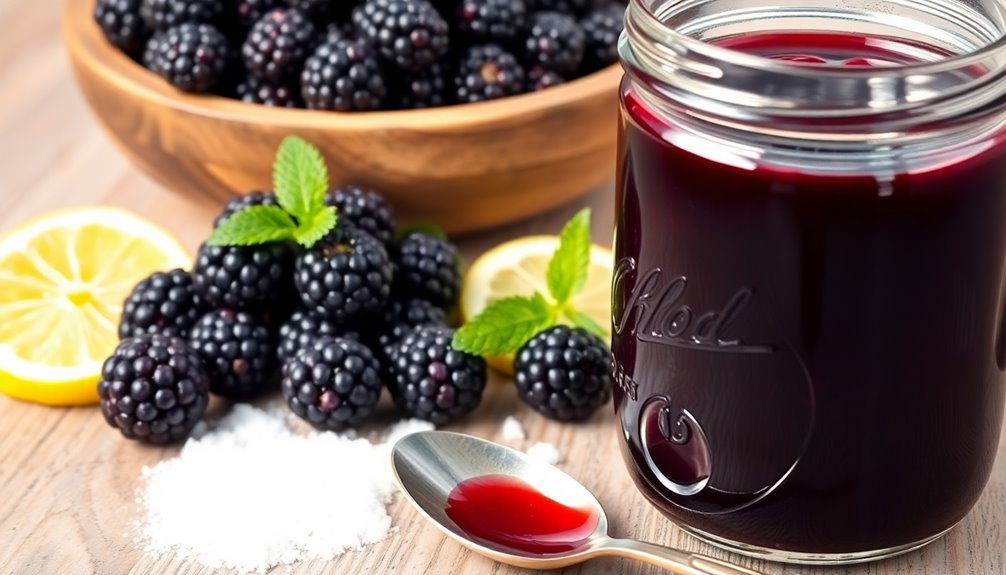
To craft a delicious blackberry syrup, you’ll need a few essential ingredients that make all the difference. Start with fresh blackberries, as they’re packed with antioxidants and offer numerous blackberry benefits.
You’ll also need granulated sugar, which helps to balance the tartness, and water to extract the berry flavor. For added depth, consider including lemon juice, which brightens the syrup and enhances its sweetness.
If you’re feeling adventurous, think about syrup variations like adding vanilla extract or spices such as cinnamon for a unique twist.
These ingredients combine to create a rich, flavorful syrup you’ll love drizzling over pancakes or yogurt. Gather these essentials, and you’re well on your way to a delightful homemade treat!
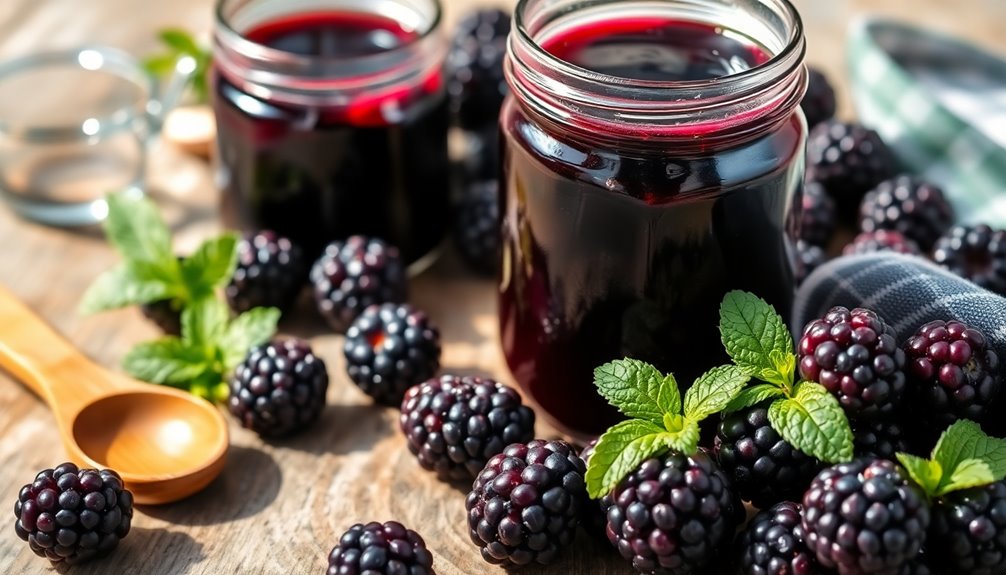
Canning Process Steps
Start by preparing your canning supplies to guarantee a smooth process for preserving your blackberry syrup. Gather your jars, lids, and a large pot for sterilization.
Begin with jar sterilization: boil your jars and lids for 10 minutes to eliminate any bacteria.
While the jars cool, simmer your blackberry syrup until it thickens, using canning techniques to ensure it reaches the right consistency.
Once ready, carefully ladle the syrup into the hot jars, leaving about a quarter-inch headspace. Wipe the rims with a clean cloth, then seal with the lids.
Finally, process your jars in a boiling water bath for the recommended time. Let them cool completely before storing in a cool, dark place.
Enjoy your homemade blackberry syrup!
Tips for Choosing the Best Blackberries
When you’re on the hunt for the best blackberries, remember that freshness is key.
Start by checking different blackberry varieties; each offers unique flavors and sweetness. Look for plump, shiny berries that are deep purple to black in color. These indicate ideal ripeness.
Explore various blackberry varieties for distinct flavors, and choose plump, shiny berries that are deep purple to black for perfect ripeness.
Avoid any that are dull or have green patches, as these are under-ripe. Ripeness indicators include a slight give when gently squeezed and an aromatic scent; if they smell sweet, you’re on the right track.
Additionally, steer clear of berries with bruises or mold, which can spoil your syrup. Proper storage techniques, such as keeping them in airtight containers, can help extend their freshness before making syrup.
Creative Ways to Use Your Blackberry Syrup
With a batch of homemade blackberry syrup ready to go, the fun begins as you explore creative ways to use it.
Drizzle that luscious syrup over pancakes for a sweet topping that’ll elevate your breakfast. You can also stir it into yogurt or oatmeal for a burst of flavor.
Don’t stop there—try crafting invigorating blackberry cocktails! Mix the syrup with your favorite spirits for a delicious twist at your next gathering.
You could even use it as a glaze for grilled meats or veggies, adding a unique touch to your dishes.
The possibilities are endless, so let your creativity shine and enjoy every drop of your delightful blackberry syrup! Additionally, using expense tracking tools can help you manage the costs of your ingredients efficiently.
How to Store and Gift Your Blackberry Syrup?
Storing and gifting your homemade blackberry syrup is a breeze with a few simple steps.
For storage options, keep your syrup in clean, sterilized glass jars or bottles. Seal them tightly and store them in the refrigerator for up to a month. If you want to prolong shelf life, consider canning your syrup using a water bath method.
When it comes to gift packaging, get creative! Use decorative jars and add a pretty label with the date and flavor. You might also include serving suggestions or recipe ideas. Additionally, consider giving your syrup alongside budget-friendly meal planning tips to inspire delicious uses.
Wrapping the jars in colorful fabric or twine adds a personal touch. This not only preserves your syrup but also makes for a delightful gift that friends and family will love.
Conclusion
Now that you’ve crafted your own blackberry syrup, you’re not just preserving fruit; you’re bottling up a taste of summer. Just like a timeless song, this syrup will sweeten your pancakes, brighten your beverages, and make every breakfast a celebration. So go ahead, share your creation with friends or keep it as your secret treasure. With every drizzle, you’ll relish the fruits of your labor, echoing the joy of home-cooked delights that never fade.