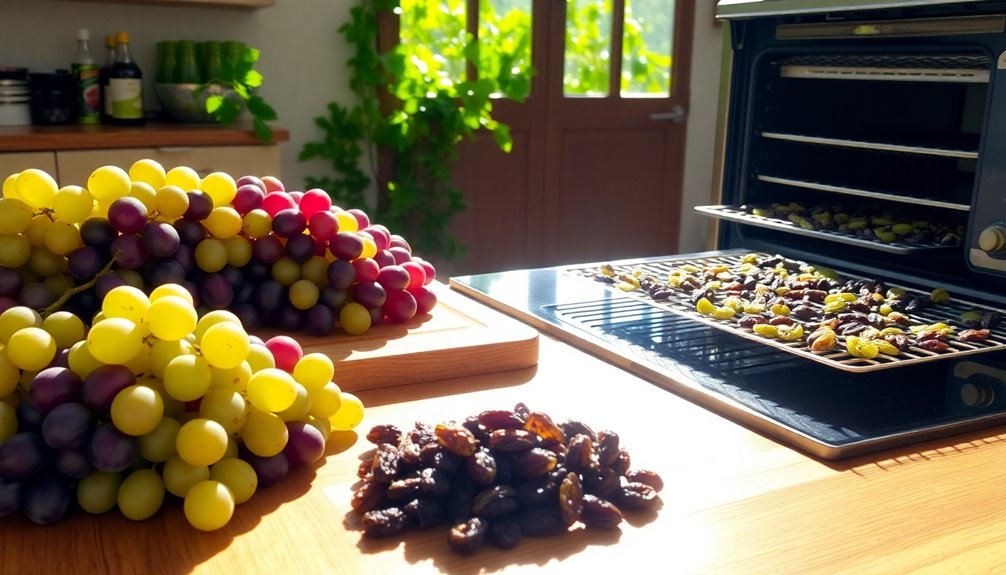
Making raisins at home is easy and fun! You can sun-dry grapes in a warm, airy spot or use your oven set to 140-160°F. Just wash and spread the grapes, checking them hourly. If you have a dehydrator, that’s great for larger batches too. Whichever method you choose, make sure you store your raisins in airtight jars in a cool place for maximum freshness. Keep exploring, and you’ll discover even more tips and tricks for the perfect raisins!
Why Make Raisins at Home?
Making raisins at home can be a rewarding experience, especially if you want to control the ingredients and affirm quality. When you make your own raisins, you confirm they’re free from preservatives and additives, enhancing their health benefits. You can also choose organic grapes, boosting the nutritional value even further.
Additionally, home-dried raisins often have a richer, more concentrated flavor compared to store-bought options. This flavor enhancement allows you to enjoy a treat that’s not only delicious but also tailored to your taste preferences.
Plus, making raisins is a fun, creative process that lets you experiment with drying methods. Overall, the benefits of homemade raisins extend beyond taste, making it a worthwhile endeavor for your health and palate. Furthermore, practicing smart resource management can lead to financial savings while enjoying homemade treats and nurturing a frugal lifestyle.
Choosing the Right Grapes for Raisins
When it comes to creating your own raisins, selecting the right grapes is key to achieving the best flavor and texture. You’ll want to choose grape varieties that are naturally sweet and have a good balance of sugar and acidity.
Thompson Seedless is a popular choice, known for its mild flavor and plumpness. If you prefer something with a more robust flavor profile, consider using Black Corinth grapes, which offer a rich, tangy taste.
Thompson Seedless grapes provide a mild sweetness, while Black Corinth grapes deliver a rich, tangy flavor perfect for raisins.
For a unique twist, try Muscat grapes; their aromatic notes can add depth to your raisins. Always look for firm, ripe grapes, as these will yield the best results. The right selection will make your homemade raisins truly delicious! Additionally, using budget-friendly cooking techniques can help maximize your enjoyment while making raisins at home.
The Traditional Sun-Drying Method Explained
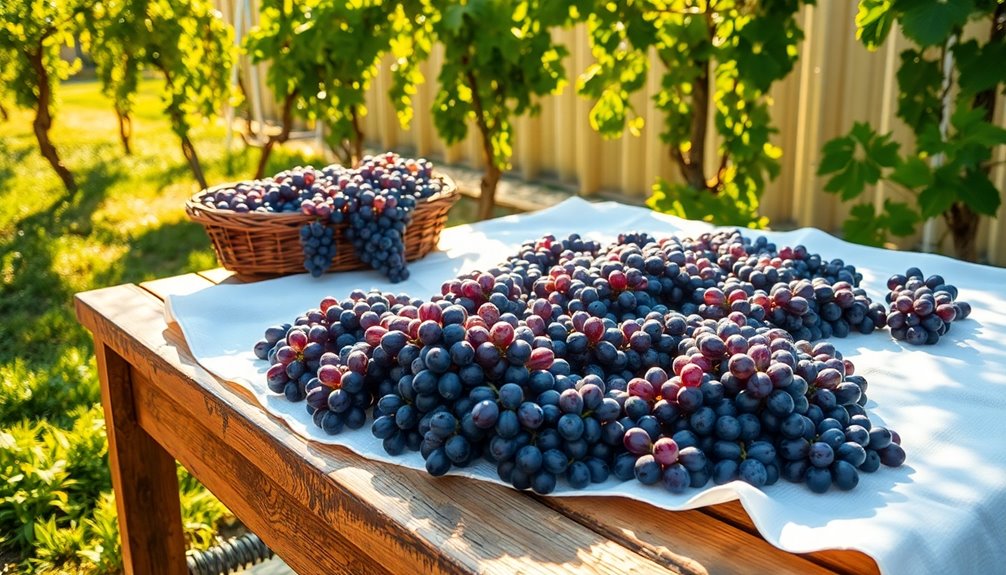
If you’re looking to make raisins at home, the traditional sun-drying method is an excellent choice. This method relies on natural sun exposure to transform juicy grapes into sweet, chewy raisins.
You’ll need to contemplate the drying duration, which can vary based on climate and grape variety.
Imagine:
- Warm sunbeams warming the grapes
- A gentle breeze carrying the sweet aroma
- Vibrant grapes glistening in the sunlight
- The satisfying crunch of a perfectly dried raisin
- The satisfaction of homemade treats
With patience and the right conditions, you’ll enjoy the rich flavor and nutrition of your homemade raisins. Additionally, using tools like expense tracking apps can help manage the cost of ingredients effectively.
Just remember to check on them regularly, ensuring they’re drying evenly under the sun.
Step-by-Step Guide to Sun-Drying Raisins
To successfully sun-dry raisins, you need to start with the right grapes. Choosing ideal grapes and ensuring proper drying conditions are essential steps in the process. Let’s explore how to select the best grapes and create the perfect environment for drying. Additionally, storing cut onions properly can help minimize waste and ensure you have fresh ingredients on hand while making your dried fruits.
Ideal Grapes Selection
Selecting the right grapes is essential for making the best raisins at home. Different grape varieties lend unique flavors and sweetness to your raisins, enhancing your final product.
For sun-drying, opt for grapes that are naturally sweet and have a thicker skin, as they hold up better during the drying process. Here are some ideal choices:
- Thompson Seedless: Sweet and versatile.
- Red Flame: Juicy with a rich flavor.
- Black Corinth: Tiny, sweet, and perfect for snacking.
- Cotton Candy: Fun and uniquely sweet.
- Muscat: Fragrant and flavorful.
Drying Conditions Needed
Once you’ve picked the perfect grapes, it’s time to create the ideal drying conditions for making raisins. Start by finding a sunny spot with good air circulation.
You’ll want to maintain low humidity levels, ideally between 30-50%, to prevent mold. If it’s too humid, consider using a fan to improve airflow.
Temperature control is essential; aim for 80-90°F (27-32°C) during the drying process. If it’s cooler, your grapes may take longer to dry, so plan accordingly.
Spread the grapes on a clean mesh screen or drying tray, allowing space between them for airflow. Keep an eye on the weather; if it rains, bring them indoors.
Patience is key, so let them dry for several days until they’re shriveled and leathery.
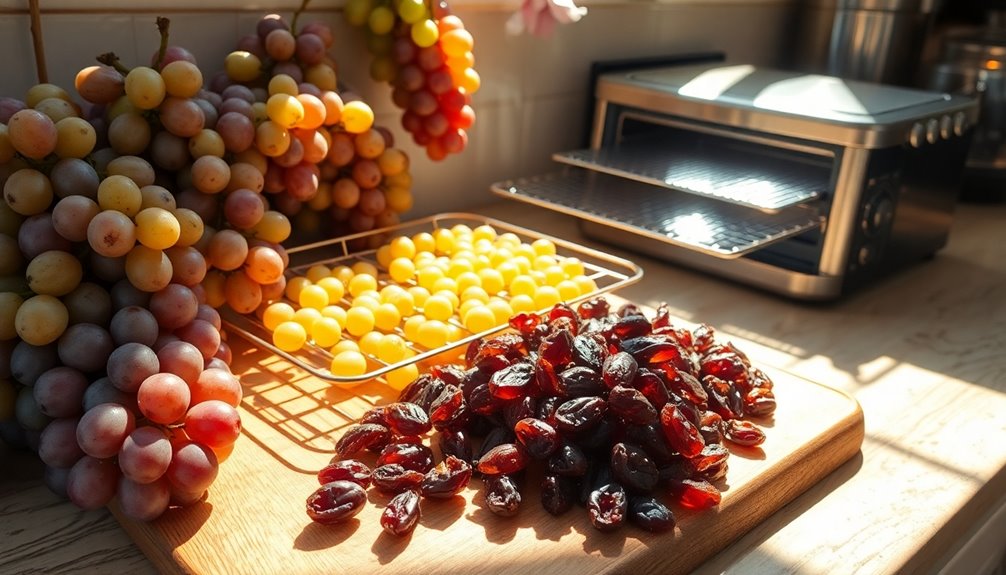
Using an Oven to Make Raisins Quickly
If you want raisins fast, using your oven is a great option.
Start by preparing the grapes properly to guarantee even drying, then set your oven to the ideal temperature for the best results. Vacuum sealing your homemade raisins can help extend shelf life, ensuring they remain fresh and delicious for months!
With these steps, you’ll have delicious raisins in no time!
Preparing The Grapes Properly
To prepare grapes for making raisins in the oven, start by choosing ripe, plump varieties that are free from blemishes. Your grape selection is essential for achieving the best flavor and texture.
Once you’ve picked the perfect grapes, use proper washing techniques to remove any dirt or pesticides. Rinse them gently under cool water and pat them dry with a clean towel.
- Bright green Thompson Seedless
- Sweet, dark Concord grapes
- Plump, juicy Black Corinth
- Firm, red Flame Seedless
- Golden, sun-kissed Muscat
After washing, remove any stems and leaves, ensuring only the grapes remain.
Now you’re ready for the next steps in your raisin-making journey!
Optimal Oven Temperature Settings
When you’re ready to dry your grapes into raisins, setting the right oven temperature is essential for achieving the perfect texture and flavor. Preheat your oven to around 140°F to 160°F (60°C to 70°C).
This low heat helps maintain the grapes’ natural sugars while effectively reducing oven humidity, which can cause uneven drying.
Spread the grapes evenly on a baking sheet, ensuring they’re not overcrowded. You’ll want to check them every hour, as drying time typically ranges from 4 to 8 hours, depending on your oven and grape size.
When they’re shriveled and chewy, they’re done! Keep an eye on them to prevent burning, and enjoy your homemade raisins!
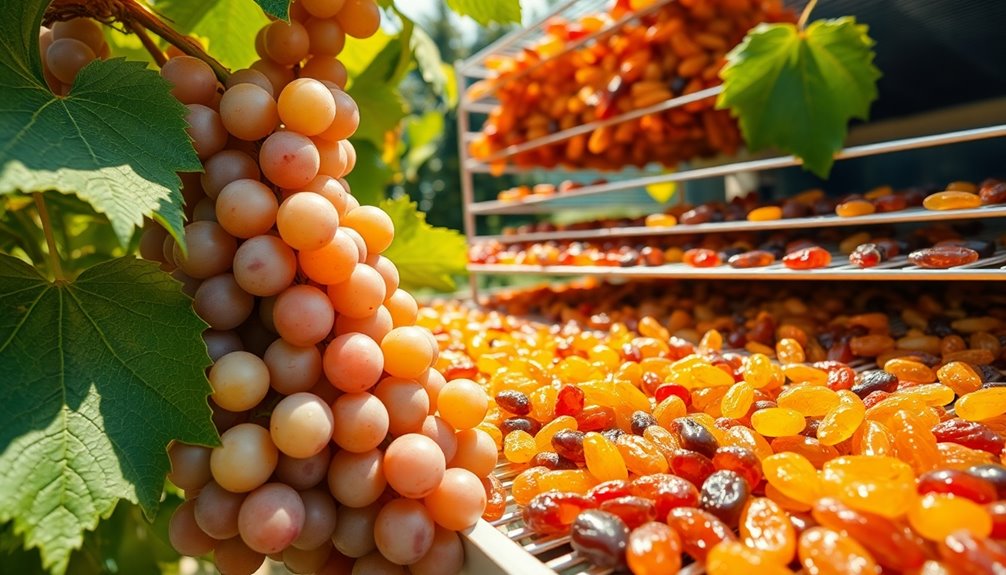
How to Dehydrate Raisins With a Dehydrator
While using a dehydrator might seem intimidating, it’s one of the easiest methods to turn fresh grapes into delicious raisins. Start by washing and removing any stems from your grapes.
Set your dehydrator to the recommended settings, typically around 135°F (57°C). Spread the grapes evenly on the trays, ensuring they’re not touching.
Expect drying times to vary, but usually, it takes about 24 hours for fully dried raisins. Check periodically for your desired texture.
- Sweet, sun-kissed grapes
- A warm, inviting kitchen aroma
- Golden, wrinkled raisins
- Crunchy snacks ready for munching
- A perfect addition to your favorite recipes
Additionally, choosing ripe grapes contributes to a unique taste profile that enhances the flavor of your homemade raisins. Enjoy your homemade raisins, knowing they’re made with love!
Comparing Sun-Drying, Oven, and Dehydrator Methods
When you’re making raisins, choosing the right drying method can make a big difference. Sun-drying offers a natural approach but comes with its own set of challenges, while ovens and dehydrators provide more control over the process. Additionally, opting for natural methods aligns with eco-friendly aspects that minimize environmental impact and promote sustainability. Let’s compare the advantages and disadvantages of each method to help you decide which one suits you best.
Sun-Drying Advantages And Disadvantages
Although sun-drying is a time-honored method for making raisins, it comes with both perks and pitfalls. You’ll enjoy the natural sweetness and rich flavor, but you’ll also face challenges like unpredictable weather.
Here are some key points to reflect on:
- Vibrant sunlight enhancing the drying process
- Long drying times that can stretch over several days
- Variable results due to inconsistent sun exposure
- Cost-effectiveness since you don’t need special equipment
- Risk of pests or contaminants during the drying period
Ultimately, if you’ve got a sunny spot and the patience to wait, sun-drying can yield delicious raisins, but be prepared for the potential downsides along the way.
Oven Versus Dehydrator Efficiency
If you’re looking to make raisins efficiently, comparing the oven and dehydrator methods to sun-drying can help you choose the best approach.
Using an oven, you’ll benefit from quicker drying times, but keep in mind that it consumes more oven energy, which can increase your electricity bill.
On the other hand, a dehydrator offers greater dehydrator capacity, allowing you to dry larger batches without the added energy costs of a traditional oven.
While both methods can yield delicious results, consider your needs.
If you only have a small amount of fruit, the oven might suffice. However, for larger quantities, a dehydrator could be a more energy-efficient and convenient choice in the long run.
Tips for Storing Your Homemade Raisins
Storing your homemade raisins properly can make all the difference in their flavor and longevity. To keep them fresh and delicious, focus on moisture control and choose the right storage containers.
Here are some tips for ideal storage:
- Use airtight glass jars to prevent moisture from seeping in.
- Store them in a cool, dark pantry or cupboard.
- Add a small packet of silica gel to absorb excess moisture.
- Keep them away from strong odors to avoid flavor contamination.
- Label containers with the date to track freshness.
Following these steps will help guarantee your raisins remain plump and flavorful, ready for snacking or adding to your favorite recipes. Additionally, consider using eco-friendly practices to further enhance the sustainability of your kitchen.
Enjoy the fruits of your labor!
Creative Ways to Use Raisins in Recipes
Raisins can add a delightful burst of sweetness and texture to a variety of dishes, making them a versatile ingredient in your kitchen.
You can easily whip up healthy raisin snacks by mixing them with nuts and seeds for a tasty trail mix.
For lunch or dinner, consider crafting raisin salads; toss greens with nuts, cheese, and a drizzle of balsamic vinaigrette for a rejuvenating meal.
If you’re in the mood for something fruity, blend raisins into your favorite raisin smoothies for natural sweetness.
Don’t forget about savory dishes! Incorporate raisins into grain bowls or tagines for a sweet contrast that balances flavors beautifully.
Embracing budget-friendly ingredient choices can elevate your culinary creativity while keeping costs low.
Your culinary creativity knows no bounds with these tiny treasures!
Troubleshooting Common Raisin-Making Issues
While making raisins at home can be a rewarding experience, you might encounter a few common issues along the way. To guarantee you get that perfect raisin texture, keep an eye on the drying duration.
Here are some troubleshooting tips:
- Crumbly raisins: They may have dried too long; reduce the time next batch.
- Sticky texture: This could mean they’re not fully dried; try extending the duration.
- Uneven drying: Rotate your trays or stir the grapes periodically.
- Mold growth: Confirm your drying area is well-ventilated and clean.
- Bitter taste: This might happen if overripe grapes were used; opt for fresher ones.
- Preventive measures like ensuring proper ventilation in drying areas can significantly reduce issues like mold growth.
Conclusion
Making raisins at home is like capturing sunshine in a tiny, chewy morsel. Whether you choose sun-drying, oven, or a dehydrator, you’ll enjoy the satisfaction of crafting your own sweet snacks. With the right grapes and a bit of patience, you can savor the fruits of your labor in creative dishes or as a healthy treat. So, roll up your sleeves and let your culinary adventure begin—your homemade raisins are just a step away!