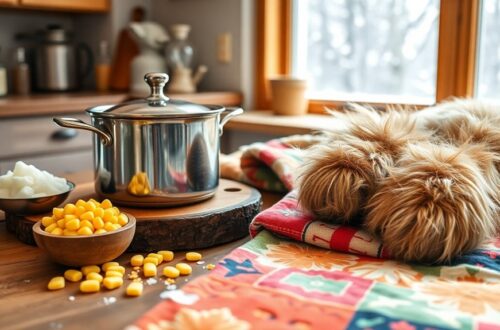
Making homemade paw wax is a simple, cost-effective way to protect your dog’s feet. You’ll need beeswax, coconut oil, and shea butter. Melt the beeswax, mix in the oils, and pour it into containers to cool. Apply it before walks to keep your pup’s paws healthy and soothed year-round. Regular checks for any signs of discomfort are essential. Keep going, and you’ll discover more tips on tailoring your paw wax for seasonal needs and introducing it to your dog.
Why Paw Protection Matters for Dogs
When you consider your dog’s overall health, don’t overlook their paws; they endure a lot of wear and tear.
Your pup’s paw health is vital, especially during harsh winter months. Cold temperatures, ice, and salt can cause irritations and injuries, making it important to protect their feet. You wouldn’t want your dog to suffer from cracked pads or painful cuts while enjoying a winter walk. By taking preventative measures, like using paw wax, you can shield their paws from winter hazards and keep them comfortable. Regularly checking their paws for any signs of damage is essential, as well as understanding local laws regarding private firearm sales to ensure your safety and compliance. Keeping their paws healthy guarantees your dog stays happy and active throughout the season.
Understanding the Ingredients in Paw Wax
When making paw wax, it’s important to know what goes into it. Each ingredient plays a vital role in protecting your dog’s paws and keeping them healthy.
For instance, using natural ingredients not only enhances the balm’s effectiveness but also ensures safety for your pet.
Key Ingredients Explained
Paw wax serves as a protective barrier for your dog’s paws, shielding them from harsh weather and rough surfaces.
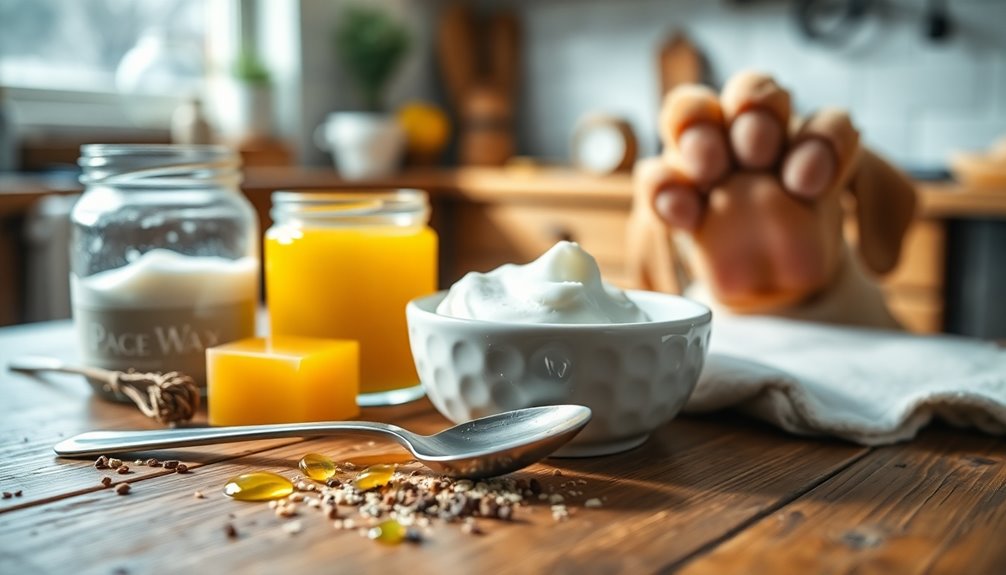
The key ingredients in your paw wax recipe play a vital role in effective dog paw care. Beeswax forms a thick layer, providing winter protection by keeping moisture in and harsh elements out.
Coconut oil moisturizes and nourishes the paw pads, preventing cracking and ensuring flexibility.
Shea butter adds an extra layer of hydration, promoting overall paw health.
Essential oils, like lavender or peppermint, not only offer a pleasant scent but also have soothing properties.
Benefits of Each Component
Understanding the benefits of each ingredient in your paw wax recipe can elevate your dog’s paw care routine. By focusing on high-quality components, you can guarantee paw health and comfort.
Here are three key ingredient benefits:
- Beeswax: Acts as a protective barrier, shielding your dog’s paws from harsh winter conditions and hot surfaces, providing seasonal protection.
- Coconut Oil: Offers moisturizing properties that promote dog comfort while being an eco-friendly option, absorbed easily into the skin.
- Shea Butter: Known for its healing properties, it supports ingredient sourcing that prioritizes natural alternatives, further enhancing paw health.
These ingredients work together to create an effective paw wax, assuring your furry friend stays happy and protected year-round.
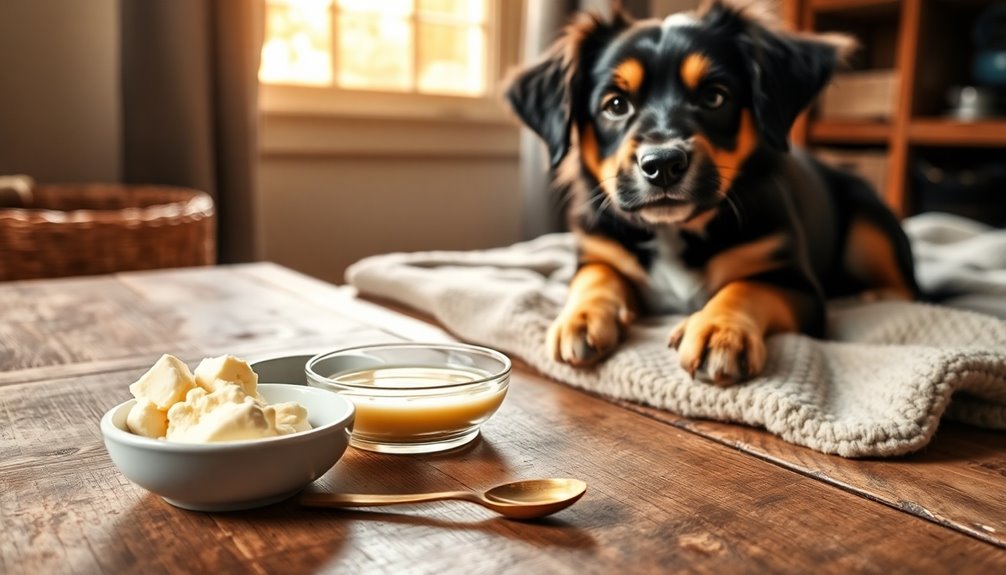
How to Make Your Own Paw Wax at Home
Making your own paw wax at home is easier than you might think! You’ll need just a few essential ingredients and some simple mixing instructions to get started. Additionally, using non-toxic ingredients ensures your dog’s safety while providing effective protection. Let’s break down what you’ll need and how to whip it all together.
Essential Ingredients Required
To create your own paw wax at home, you’ll need just a few essential ingredients that are both effective and dog-friendly.
Using natural alternatives guarantees your pup’s safety while providing protection. Depending on the season, you might need to make some adjustments for ideal results.
Here’s what you’ll need:
- Beeswax – This forms the base and provides a waterproof barrier.
- Coconut Oil – A moisturizing agent that soothes and protects dry pads.
- Shea Butter – It nourishes and conditions your dog’s paws, especially in harsh weather.
With these ingredients, you can tailor your paw wax to suit your dog’s needs throughout the year, guaranteeing their feet stay healthy and protected.
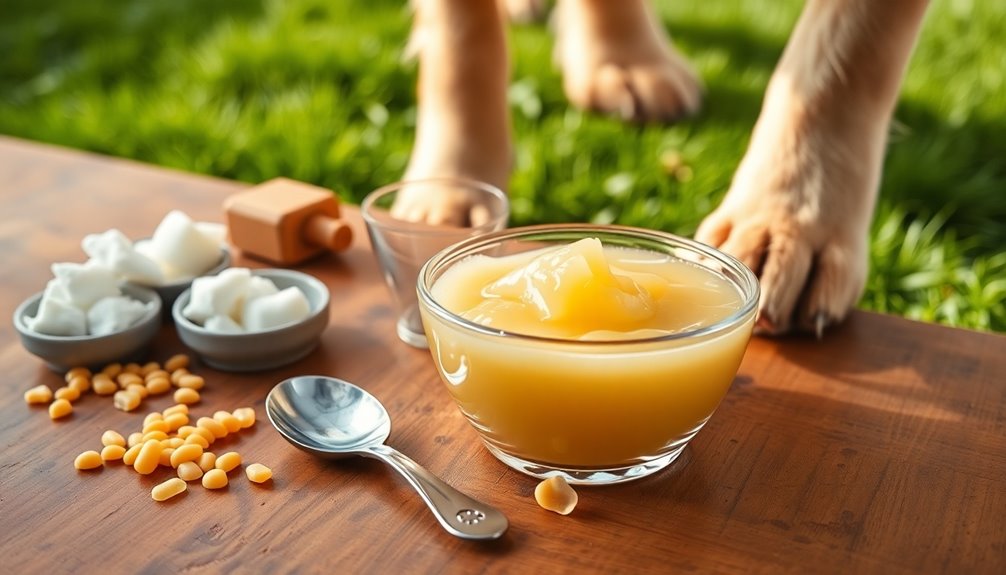
Simple Mixing Instructions
Get ready to whip up your own paw wax with just a few simple steps! Start by melting two parts beeswax in a double boiler.
Once it’s melted, stir in one part coconut oil and one part shea butter. These ingredient ratios guarantee a perfect consistency that’ll protect your pup’s paws.
Now, use mixing techniques like whisking or stirring to blend everything evenly. After it’s well combined, remove the mixture from heat and let it cool for a few minutes.
Pour the wax into small containers or molds. Allow it to set completely before using. This easy recipe not only saves you money but also gives you peace of mind knowing exactly what’s in your dog’s paw wax!
Step-by-Step Guide to Creating Paw Wax
Creating paw wax at home is a simple process that can keep your dog’s paws protected and moisturized. By using natural ingredients, you guarantee paw health while providing winter protection. Additionally, opting for homemade solutions can significantly reduce packaging waste and save money on commercial products.
Creating homemade paw wax is a straightforward way to protect and moisturize your dog’s paws, ensuring their health and comfort during winter walks.
Follow these steps for an effective homemade remedy:
- Melt the base: Combine 1 part beeswax with 2 parts coconut oil in a double boiler until fully melted.
- Add essential oils: Stir in a few drops of vitamin E oil for added nourishment and dog comfort.
- Pour and cool: Transfer the mixture into a small container and let it solidify.
This easy dog grooming solution not only enhances pet safety but also offers seasonal care, guaranteeing your furry friend enjoys comfortable walks even in harsh conditions.
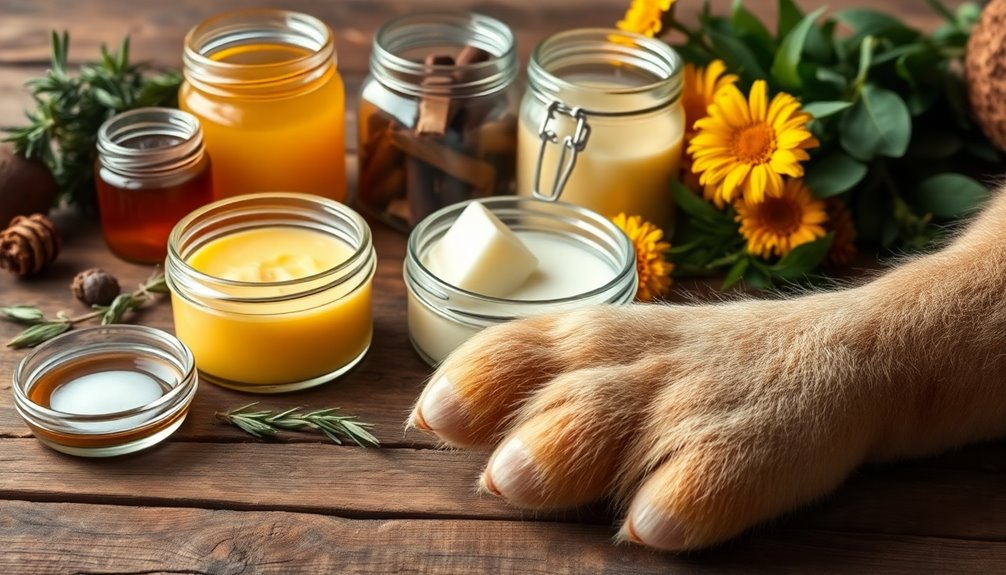
Tips for Storing Your Homemade Paw Wax
Once you’ve made your homemade paw wax, proper storage is key to keeping it effective.
Use airtight containers and store them in a cool, dark place to maximize shelf life. Additionally, consider using budget-friendly cooking methods to create your paw wax, ensuring you can make it whenever needed without breaking the bank.
With a few simple tips, you’ll guarantee your paw wax stays fresh and ready for your furry friend whenever needed.
Ideal Storage Containers
Choosing the right storage container for your homemade paw wax can make all the difference in maintaining its quality. Here are some storage tips to help you select the best container options:
- Glass Jars: They’re airtight and won’t react with your wax, keeping it fresh. Plus, they’re easy to clean and reusable.
- Plastic Containers: Look for BPA-free options. They’re lightweight and great for travel, but make sure they’ve tight-fitting lids to prevent spills.
- Metal Tins: These are sturdy and portable, perfect for on-the-go applications. Just confirm they’re lined to avoid any reactions with the wax.
Whichever option you choose, make sure your container is clean and dry before filling it with your homemade paw wax for ideal storage.
Cool, Dark Place
Storing your homemade paw wax in a cool, dark place helps preserve its effectiveness and longevity. Direct sunlight and heat can diminish its cooling properties, so aim for a spot that remains consistently cool.
A pantry or cupboard works well, as these areas provide the dark storage your wax needs. Avoid places like near ovens or windows, where temperatures fluctuate and light exposure is high.
If you have a refrigerator, that can be a great option, too, but be mindful of moisture. Always make certain the container is tightly sealed to keep the wax fresh.
Shelf Life Tips
To guarantee your homemade paw wax lasts as long as possible, it’s essential to focus on proper storage techniques. By following these shelf life tips, you can improve its shelf stability and guarantee your furry friend benefits from it for a while.
- Use Airtight Containers: Store your paw wax in airtight jars to prevent moisture and air exposure, which can degrade its quality.
- Keep It Cool: Opt for a cool, dark location, away from sunlight and heat sources, to maintain the wax’s integrity.
- Label and Date: Clearly label each container with the date you made it. This helps you track freshness and decide when to make a new batch.
With these simple storage solutions, your homemade paw wax will be ready whenever your pup needs it!
When to Apply Paw Wax for Best Results?
Applying paw wax at the right time can make a significant difference in its effectiveness. For best results, consider application timing based on your dog’s activities and the season.
If you frequently walk your dog on hot pavement or icy sidewalks, apply the wax before heading out. Seasonal considerations are vital; during winter, the wax protects against ice and salt, while in summer, it shields against harsh heat.
Aim to apply the wax at least 30 minutes prior to walks for ideal absorption. If you notice your dog’s paws are dry or cracked, it’s a good idea to reapply as needed.
Regular maintenance guarantees your pup’s paws stay healthy and protected year-round. Additionally, using expense tracking apps can help you manage the costs associated with your dog’s care effectively.
How to Apply Paw Wax to Your Dog’s Paws
Applying paw wax to your dog’s paws is a simple yet essential step for their comfort and protection. Proper application not only enhances paw comfort but also makes your dog grooming routine more effective. Here’s how to do it:
Applying paw wax is crucial for your dog’s comfort and protection, enhancing grooming routines and ensuring healthy, happy paws.
- Clean the Paws: Start by washing your dog’s paws with warm water and a gentle soap. Dry them thoroughly to remove any dirt or debris.
- Warm the Wax: Rub a small amount of paw wax between your fingers to soften it. This makes it easier to apply.
- Apply Evenly: Gently massage the wax onto the pads and between the toes, ensuring even coverage. This helps shield their paws from harsh surfaces. Additionally, keeping a schedule for timely invoicing can help remind you to regularly check and maintain your dog’s paw care routine.
With these steps, you’ll keep your dog’s paws healthy and happy!
Signs Your Dog Needs Paw Protection?
How can you tell if your dog needs paw protection? Look for signs of paw discomfort, like limping or excessive licking.
If your dog hesitates to walk on hot pavement or icy surfaces, it’s a clear indicator that their paws might need some help.
Seasonal changes can also affect your dog’s paw health; winter can lead to cracked pads from cold and salt exposure, while summer heat can cause burns.
Keep an eye out for any redness or swelling, as these are signs that your dog’s feet are struggling.
If you notice your pup frequently shaking their paws or avoiding rough terrain, it’s time to reflect on paw protection.
Monitoring water usage is essential for overall pet care, as hydration plays a critical role in your dog’s health and comfort.
Your dog’s comfort is essential, so don’t ignore these warnings!
Alternatives to Homemade Paw Wax
If you’re considering alternatives to homemade paw wax, there are several commercial products designed specifically for paw protection.
These store bought options often provide reliable results and can save you time. Here are some popular choices:
- Paw Balm: Many brands offer balms made with natural alternatives like coconut oil and shea butter, ensuring your dog’s paws stay moisturized and protected.
- Booties: Dog booties are a fantastic option for extreme weather, providing full coverage and comfort for your pup’s paws.
- Paw Protectors: These are sprays or gels that create a barrier against harmful elements like salt, snow, and hot pavement. Engaging in outdoor play can also help keep your dog’s paws healthy and strong.
Common Mistakes When Making Paw Wax
When making paw wax, it’s easy to make a few common mistakes that can affect the final product. Choosing the wrong ingredients or not mixing them properly can lead to ineffective wax. Let’s explore how to avoid these pitfalls for the best results! Regularly inspecting stored produce for color changes can help ensure the safety and effectiveness of your ingredients.
Incorrect Ingredient Choices
While crafting paw wax, many people overlook essential ingredient choices that can lead to ineffective or even harmful results.
To guarantee you’re protecting your dog’s paws while maintaining moisture, pay attention to these common mistakes:
- Using Low-Quality Oils: Cheap oils often lack the nutrients needed to nourish your dog’s paws, making them less effective.
- Skipping Natural Ingredients: Synthetic additives can irritate your dog’s skin. Stick to natural options for better results.
- Ignoring Allergies: Always consider potential allergies. Test a small amount before full application to avoid adverse reactions.
Proper ingredient sourcing is vital for a successful paw wax.
With the right choices, you’ll keep your furry friend’s paws moisturized and protected!
Improper Mixing Techniques
Always pay attention to mixing temperatures; if the wax is too hot or too cold, the ingredients won’t blend properly. This can lead to separation or a gritty texture that won’t soothe your dog’s paws.
Additionally, sticking to correct ingredient ratios is essential. If you add too much of one ingredient, it can throw off the balance, resulting in a wax that doesn’t perform well.
How Often Should You Reapply Paw Wax?
To keep your dog’s paws protected and healthy, you should reapply paw wax regularly, especially after walks or playtime.
Maintaining the right paw wax frequency is essential for effective dog foot care. Here are some guidelines to follow:
- After Every Walk: If your dog walks on rough surfaces, reapply the wax to guarantee maximum protection.
- Before Outdoor Play: Always apply paw wax before heading outside, especially in extreme weather conditions.
- Weekly Maintenance: Even if your dog hasn’t been out much, consider reapplying once a week to keep their paws moisturized and shielded.
Additional Benefits of Using Paw Wax
Using paw wax not only protects your dog’s paws from harsh surfaces but also offers several additional benefits you mightn’t have considered.
One of the key paw wax benefits is its ability to provide moisture, preventing cracking and dryness in your dog’s pads. This can be especially helpful during extreme weather conditions, ensuring your furry friend stays comfortable.
Additionally, applying paw wax can act as a barrier against harmful chemicals, like salt or ice melt, which can irritate your dog’s feet.
For peak paw health tips, regularly check your dog’s paws for any signs of wear or injury.
Eco-Friendly Practices for Your Paw Wax
Caring for your dog’s paws can go hand in hand with eco-friendly practices. By using eco-friendly materials and focusing on sustainable sourcing, you not only protect your pup’s feet but also the planet.
Here are three easy ways to embrace eco-conscious paw wax making:
- Choose Natural Oils: Opt for organic coconut or olive oil, which are both nourishing and biodegradable.
- Use Beeswax: This natural wax is a sustainable option that provides a protective barrier without harming the environment.
- Select Recyclable Containers: Store your paw wax in glass or metal tins that can be reused or recycled, reducing plastic waste.
Tailoring Paw Wax for Different Weather Conditions
Adapting your paw wax for different weather conditions guarantees your dog’s paws stay protected year-round.
For winter, consider adding more beeswax to create a thicker barrier against ice and snow. This seasonal adjustment not only shields against cold but also prevents salt and chemicals from irritating their pads.
In summer, you’ll want a lighter formula with more oils to keep paws moisturized without overheating. Weather considerations like humidity and heat can also affect how often you apply the wax.
If it’s particularly dry, a nourishing blend of oils can help maintain softness.
Always assess your environment and adjust your paw wax accordingly to make certain your furry friend enjoys outdoor adventures comfortably and safely, regardless of the season!
How to Introduce Paw Wax to Your Dog
Introducing paw wax to your dog can be a smooth process if you take it step by step. Use these effective paw introduction techniques to guarantee your dog feels comfortable:
- Familiarize: Let your dog sniff and explore the paw wax first. This helps them associate it with something positive.
- Apply Gradually: Start by applying a small amount on one paw while giving treats and praise. Once they’re comfortable, apply to other paws.
- Short Sessions: Keep the initial application sessions brief. Gradually increase the duration as your dog becomes accustomed to the sensation.
Always observe your dog for signs of discomfort.
Using these dog comfort tips will make the introduction much easier and more enjoyable for both of you.
Conclusion
Your dog’s paws deserve the best armor against the elements. With homemade paw wax, you’re not just protecting their delicate pads; you’re crafting a shield of love that wraps around their feet like a warm hug. Remember, each application is a step toward comfort and joy for your furry friend. So, grab those ingredients and let your creativity flow—your pup’s paws will thank you for this little act of kindness, turning every walk into a delightful adventure!