To repair cedar boards on a budget, use PVA glues like Titebond III for strong, waterproof bonds. Clean and prepare your surfaces by removing oils and contaminants for effective adhesion. Apply the glue evenly and clamp securely while it cures to guarantee a solid bond. Test the strength by pulling apart joined pieces to confirm reliability. With the right techniques, you can achieve durable repairs. Discover more tips to master your cedar projects.
Understanding Wood Glue: The Basics
When you’re tackling woodworking projects, understanding wood glue is essential, as it creates strong bonds that can even exceed the wood’s natural strength.
PVA glue, or polyvinyl acetate, is the most common type of wood glue you’ll encounter. It effectively bonds porous materials like wood, making it perfect for your projects.
Different PVA formulations exist, including waterproof options like Titebond III, ideal for moisture-prone areas. For the strongest hold, apply glue to both surfaces, ensuring even coverage.
Remember to let it set undisturbed for the recommended time. Also, consider your workspace conditions; good air circulation and room temperature can enhance adhesion and drying times.
Additionally, using the right glue can significantly impact your project’s success, much like how using expense management apps can streamline financial organization in your life.
Master these basics, and you’ll achieve reliable results in your woodworking endeavors.
Choosing the Right Glue for Cedar
When it comes to choosing the right glue for cedar, you’ve got several solid options to take into account.
Popular choices like Titebond III and polyurethane glue offer strong bonds, but surface preparation is essential for the best results.
To guarantee your glue’s effectiveness, testing a small bond before tackling larger repairs can save you time and effort. Additionally, ensuring proper receiving management can significantly enhance the durability of your repairs.
Popular Glue Options
Choosing the right glue for cedar can greatly impact the durability and appearance of your project.
Titebond III is a top choice, thanks to its waterproof properties and strong adhesion, making it perfect for both indoor and outdoor applications. Users also find Titebond II effective, although it’s less water-resistant.
If you’re looking for an alternative, polyurethane glue offers a robust bond and expands to fill gaps, but you’ll need to handle it carefully due to its foaming nature.
Remember, testing glue bonds by pulling apart glued pieces can help confirm if the glue you selected is reliable.
Ultimately, choose the glue that best fits your project needs and conditions.
Surface Preparation Importance
Proper surface preparation is vital for achieving a strong bond when working with cedar boards. To guarantee a solid glue joint, you should start by cleaning and jointing the edges, as factory edges often lack ideal adhesion.
Use acetone or mineral spirits to remove any oils or contaminants that could weaken the bond. Roughening the surfaces slightly can also enhance adhesion by increasing the surface area for the glue.
It’s critical to check that your cedar is dry, as excess moisture can lead to shrinkage and a compromised bond. Finally, straight and accurately aligned edges are key for a successful glue-up, assuring proper contact between the surfaces.
Testing Glue Effectiveness
Although you might’ve a preferred glue for your cedar projects, testing glue effectiveness is essential to guarantee a strong bond.
Start by gluing two pieces of cedar together and try pulling them apart after a day. If the wood tears instead of the glue failing, you’ve found a solid adhesive.
Titebond III is often recommended for cedar due to its water resistance and strong properties, but don’t hesitate to experiment with Titebond II or polyurethane glues.
Remember, surface preparation is critical; clean the edges or use acetone to enhance adhesion.
Finally, make sure you’re using kiln-dried cedar rather than wet wood, as proper moisture management is crucial for achieving reliable glue bonds in your projects.
Benefits of Using PVA Glue
When you’re looking to repair cedar boards, PVA glue stands out as an excellent choice due to its strong bonding capabilities with porous materials.
This polyvinyl acetate glue penetrates wood fibers, creating robust adhesive connections that can outlast the wood itself. Plus, PVA glue is generally colorless and odorless, making it perfect for indoor projects where aesthetics matter.
If you’re working outdoors, many PVA glues are waterproof or water-resistant, ensuring your repairs can withstand the elements.
You’ll appreciate that PVA glue bonds can be stronger than the wood itself, preventing failure at the glue joint during stress.
With careful application, you can achieve a clean finish and maximum adhesive strength, making your repairs both effective and visually appealing. Additionally, using eco-friendly brands of PVA glue can enhance your commitment to sustainable practices in DIY projects.
Application Techniques for Effective Bonding
To achieve a strong bond when repairing cedar boards, start with clean, freshly jointed surfaces. Apply glue evenly with a brush or spreader, and don’t forget to clamp the pieces securely while they cure. This attention to detail will guarantee effective bonding and long-lasting results. Additionally, utilizing expense categorization can help manage your materials budget effectively throughout your projects.
Surface Preparation Tips
Proper surface preparation is essential for achieving a strong bond when repairing cedar boards. Here are some surface preparation tips to help you create the best adhesion:
- Clean the surfaces: Use acetone or mineral spirits to remove oils and contaminants from the cedar boards, ensuring clean and freshly jointed edges.
- Roughen the surfaces: Lightly sanding or scuffing the edges increases surface area for better glue strength.
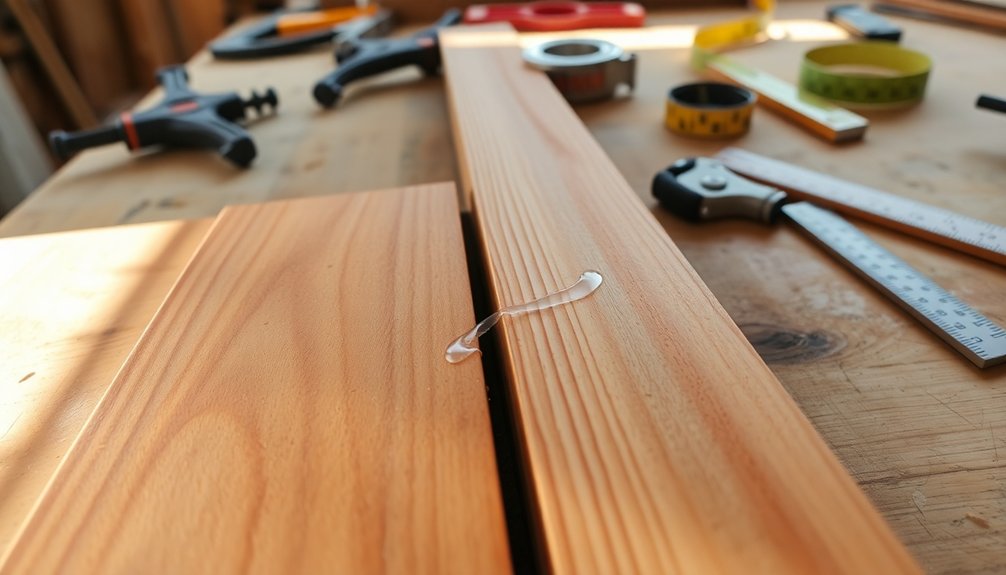
- Align the edges: Make sure the boards are straight and properly aligned to prevent weak bonds and structural issues.
- Follow drying instructions: Allow ample drying time as per the glue instructions, and don’t disturb the assembly during this period for ideal bond strength.
Following these steps will set you up for success in your repair project!
Glue Application Techniques
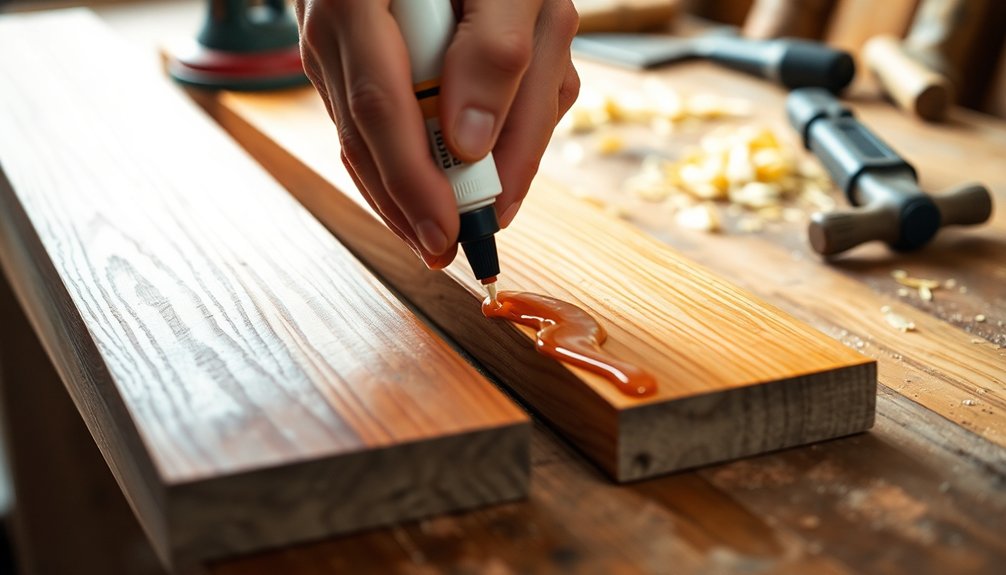
Achieving a strong bond in your cedar repairs hinges on effective glue application techniques. Start by applying glue to both surfaces you want to bond, guaranteeing even coverage for a robust connection. A brush or spreader can help you attain a thin, uniform coat.
Don’t forget to wipe away any excess glue immediately with a clean cloth to keep your project neat. Once the surfaces are glued, use a G-clamp to secure them together, applying even pressure to maintain alignment.
For the finest results, prepare your cedar surfaces by cleaning them with acetone or mineral spirits to eliminate any oils or contaminants. Finally, let the glued assembly sit undisturbed for at least 24 hours to guarantee prime bond strength.
Clamping and Curing Time
After applying glue, the next step is clamping the cedar boards together to guarantee a strong bond during the curing process.
Proper clamping time is essential, as it keeps the surfaces in contact for peak adhesion.
Follow these steps for effective clamping:
- Apply a thin, even coat of glue to both surfaces.
- Use G-clamps or parallel clamps to guarantee even pressure across the joint.
- Maintain clamping time of at least 30 minutes to an hour for initial hold.
- Allow full curing, which may take up to 24 hours, and guarantee adequate air circulation around the joints to speed up drying.
Testing Glue Strength: Ensuring Reliability
While testing glue strength might seem like an extra step, it’s essential for ensuring reliable bonds in your cedar projects.
Start by gluing two pieces of cedar together, then wait a day before pulling them apart. This simple test reveals the bond’s effectiveness—many users find the wood tears before the glue fails, especially with strong adhesives like Titebond III.
Remember, clean and freshly jointed edges improve adhesion and overall bond strength.
Testing glue strength not only confirms the effectiveness of your adhesive but also gives you confidence for future endeavors. Additionally, it’s beneficial to consider the importance of financial tracking to ensure you can invest in high-quality materials and tools for your woodworking projects.
Since different glues yield varying results on cedar, personal experimentation is key to discovering the best adhesive for your specific applications.
Expert Tips for Successful Glue-ups
Successful glue-ups hinge on a few key practices that enhance bond strength and durability. To guarantee your glue will work best, follow these expert tips:
Mastering glue-ups requires attention to detail for optimal bond strength and durability. Follow these expert tips for success.
- Clean and Joint: Make sure surfaces are clean and freshly jointed. Factory edges may not bond well.
- Choose the Right Glue: Use Titebond III for its water resistance and strong bond on cedar, but don’t hesitate to test others like Titebond II or polyurethane.
- Apply Evenly: Spread glue thinly and evenly on both surfaces, then press them together and shift slightly for complete coverage.
- Monitor Moisture Content: Verify cedar is properly dried, as too much moisture can compromise the bond strength and lead to joint failure. Additionally, consider how proper financial management can help you invest in high-quality materials for your projects.
Conclusion
To summarize, when repairing cedar boards on a budget, PVA glue stands out as your best option. Did you know that PVA can create bonds stronger than the wood itself in many cases? By choosing the right glue and applying it correctly, you can guarantee a lasting repair. Remember to test the strength of your bond and follow expert tips for a successful project. With the right approach, your cedar boards will be durable and beautiful once again!