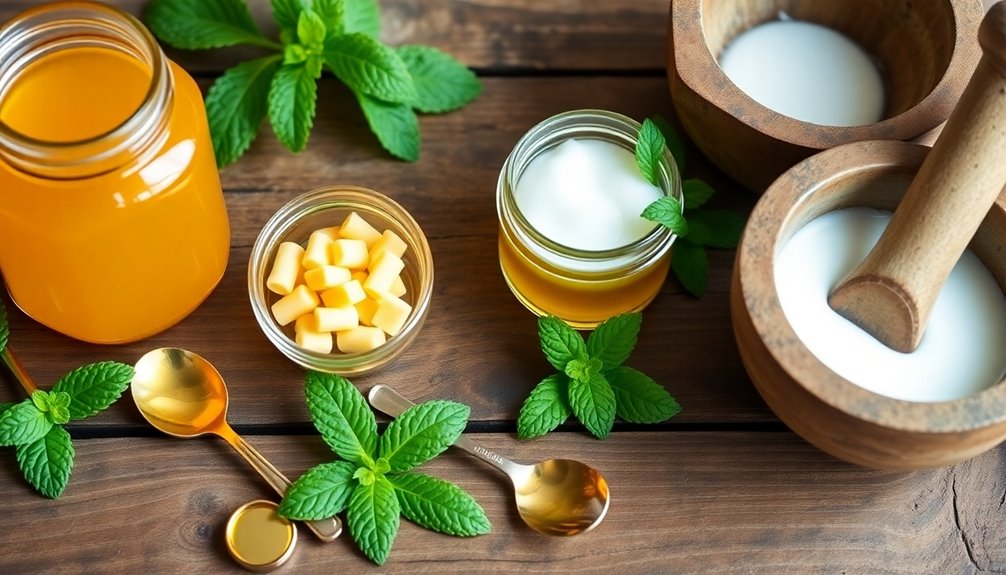
You can easily whip up a nourishing lip balm using honey from your pantry! Combine equal parts beeswax and coconut oil with a teaspoon of honey for moisture. Add a few drops of your favorite essential oil for a delightful scent. This mixture hydrates, soothes, and protects your lips. Store it in small jars or tubes, and you’ll have a homemade treat ready to use. Discover more tips and tricks to make your lip balm perfect!
Why Use Honey in Lip Balm?
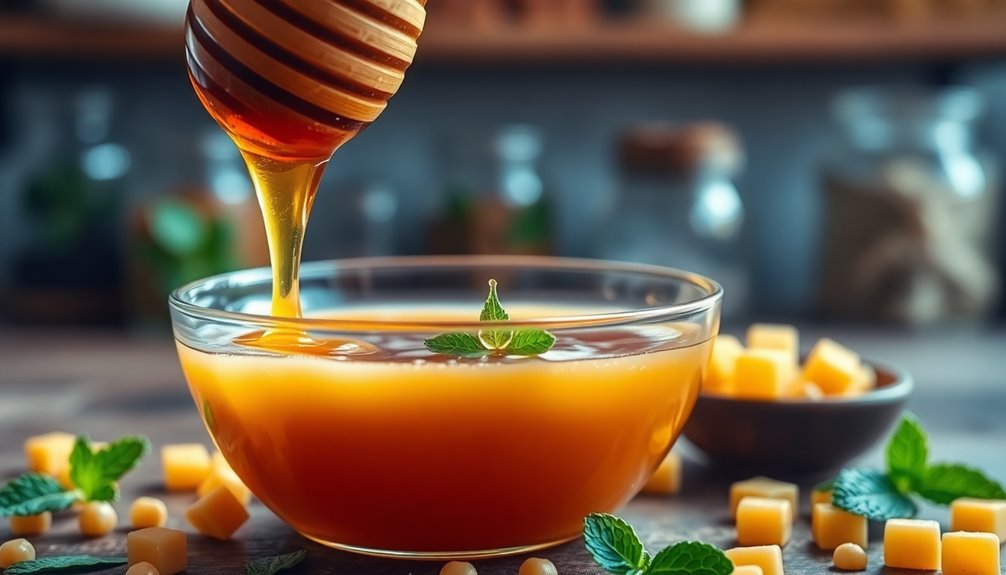
When you consider the benefits of honey, it’s clear why it’s a fantastic ingredient in lip balm. Honey’s natural sweetness not only adds a pleasant flavor but also acts as a humectant, drawing moisture to your lips. This means your lips stay hydrated and soft, even in dry conditions.
Additionally, honey has antibacterial properties, which can help soothe minor irritations and keep your lips healthy. Its antioxidant content also supports skin repair, making it a wonderful choice for maintaining youthful-looking lips. Moreover, incorporating natural ingredients like honey can lead to effective oral hygiene practices that promote overall wellness.
Essential Ingredients for Homemade Lip Balm
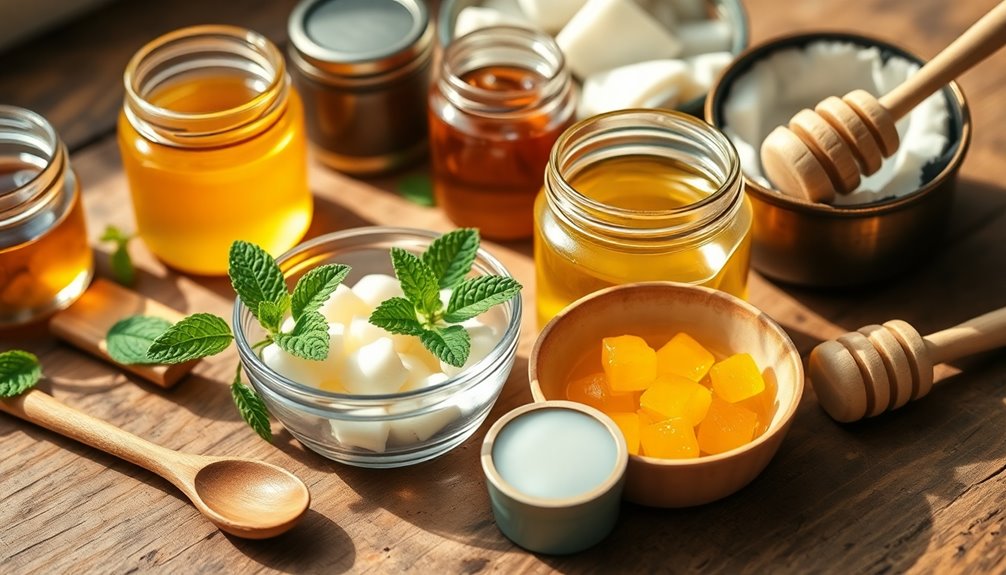
When making your homemade lip balm, choosing the right natural oils is vital for hydration and softness. You’ll also want to understand the benefits of beeswax, as it helps to lock in moisture and provides a protective barrier. Let’s explore these essential ingredients to create the perfect blend for your lips. Additionally, using budget-friendly cooking techniques can inspire creativity in your homemade projects.
Natural Oils Selection
Choosing the right natural oils is essential for crafting an effective homemade lip balm. Here are some fantastic options that’ll keep your lips moisturized and nourished:
- Coconut Oil: This carrier oil hydrates deeply and has antibacterial properties.
- Jojoba Oil: Mimicking your skin’s natural oils, it absorbs quickly and soothes irritation.
- Almond Oil: Rich in vitamins, it softens and protects your lips.
- Shea Butter: A natural emulsifier, it provides a creamy texture while locking in moisture.
You can also consider adding *avocado oil* or *olive oil* for extra nourishment.
Enhance your balm with *essential oils* or *fragrance oils* for a delightful scent.
With these oils, you’re set for luscious lips!
Beeswax Benefits Explained
Beeswax is a key ingredient in homemade lip balm, offering numerous benefits that enhance both texture and effectiveness. Its natural properties create a protective barrier on your lips, locking in moisture and preventing dryness. This makes it an ideal choice for soothing chapped lips.
Plus, beeswax has anti-inflammatory and antibacterial qualities, which can help heal minor irritations.
When you choose beeswax, you’re also opting for sustainability. Beeswax is a renewable resource, ensuring that your lip balm is eco-friendly. By using responsibly sourced beeswax, you support beekeeping practices that benefit the environment.
How to Gather Your Supplies
Before you start making your lip balm, you need to gather all your supplies.
Create an essential ingredients checklist to guarantee you have everything on hand, and don’t forget the tools you’ll need for the process. Utilizing a user-friendly interface can simplify your preparation and ensure you don’t miss any items.
With everything ready, you’ll be set to whip up your homemade balm in no time!
Essential Ingredients Checklist
Gathering your supplies for a homemade lip balm is a straightforward process that can enhance your DIY experience.
To create a nourishing balm packed with honey benefits for effective lip care, you’ll need to gather the right ingredients. Here’s a quick checklist to get you started:
- Beeswax – This natural wax forms a protective barrier, sealing in moisture.
- Coconut Oil – Known for its hydrating properties, it adds smoothness to your balm.
- Honey – A natural humectant that draws moisture to your lips while providing soothing benefits.
- Essential Oils – Choose your favorite for a personalized scent and added therapeutic effects.
With these ingredients, you’re on your way to creating a luxurious lip balm right from your pantry!
Tools You’ll Need
To successfully whip up your homemade lip balm, you’ll need a few essential tools that make the process smooth and efficient. First, grab a double boiler or a microwave-safe bowl for melting your ingredients.
Next, you’ll need measuring spoons or a scale to guarantee precise amounts. A spatula is essential for mixing everything together, and don’t forget small containers or tubes for storing your finished balm.
For a tools overview, a small funnel can be handy for pouring into containers without spills.
Finally, have some paper towels on hand for quick clean-ups. With this essential equipment, you’ll be well on your way to creating lip balm that nourishes and moisturizes your lips naturally.
Step-by-Step Instructions for Making Lip Balm
Making your own lip balm is a simple and rewarding process that only takes a few steps.
Creating your own lip balm is a fun and easy way to indulge in DIY skincare.
Not only will you enjoy the lip balm benefits, but you’ll also immerse yourself in the world of DIY skincare. Here’s how to do it:
- Gather your ingredients: You’ll need beeswax, coconut oil, honey, and essential oils.
- Measure and mix: Combine equal parts beeswax and coconut oil in a double boiler.
- Add sweetness: Stir in a teaspoon of honey for that natural flavor and moisture.
- Cool and store: Pour the mixture into small containers and let it cool completely.
Once it’s set, you’ll have nourishing lip balm ready to keep your lips soft and hydrated! Additionally, making your own products can help you stick to a budgeting method that prioritizes savings and spending effectively.
Tips for Melting and Mixing Ingredients
When it comes to melting and mixing your ingredients for lip balm, using a double boiler is key for achieving the perfect consistency. This method prevents overheating, which can ruin your blend.
Start by measuring your ingredients according to the mixing ratios specified in your recipe. For best results, use a kitchen scale for accuracy.
As you melt the wax and oils, stir gently to guarantee everything combines smoothly. Pay attention to the melting techniques; avoid direct heat, as it can cause separation.
Once melted, remove from heat and quickly incorporate any additives, like honey or essential oils, while the mixture is still warm. This helps maintain their beneficial properties and guarantees a well-blended lip balm. Additionally, using eco-friendly practices can enhance the sustainability of your homemade products.
How to Customize Your Lip Balm Flavors
Customizing your lip balm flavors is a fun way to make your creations uniquely yours.
You can experiment with essential oils, add natural flavor extracts, or even infuse your balm with herbal teas for a revitalizing twist. Exploring various tea types can provide unique flavor combinations that enhance your lip balm experience!
Let’s explore these options to elevate your lip balm game!
Essential Oils Selection Tips
Wondering how to elevate your homemade lip balm with delightful flavors? Choosing the right essential oils can enhance both the scent and the benefits of your balm.
Here are some essential oils selection tips to get you started:
- Peppermint: Provides a revitalizing tingle and boosts circulation.
- Lavender: Offers calming properties and a soothing aroma.
- Citrus: Adds a bright, uplifting scent that can energize your mood.
- Vanilla: Gives a warm, comforting flavor and promotes relaxation.
When selecting oils, consider their sourcing to guarantee purity and quality.
Adding Natural Flavor Extracts
To elevate your homemade lip balm, adding natural flavor extracts can transform it into a delightful treat for your lips. You can easily customize your balm by choosing from various extract sources like vanilla, peppermint, or almond.
When selecting your flavors, think about flavor pairing; for instance, combining vanilla and honey creates a warm, comforting profile, while peppermint offers a revitalizing twist. Start with a few drops and adjust according to your taste.
Remember to use high-quality extracts to guarantee a pleasant aroma and flavor. This way, you’ll not only nourish your lips but also make applying lip balm a more enjoyable experience.
Get creative and find the perfect blend that suits your personal style!
Infusing With Herbal Teas
While you’re exploring ways to enhance your lip balm, infusing it with herbal teas can add unique flavors and beneficial properties.
Here’s how to customize your lip balm with different tea varieties:
- Chamomile – Known for its soothing herbal benefits, it offers a gentle, calming scent.
- Peppermint – This invigorating tea variety gives a revitalizing tingle, perfect for an uplifting balm.
- Lavender – With its floral aroma, lavender provides relaxation and a touch of luxury.
- Rooibos – Rich in antioxidants, this tea variety adds an earthy flavor and skin-nourishing properties.
The Benefits of Natural Oils in Lip Balm
Natural oils play an essential role in lip balm, enhancing both its texture and effectiveness.
When you choose oils like coconut, jojoba, or almond, you’re tapping into natural oil benefits that nourish and protect your lips. These oils create a smooth, buttery consistency that glides on easily, making application a breeze.
Choosing natural oils like coconut, jojoba, or almond nourishes and protects your lips while ensuring a smooth, effortless application.
Plus, they improve oil absorption, ensuring your lips soak up the moisture they crave. Natural oils also provide a barrier against harsh elements, keeping your lips hydrated and soft.
By incorporating these oils into your lip balm, you’re not just adding flavor or scent; you’re giving your lips the care they deserve. Additionally, using seasonal fresh produce can enhance your overall wellness by providing essential nutrients that support skin health.
Storing Your Homemade Lip Balm
Once you’ve crafted your homemade lip balm, storing it properly is essential for maintaining its freshness. Choose ideal containers that seal well, and keep an eye on temperature to prevent melting or hardening. Also, be mindful of its shelf life to guarantee you enjoy your balm at its best. Consider using washable electrostatic filters in your home to improve air quality, as this can contribute to a healthier environment for your skin.
Ideal Storage Containers
Choosing the right storage containers for your homemade lip balm is crucial for maintaining its quality and freshness. Here are some great options to take into account:
- Glass jars: They provide airtight seals and add a touch of elegance with decorative packaging.
- Metal tins: Perfect for travel-friendly options, these durable containers keep your balm safe and secure.
- Silicone molds: If you’re feeling creative, use these to shape your lip balm while being eco-friendly.
- Vintage containers: Upcycled materials can add personality, and you can personalize labels to make them truly yours.
No matter what you choose, make sure your containers protect your balm and keep it fresh for every use!
Temperature Control Tips
To keep your homemade lip balm fresh and effective, it’s essential to control the temperature during storage. Aim for ideal conditions by storing your balm in a cool, dark place, away from direct sunlight and heat sources.
Excessive heat can cause the balm to melt, altering its texture and effectiveness. Conversely, freezing temperatures can harden your balm too much, making it difficult to apply.
Consider using temperature regulation methods, like a cool pantry or a dedicated shelf in your refrigerator.
Always check the consistency before using, as temperature fluctuations can affect the formula. By maintaining a stable environment, you’ll guarantee your lip balm remains smooth and nourishing for longer.
Shelf Life Considerations
How long can you expect your homemade lip balm to last? Generally, your lip balm will have a shelf life of about six months to a year, depending on various factors.
To guarantee ideal shelf stability, store it in a cool, dark place.
Keep an eye out for these expiration indicators:
- Change in Color: If it darkens or becomes cloudy, it’s time to toss it.
- Off Smell: A rancid or unusual odor signals spoilage.
- Texture Alteration: If it feels grainy or separates, don’t use it.
- Container Damage: Cracks or leaks can lead to contamination.
How to Test the Consistency of Your Lip Balm?
Testing the consistency of your lip balm is essential for achieving that perfect texture.
Start by scooping a small amount of the balm with your fingertip. Rub it between your fingers to feel its smoothness and thickness. If it feels too waxy or greasy, you may need to adjust your recipe.
Scoop a small amount of balm with your fingertip and assess its smoothness and thickness for optimal texture.
For a more precise approach, conduct a consistency testing by placing a small dab on your lips. This allows for an accurate texture evaluation, helping you determine if it glides on easily or feels overly heavy.
If you’re not satisfied, tweak your ingredients—add more oils for softness or wax for firmness. Keep experimenting until you hit that ideal balance you’re looking for! Additionally, consider using vacuum sealing to store your homemade lip balm, as it can help maintain freshness and prevent contamination.
Troubleshooting Common Lip Balm Issues
Even if you’ve followed the perfect recipe, your lip balm can still present issues. Here are some common problems and how to tackle them:
- Texture Issues: If it feels too waxy, consider adjusting the melting point by adding more oil.
- Flavor Balance: Overpowering flavors can be off-putting; try reducing the amount of flavoring oil to match your scent preferences.
- Color Variations: Natural ingredients may lead to unexpected hues; experiment with different sources for consistent color.
- Allergy Concerns: Always check ingredient sourcing to verify none of your chosen components trigger allergies.
Creative Packaging Ideas for Your Lip Balm
After perfecting your lip balm recipe, it’s time to think about how you’ll present it. Consider using decorative tins for a charming touch or personalized jars to showcase your unique style.
You can design custom labels that reflect your brand, making it instantly recognizable. For an eco-friendly approach, opt for upcycled materials or travel-friendly containers that reduce waste while being practical. Additionally, incorporating creative solutions like stacked wooden crates can enhance the display of your lip balm products effectively.
If simplicity is more your style, minimalist designs can convey elegance without overwhelming. To add a fun twist, use themed wraps that resonate with your target audience.
No matter your choice, creative packaging not only enhances the balm’s appeal but also elevates the entire experience for the user.
How to Gift Your Homemade Lip Balm
How can you make your homemade lip balm an unforgettable gift? Start with thoughtful gift wrapping that reflects your recipient’s style. Here’s how to elevate your lip balm into a cherished present:
Make your homemade lip balm a memorable gift with thoughtful wrapping that showcases your recipient’s unique style.
- Choose a beautiful container — opt for glass jars or tins that catch the eye.
- Add a personal touch — create personalized labels featuring the flavor and a sweet message.
- Incorporate natural elements — tie a sprig of dried lavender or a cinnamon stick around the container for an aromatic touch.
- Include a handwritten note — share your recipe or a heartfelt message to make it extra special.
These simple steps will transform your homemade lip balm into a delightful gift that anyone would love!
Frequently Asked Questions About Lip Balm
Creating homemade lip balm can spark plenty of questions, especially if you’re new to the process. One common concern is how long your DIY beauty creations will last. Typically, homemade lip balms can stay fresh for about six months when stored properly.
Another frequent question is about the best ingredients for effective lip care. Natural oils, beeswax, and honey are great choices for moisture and protection.
If you’re wondering about scents or flavors, you can customize your balm with essential oils, but be cautious with the amounts.
Finally, don’t hesitate to experiment! DIY beauty is all about finding what works best for you. Enjoy the process and have fun creating your perfect lip balm!
The Importance of Natural Ingredients for Lip Care
When it comes to lip care, choosing natural ingredients is essential for maintaining healthy and hydrated lips. Not only do they provide effective moisture, but they also come with numerous natural skincare benefits.
Here’s why you should focus on organic ingredient sourcing:
- Nourishment: Natural oils like coconut and almond deeply hydrate, preventing chapping.
- Healing: Ingredients like beeswax and honey promote healing for cracked lips.
- Safety: Natural components reduce the risk of irritation, making them ideal for sensitive skin.
- Sustainability: Organic sourcing supports eco-friendly practices, benefiting both you and the planet.
Conclusion
So, there you have it—your very own honey lip balm, because who wouldn’t want to slather their lips with something that could double as a snack? Forget those overpriced, chemical-laden tubes that promise the moon; you’ve got the sweet nectar of nature right in your pantry. Now, every time you apply it, you can feel like a DIY genius while simultaneously wondering why you ever trusted corporate lip care. Cheers to your newfound culinary beauty skills!